(Activity time: about 60 minutes)
(Download the Day Two Files Here)
Previous Posts:
Game Jam Day 1
Intro
Hello, and welcome to day 2 of the Dad and Daughter Quarantine Game Jam Tutorial!
Yesterday we started making Mia’s Daring Escape. We set up the game, added Mia and a few bricks to the screen, and used the keyboard to move Mia around.
Today we’re going to continue by giving Mia a floor of bricks where she can run and jump!
First Task: Put Mia in the right place
We begin where we left off yesterday. You can use the files you already have, or download the day two files and start from there. The day two files have today’s code changes to help you if you get lost.
This is what the game looks like right now:
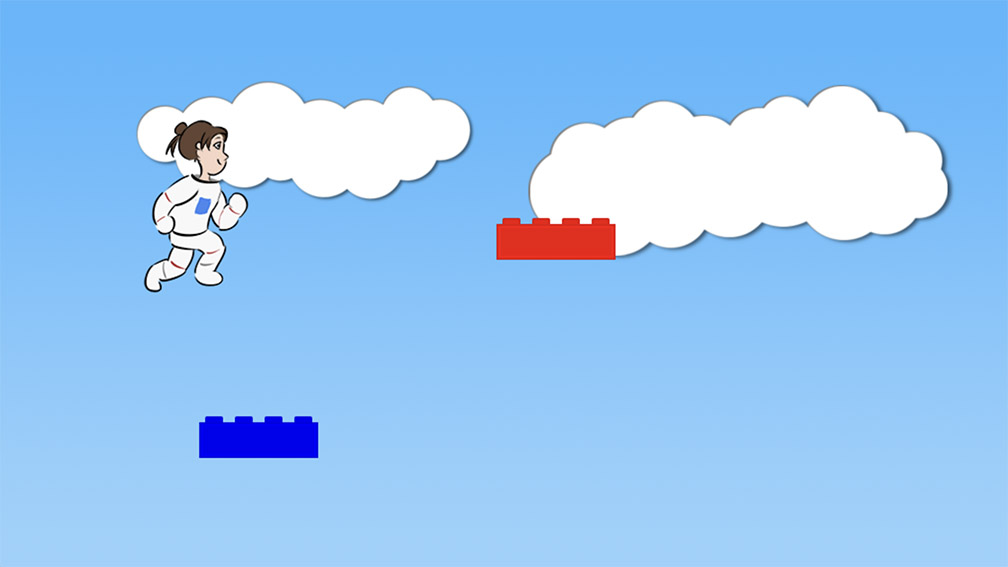
We need to start by deleting those bricks and moving Mia to the bottom of the screen, where she’ll spend most of her time.
Open game.js, and delete the following lines:
// Welcome! This is where you'll write your game code.
// Anything with two // slashes in front is a comment.
// The computer ignores comments. They're for humans
// to explain things to other humans.

let mia = null;
let brick_1 = null;
let brick_2 = null;


function initializeGame() {

  let blue_sky = makeSprite("Art/blue_sky.png");
  blue_sky.position.set(0, 0);
  stage.addChild(blue_sky);

  mia = makeAnimatedSprite("Art/mia_animations.json", "run");
  mia.position.set(200, 200);
  stage.addChild(mia);
  mia.animationSpeed = 0.3;
  mia.play();

  brick_1 = makeSprite("Art/brick.png");
  brick_1.position.set(500, 200);
  brick_1.tint = color(1,0,0);
  stage.addChild(brick_1);

  brick_2 = makeSprite("Art/brick.png");
  brick_2.position.set(200, 400);
  brick_2.tint = color(0,0,1);
  stage.addChild(brick_2);
}


function updateGame(diff) {

  // If the right key got pushed, move Mia to the right
  if (key_down["ArrowRight"]) {
    mia.x = mia.x + 5;
  }

  // If the left key got pushed, move Mia to the left
  if (key_down["ArrowLeft"]) {
    mia.x = mia.x - 5;
  }

  // If the down key got pushed, move Mia down
  if (key_down["ArrowDown"]) {
    mia.y = mia.y + 5;
  }

  // If the up key got pushed, move Mia up
  if (key_down["ArrowUp"]) {
    mia.y = mia.y - 5;
  }
}
Now it’s just Mia on the screen, and we’ve gotten rid of the code that lets us move up and down.
Before we put Mia on the bottom of the screen, we need to talk about anchors.
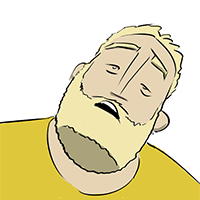
This is one of the images in Mia’s animation:
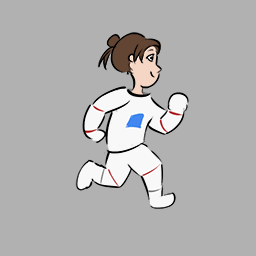
There’s a lot of empty space around Mia.
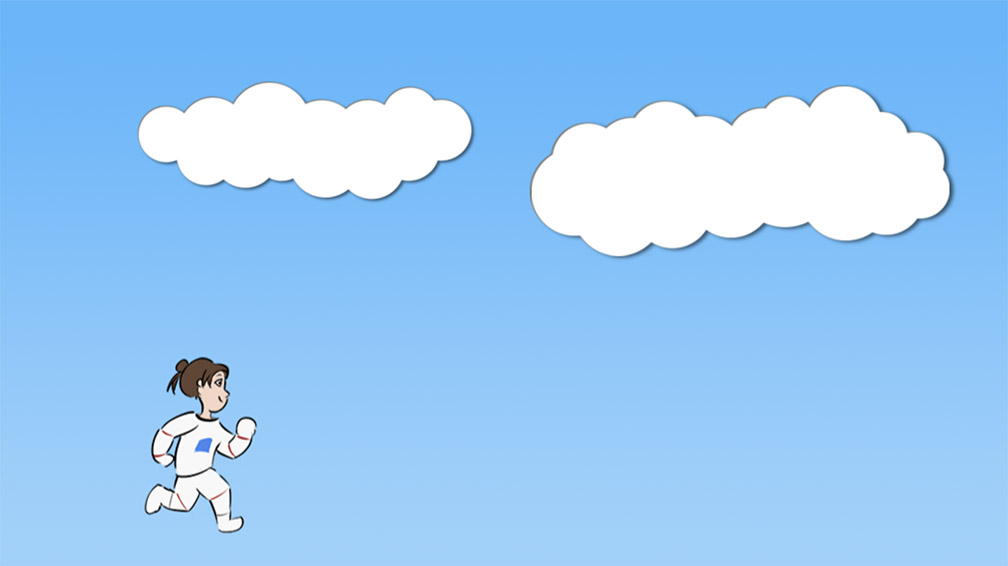
This is what that picture looks like on the screen:
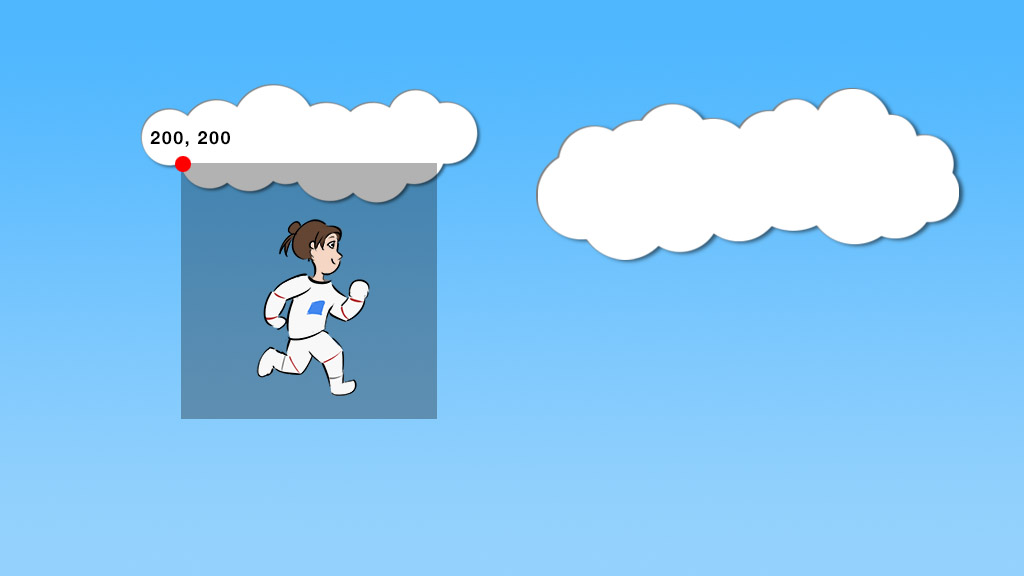
When we give x, y coordinates for Mia, the computer starts drawing from the top left corner of her image.
But we’re making a jumping game, which means we want to work with the coordinates right beneath where Mia is standing:
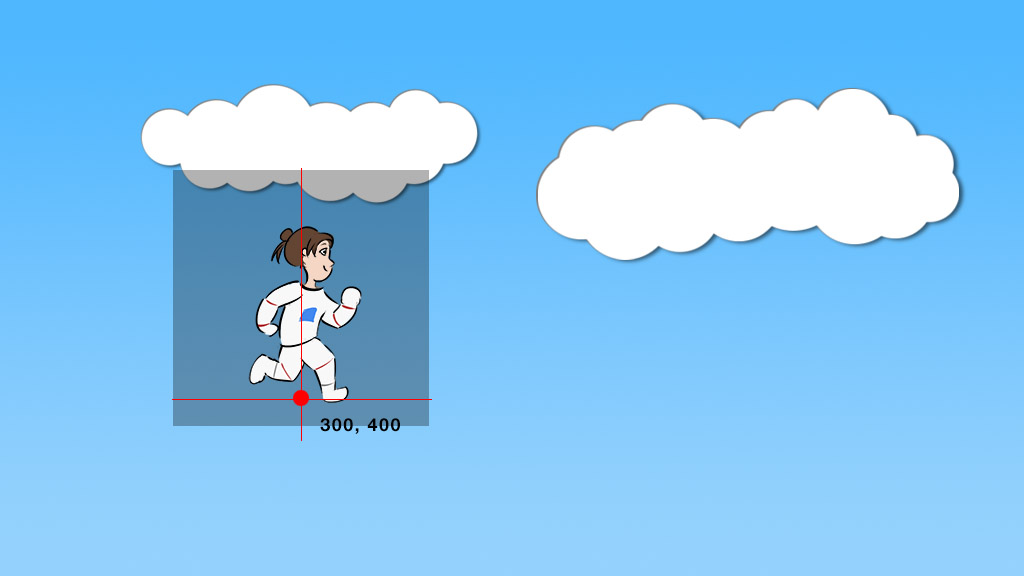
Instead of having to do a lot of extra calculations, we tell the computer to change Mia’s anchor point.
An anchor point is the point in an image that the computer uses for drawing. When you tell the computer to draw something at coordinates 300, 400, the computer moves 300 pixels to the right, then 400 pixels down, then draws the image so that the anchor point is right at that center spot.
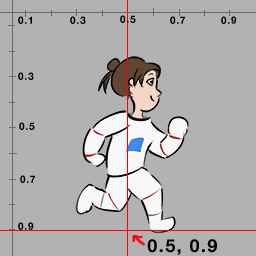
Anchor points are given in fractions. Look at the image above. That point just below the center of Mia is halfway between the left and right sides of the image, or 0.5.
And it’s 90% of the way towards the bottom of the image, or 0.9.
If your child hasn’t learned about number lines and decimals yet, this is an excellent example for teaching.
So we’re going to set Mia’s anchor point at 0.5, 0.9, and then put her almost at the bottom of the screen.
Go ahead and add this code together:
function initializeGame() {

  let blue_sky = makeSprite("Art/blue_sky.png");
  blue_sky.position.set(0, 0);
  stage.addChild(blue_sky);

  mia = makeAnimatedSprite("Art/mia_animations.json", "run");
  mia.position.set(200, 200);
  mia.anchor.set(0.5, 0.9);
  mia.position.set(200, game_height - 40);
  stage.addChild(mia);
  mia.animationSpeed = 0.3;
  mia.play();
}
Remember, you can always press Command-R on a Mac or Ctrl-R on Windows to reset the game.
Also, now is a great time to talk about the debug console. If you press Command-Option-J (edit: it’s Command-Option-I) on a Mac or Ctrl-Shift-J on Windows, you’ll open up a little side window where you can print information or see any errors. You can press the same keys to close it again. Alternately, you can go to the View menu above and choose “Toggle Developer Tools”.
The errors usually show up as red text, and you can usually google the red text for some good answers to your problems.
But of course, if you get really stuck, please feel free to post questions in the comments below, or mail me at matt.carlin@alphazoollc.com, and I’ll do my best to help out.
Make sure you delete the old position line to make room for the new one.
I’ve provided some nice variables for working with the edges of the screen. game_width and game_height are 1024 and 576, and you can use these instead of having to do the math to figure out stuff near the right and bottom sides of the screen.
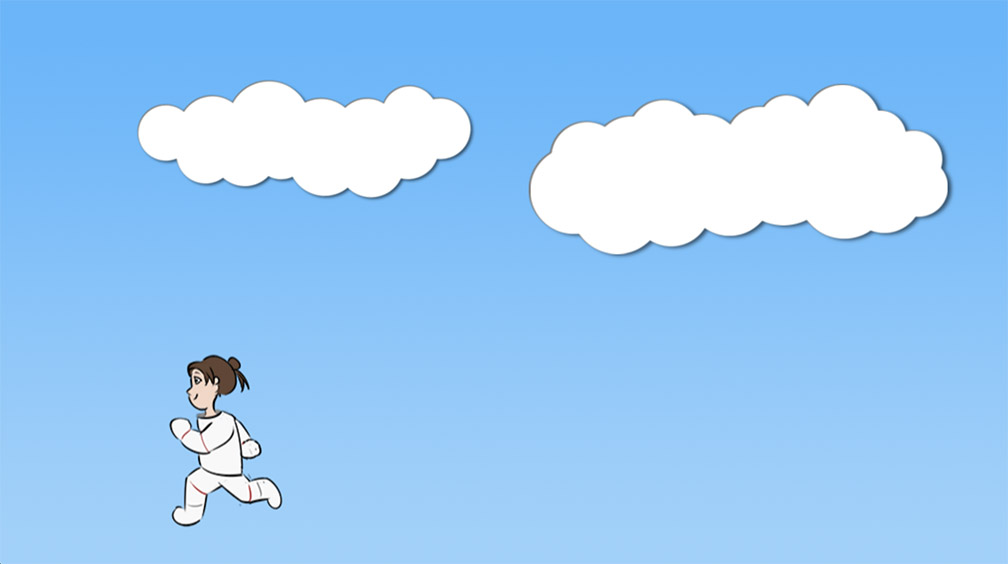
So we’ve set Mia’s anchor beneath her feet, and we’ve set her y position to game_height – 40, which means 40 pixels from the bottom of the screen.
Mia should look like this now:
What do you think will happen if you set Mia’s anchor to 0.5, 1.0?
Make a guess, then try it out!
We also want to make Mia a little bit faster, and we want to make her turn around if she’s running to the left. Add this code together:
function updateGame(diff) {

  // If the right key got pushed, move Mia to the right
  if (key_down["ArrowRight"]) {
    mia.x = mia.x + 5;
    mia.x = mia.x + 7;
    mia.scale.set(1,1);
  }

  // If the left key got pushed, move Mia to the left
  if (key_down["ArrowLeft"]) {
    mia.x = mia.x - 5;
    mia.x = mia.x - 7;
    mia.scale.set(-1,1);
  }
}
Now when you press the left key to run left, Mia should face left:
First, we make Mia a little faster by changing the distance she moves when we push the keys.
Second, in addition to position and anchor, we can change the scale of a sprite. This means making it bigger or smaller.
1 is the normal value. 2 is twice as wide, or twice as tall. 0.5 is half as wide, or half as tall. Finally, -1 means “flip it backwards”.
We’ve set Mia to -1 on the x axis, so her left and right are flipped. But we’ve set her to 1 on the y axis, so she’s not upside down or super tall or anything.
You know what we’re going to do now. Try changing the scale numbers. Can you make Mia go upside down? Can you make her super huge or super tiny or super wide?
Anyway, now Mia’s in place, and we’re ready to add a *bunch* of bricks.
Second Task: Add a bunch of bricks!
On day one, when we added two bricks, we had to write code for each brick, and we had to name them differently. That was fine for just two bricks, but Mia’s Daring Escape is going to have dozens of bricks! Hundreds of bricks!
It would be really annoying to write the code for every brick.
Instead, we’re going to use a loop.
A loop is when you make the computer do something over and over again a certain number of times. Maybe forever.
We’re going to make a loop that adds ten bricks to the screen.
This is nice, because later, when we want way more than ten bricks, we only need to change the loop number to make it higher.
Sigh. Loops are ugly, true in almost every programming language, and there’s no nice way to teach them. I’m sorry.
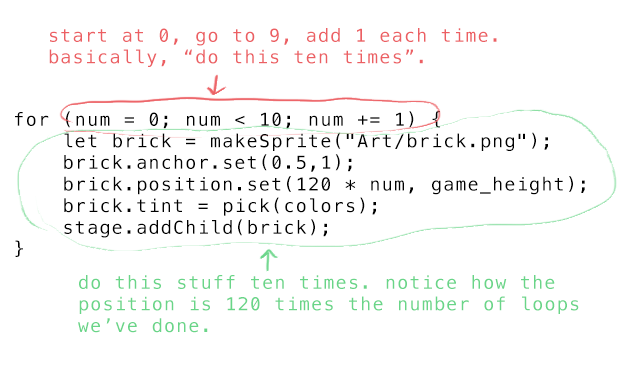
The loop starts with “for”, then inside ( ) parentheses you say how you want the loop to go. Then in between { } curly brackets, you write the code that you want to happen over and over.
What’s nice is you can count the number of times you’ve been in the loop, and use this as a variable in your code. So, for instance, we’re going to move 120 pixels each time we put another brick down, and we’ll use the loop number to set a different position every time.
Let’s write the loop:
let mia = null;
let bricks = [];
let colors = [
  color(1,0,0), // Red
  color(0,1,0), // Green
  color(0,0,1), // Blue
]


function initializeGame() {

  let blue_sky = makeSprite("Art/blue_sky.png");
  blue_sky.position.set(0, 0);
  stage.addChild(blue_sky);

  for (num = 0; num < 10; num += 1) {
    let brick = makeSprite("Art/brick.png");
    brick.anchor.set(0.5,1);
    brick.position.set(120 * num, game_height);
    brick.tint = pick(colors);
    stage.addChild(brick);
    bricks.push(brick);
  }

  mia = makeAnimatedSprite("Art/mia_animations.json", "run");
  mia.anchor.set(0.5, 0.9);
  mia.position.set(200, game_height - 40);
  stage.addChild(mia);
  mia.animationSpeed = 0.3;
  mia.play();
}
We start by making two lists. One is a list of bricks, and the other is a list of colors. We’ll talk more about lists later, but for now, lists are exactly like in real life. Milk, eggs, flour, sugar is a list.
Then we write our loop. Inside the loop, we do the same sprite making code we’ve done a few times before.
Detail: We didn’t have to name each brick differently, brick_1, brick_2, brick_3, etc. That’s because when you define something inside a loop, the variable name only lasts for one loop, and you can re-use it on the next go around.
You’ve no doubt noticed that we write let in a bunch of places. let says “make me a new variable with this name”.
If you try to use let to make a new variable with the same name as an old one, the program will tell you that’s illegal, and it will crash.
Variables that get created outside any function are global. You can use them everywhere, but you can’t re-use the name for something else.
Variables that get created inside a function or inside a loop (basically, inside { } curly braces) are local, and they live and die in that local area. You can’t use them outside, but you can use the same names over again.
All of this is called scope.
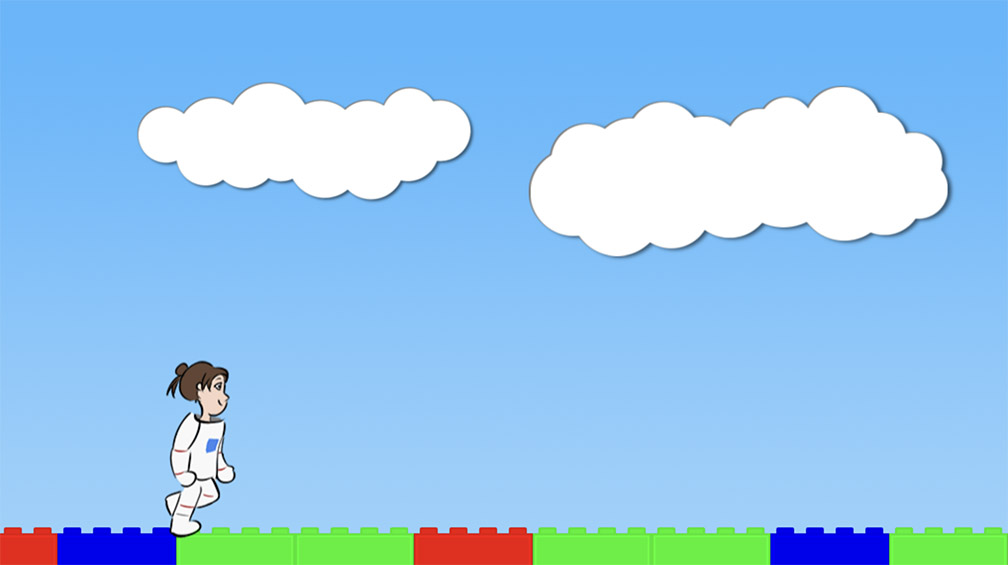
When we tint the bricks, we use a new function called pick to pick a random color from the list of colors. That means the bricks are randomly red, blue, or green.
Try resetting the program a few times. The brick colors should change.
We also write “bricks.push(brick)”, which adds the new brick to our list of bricks. We’ll use this list in another lesson.
Third Task: Scroll the Screen!
Mia’s Daring Escape is a platform game. That means we’re going to run a long distance, and the screen is going to have to scroll to keep up.
Right now, when you go too far left or right, Mia just runs off the edge of the screen.
We need to write code to make the game follow Mia, and we need to make the level bigger.
While Mia is running great distances, we want to keep Mia roughly in the center of the screen. In order to accomplish this, we make a tracker. The tracker can be up to 100 pixels away from Mia.
Then, we move the whole game stage so that the tracker is in the center of the screen.
And we’re going to do all of this in a new function!
Add this to the code:
let mia = null;
let bricks = [];
let colors = [
  color(1,0,0), // Red
  color(0,1,0), // Green
  color(0,0,1), // Blue
]

let tracker = 0;


function initializeGame() {

  let blue_sky = makeSprite("Art/blue_sky.png");
  blue_sky.position.set(0, 0);
  stage.addChild(blue_sky);

  for (num = 0; num < 10; num += 1) {
    let brick = makeSprite("Art/brick.png");
    brick.anchor.set(0.5,1);
    brick.position.set(120 * num, game_height);
    brick.tint = pick(colors);
    stage.addChild(brick);
    bricks.push(brick);
  }

  mia = makeAnimatedSprite("Art/mia_animations.json", "run");
  mia.anchor.set(0.5, 0.9);
  mia.position.set(200, game_height - 40);
  stage.addChild(mia);
  mia.animationSpeed = 0.3;
  mia.play();
}

// Keep Mia roughly in the center of the screen by using a tracker
// which stays within 100 pixels of Mia, and then moving the whole stage
// so that the tracker stays in the center of the screen.
function followMia() {

  if (mia.x - tracker > 100) {
    tracker = mia.x - 100;
  }

  if (tracker - mia.x > 100) {
    tracker = mia.x + 100;
  }

  stage.x = (game_width / 2 - tracker);
}


function updateGame(diff) {

  // Don't try to update the game until we've created Mia,
  // or the game will crash.
  if (mia == null) return;

  // If the right key got pushed, move Mia to the right
  if (key_down["ArrowRight"]) {
    mia.x = mia.x + 7;
    mia.scale.set(1,1);
  }

  // If the left key got pushed, move Mia to the left
  if (key_down["ArrowLeft"]) {
    mia.x = mia.x - 7;
    mia.scale.set(-1,1);
  }

  followMia();
}
Reminder: you can always press Command-R on a Mac or Ctrl-R on Windows to reset the game.
Also reminder: you can press Command-Option-J (edit: it’s Command-Option-I) on a Mac or Ctrl-Shift-J on Windows to bring up the debug console to see any errors!
There’s a lot going on here. We make a new variable called tracker by writing “let tracker” at the top.
We make a new function called followMia, and we call that function by writing followMia() at the bottom of updateGame.
followMia is where we do our tracking and our screen shifting.
First, we check to see if the tracker is more than 100 pixels behind mia’s x position, and if so, we move it to 100 behind.
Then, we check to see if the tracker is more than 100 pixels ahead of mia’s x position, and if so, we move it to 100 ahead.
This means Mia can run around to the sides of the tracker a little bit, but if she gets too far, the tracker will snap in place and start following her.
Finally, we move the whole game stage to put the tracker in the center of the screen! The tracker acts like a sort of focus point for the camera; it will always stare at the tracker.
Detail: Why is the stage being pushed to (game_width / 2 – tracker)?
To come up with that number, we do a little bit of algebra.
The tracker is sitting on the stage. If the stage x is 100, and the tracker is 200, the tracker will be at 300 on the screen. In general, we want:
tracker + stage.x == game_width/2
Rewrite this to get:
stage.x == game_width/2 – tracker
Hooray! Now Mia can run… off… into the blackness of space.
Okay, so we need more sky and more bricks.
More bricks are easy!
Just change the loop numbers, like this:
for (num = 0; num < 10; num += 1) {
for (num = -8; num < 70; num += 1) {
  let brick = makeSprite("Art/brick.png");
  brick.anchor.set(0.5,1);
  brick.position.set(120 * num, game_height);
  brick.tint = pick(colors);
  stage.addChild(brick);
  bricks.push(brick);
}
Boom. Tons of bricks.
For the sky, we’re going to need to put the sky picture into its own loop.
Do this:
let blue_sky = makeSprite("Art/blue_sky.png");
blue_sky.position.set(0, 0);
stage.addChild(blue_sky);

for (num = -1; num < 8; num += 1) {
  let blue_sky = makeSprite("Art/blue_sky.png");
  blue_sky.position.set(game_width * num, 0);
  stage.addChild(blue_sky);
}
Lots of sky now too. The sky loop is smaller because the sky picture is bigger. Note that each sky picture is a whole game_width further than the last. That’s 1024 pixels for each sky.
Later we’ll add boundaries, so Mia can’t run off into empty space. But for now, you should be able to run a long time to the right before running out of bricks and sky.
Pretty good. We’ve just got one last thing to do today.
Last Task: Make Mia jump!
You’re pretty tired again. I can see it.
Just like yesterday, we’re not going to think too hard about this last task. It’s kind of a bonus.
The last thing we have to do is make Mia jump.
To do this, we’re going to give Mia a state and a velocity.
Mia’s state can be either “running” or “jumping”. When the player presses spacebar, if Mia’s not already jumping, we’ll switch her state to jumping.
Mia’s velocity is how fast she’s moving and in what direction. For now, we’re just going to give Mia a velocity in the y direction, up and down.
The way velocity works in beginner game programming is this: every time you call updateGame, you change the position by adding velocity. Remember that the updateGame function is called about 60 times a second. So if the character starts at y = 100, and the velocity is 5, then on one frame, the character will go from 100 to 105, and on the next, from 105 to 110, and so forth, and after 1 second (60 frames), the character will be at 400 (that’s 100 + 5 * 60).
For a jump, you start by setting the velocity upwards (negative, towards y = 0), but every update, you add some gravity (positive, towards y = 576), so eventually the upward jump stalls out and the character falls back to ground.
Let’s write this out in code. Don’t worry about the details today. We’ll learn more about this and refine it later.
Change the code like so:
function initializeGame() {

  for (num = -1; num < 8; num += 1) {
    let blue_sky = makeSprite("Art/blue_sky.png");
    blue_sky.position.set(game_width * num, 0);
    stage.addChild(blue_sky);
  }

  for (num = -8; num < 70; num += 1) {
    let brick = makeSprite("Art/brick.png");
    brick.anchor.set(0.5,1);
    brick.position.set(120 * num, game_height);
    brick.tint = pick(colors);
    stage.addChild(brick);
    bricks.push(brick);
  }

  mia = makeAnimatedSprite("Art/mia_animations.json", "run");
  mia.anchor.set(0.5, 0.9);
  mia.position.set(200, game_height - 40);
  stage.addChild(mia);
  mia.animationSpeed = 0.3;
  mia.play();
  mia.state = "running";
  mia.y_velocity = 0;
}

...
...
...

function updateGame(diff) {

  // Don't try to update the game until we've created Mia,
  // or the game will crash.
  if (mia == null) return;

  // If the right key got pushed, move Mia to the right
  if (key_down["ArrowRight"]) {
    mia.x = mia.x + 7;
    mia.scale.set(1,1);
  }

  // If the left key got pushed, move Mia to the left
  if (key_down["ArrowLeft"]) {
    mia.x = mia.x - 7;
    mia.scale.set(-1,1);
  }

  // If the space bar got pushed, make Mia jump
  if (key_down[" "] && mia.state == "running") {
    mia.state = "jumping";
    mia.y_velocity = -20;
  }

  // If Mia is jumping, move her upwards, use gravity to pull her downwards,
  // and if she reaches the ground, stop the jump.
  if (mia.state == "jumping") {
    mia.y = mia.y + mia.y_velocity;
    mia.y_velocity = mia.y_velocity + 0.8;
    if (mia.y > game_height - 40) {
      mia.y = game_height - 40;
      mia.y_velocity = 0;
      mia.state = "running";
    }
  }

  followMia();
}
Note the line “key_down[” “] && mia.state == “running”. That’s key_down, then a single space between quotes, which means the spacebar. That’s also two & symbols. It won’t work with one.
If the spacebar is pressed, Mia switches to jumping and her velocity makes her go up.
When she’s jumping, gravity gradually brings her back down, and if she hits our original ground height, she switches back to running.
Boom! You now have a platformer.
Tomorrow we’ll add falling bricks and death and stuff.