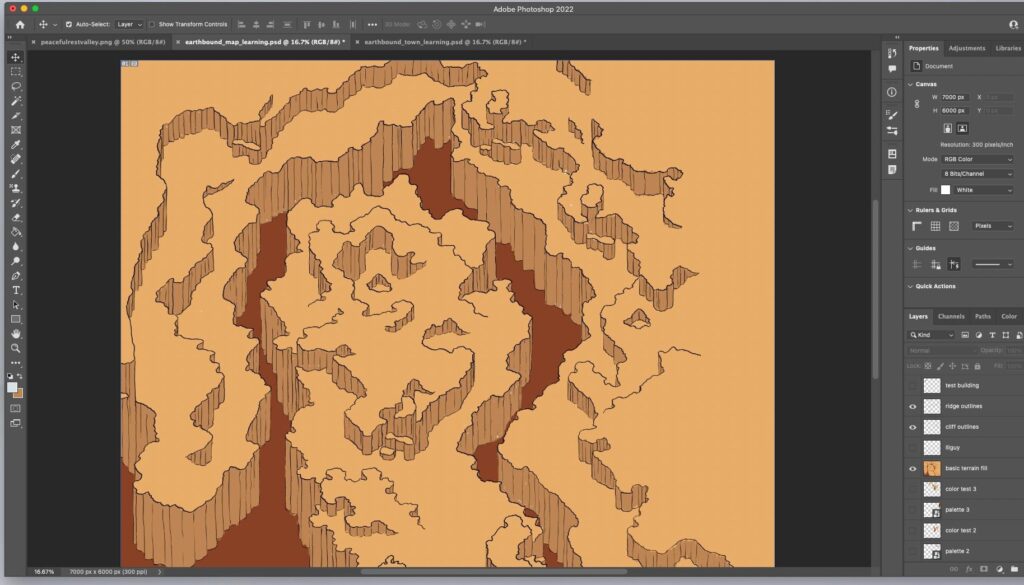
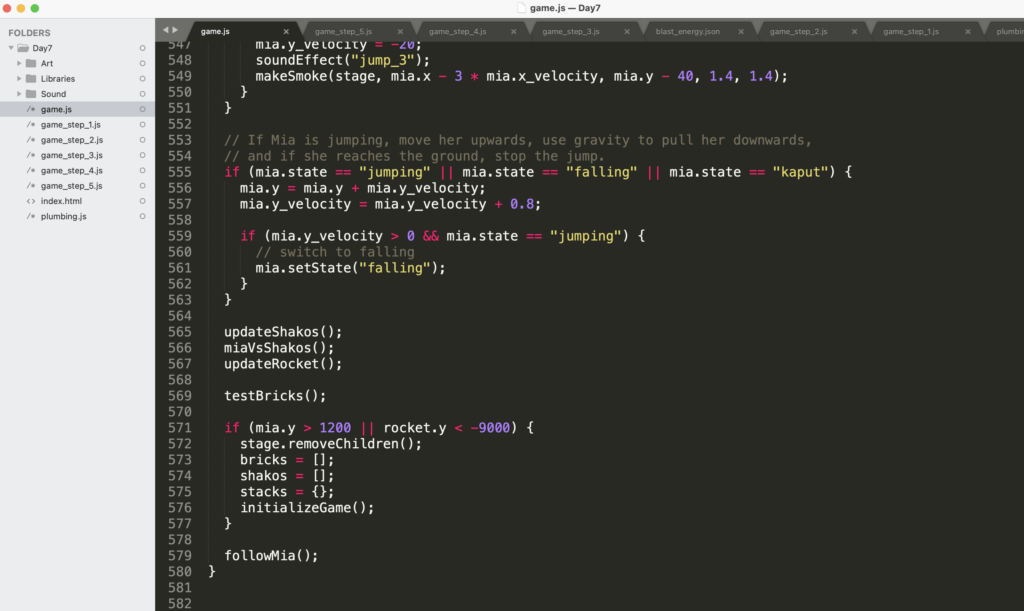
Quick map switching prototype for our upcoming educational RPG! This time it’s using my own map, with topography from scratch.
Here’s a bit more preliminary map work for the upcoming educational RPG.
I’ve taken my walking character code from the Alpha Zoo game and set up my little character to walk around on a chunked 7000×6000 map. Next up, I’ll draw my own map (so it’s not a steal from Earthbound) and share that.
Showing off a bit of preliminary map drawing practice for an upcoming educational RPG.
Sharp eyed readers might notice similarities to Peaceful Rest Valley from Earthbound. That’s because I based my topography on that map. I’ll use this and a modified version of the map system from Alpha Zoo to start roughing out an RPG map system, and when I’m happy with it, I’ll make a new map using my own topography, fill it in this style, and finish it a little more in the style of Neutral Party Maps, who really makes the best maps.
(Obrigado a Wilk Maia por traduzir este post!)
(Tempo de atividade: aproximadamente 60 minutos)
(Baixe os arquivos do Dia 1 aqui)
Introdução
Olá e seja bem vindo ao tutorial Game Jam da Quarentena de Pai e Filha!
Este tutorial de aproximadamente sete dias vai levá-lo, o pai em quarentena que sabe apenas um pouco de programação e a filha em quarentena que quer fazer jogos, do zero a um joguinho fofinho.
Obviamente mães e filhos, bem como outras combinações de pessoas, podem fazer parte deste Jam. Você provavelmente nem mesmo precisa estar confinado em casa. Mas eu escrevo sobre minha realidade.
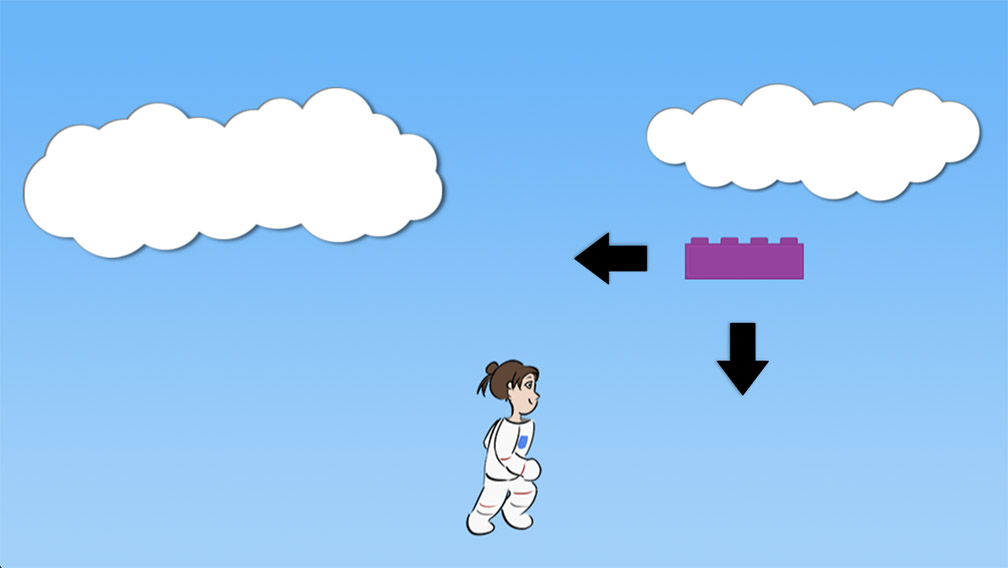
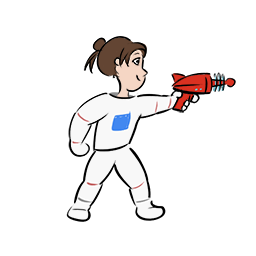
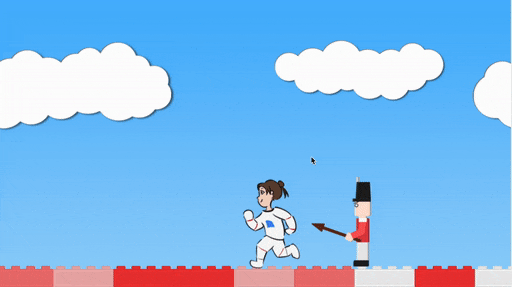
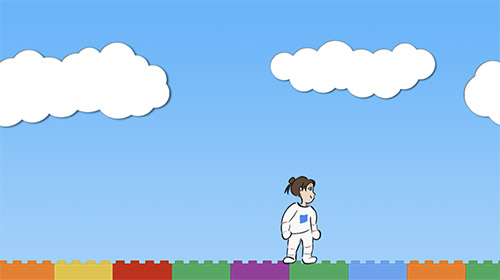
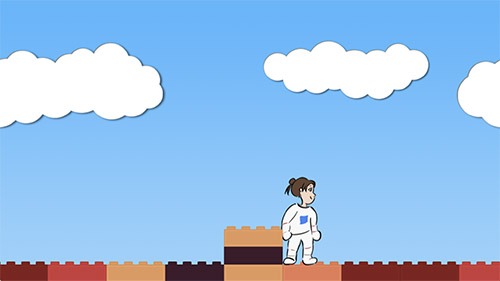
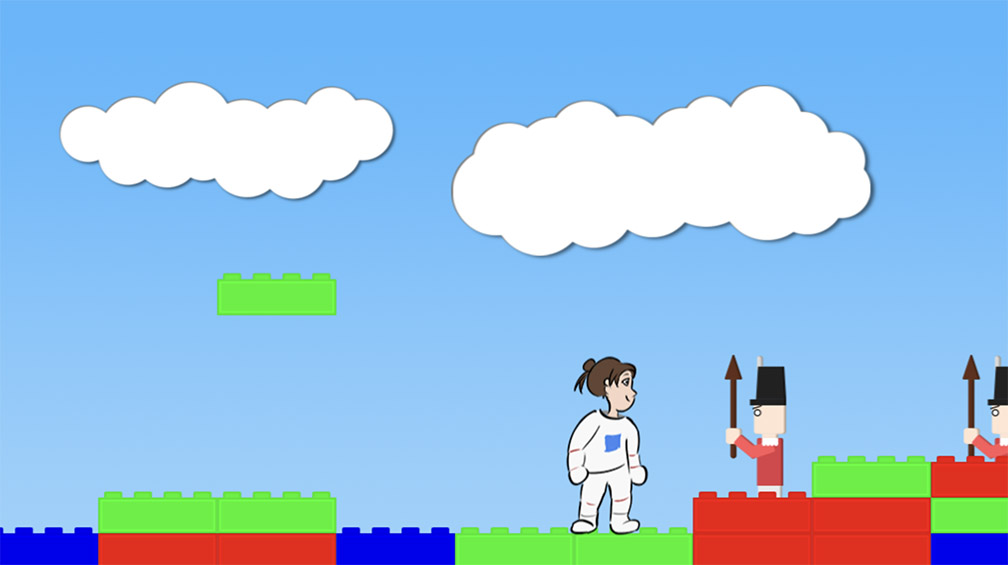
Nós vamos fazer um jogo chamado Fuga Ousada da Mia. Ele parece mais ou menos com isso:

A Mia é uma astronauta explorando um estranho planeta, quando é pega numa tempestade de tijolos de plástico. Ajude-a a correr de volta para seu foguete antes que ela seja atingida na cabeça.
Este tutorial terá seções para o pai e seções para a filha.
Você terá acesso a um framework desenvolvido especificamente para este propósito, a fim de facilitar as coisas. Mas você vai aprender um pouco de JavaScript de verdade.
Se você e sua filha fizerem mais jogos e você tiver um espacinho online você pode hospedar seus jogos e quase qualquer pessoa poderá jogá-lo em um navegador.
Você pode ensinar o quanto achar apropriado deste quadro amarelo à sua filha.
Você aprenderá como computadores transformam números em jogos. Você aprenderá como pessoas como você (sim, você!) usam frases cuidadosamente escritas e vários números para dizer aos computadores como executar jogos. Isso envolve muita mágica e muita tentativa e erro.
Lembre-se também, criança, seu pai está aprendendo. Portanto, seja gentil.

Hoje, o pai vai preparar o jogo e, então, pai e filha vão inserir Mia e alguns tijolos na tela juntos. Nessa jornada, ambos aprenderão um pouco sobre o sistema de coordenadas. Finalmente, o pai vai adicionar controles de teclado ao jogo e pai e filha poderão experimentar alterar a posição de Mia e dos tijolos.
Vamos começar!
Configurando o jogo
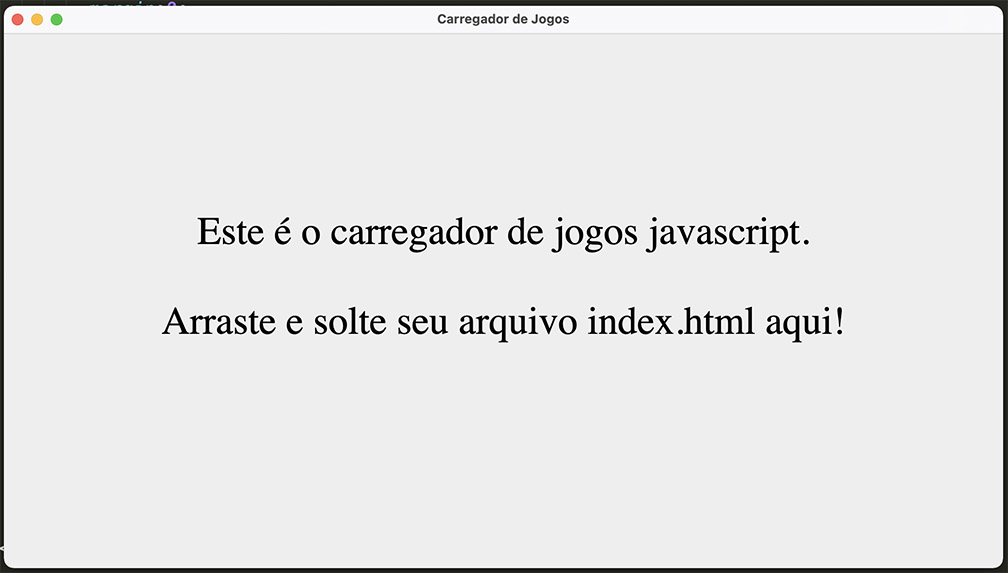
O que nós vamos fazer é um jogo de navegador usando a linguagem de programação JavaScript. A ideia é que ele seja executado em um navegador.
Mas, por questão de segurança, você não pode simplesmente executar o jogo diretamente no seu computador abrindo o arquivo principal no seu navegador. O navegador espera acessar um site, não um arquivo local.
Então, para facilitar as coisas, eu preparei um programa auxiliar que vai executar seu jogo. Você pode abrir o programa auxiliar, arrastar o arquivo principal, index.html, para ele e o jogo vai começar a executar.
Aqui está o Programa para Mac e aqui está o Programa para Windows.
Você também precisará de um editor de texto. O Bloco de Notas funciona bem. Muitos programadores gostam do Sublime Text, que é bom e também gratuito. Não use o Microsoft Word porque a formatação especial quebra o código. Se você quiser usar o Editor de Texto do Mac, salve tudo como texto comum porque, novamente, em caso contrário a formatação especial vai quebrar o código.
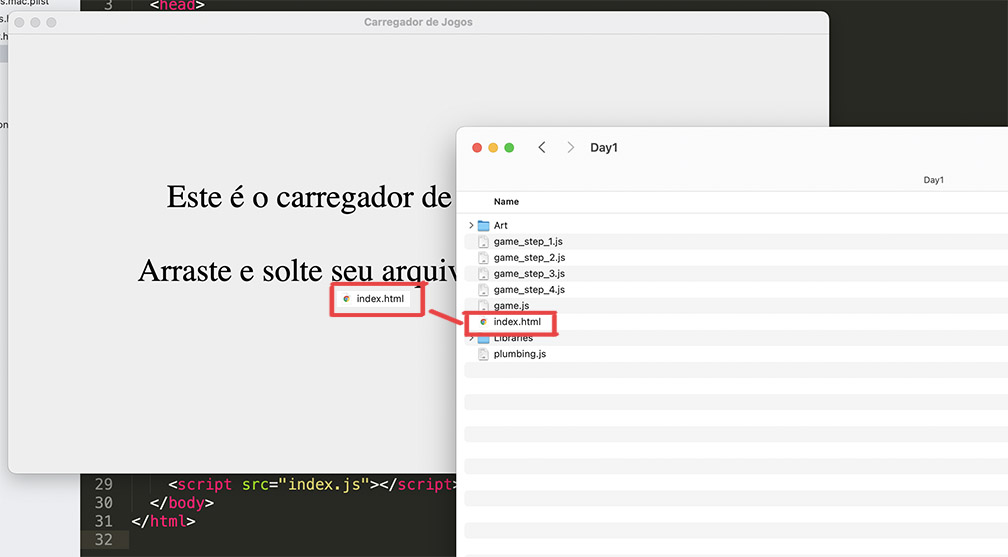

Aqui estão os arquivos do Dia 1. Há arquivos de arte para Mia e os tijolos, o código-fonte para vocês completarem, o código-fonte completo para referência e muito código de suporte que você pode simplesmente ignorar.
Baixe os arquivos e ponha-os onde você quiser. Execute o programa auxiliar (você pode precisar dar permissões a ele). Arraste o arquivo index.html no programa auxiliar e você verá… um céu azul.
Primeira Tarefa: Adicionar Mia!
Abra o arquivo chamado game.js. É nele que vocês vão trabalhar.
Você deverá ver algo assim:
// Bem-vindos! É aqui que vocês escreverão seu jogo.
// Qualquer coisa iniciando com duas // barras na frente é um comentário.
// O computador ignora comentários. Eles servem para humanos
// explicarem coisas a outros humanos.
function initializeGame() {
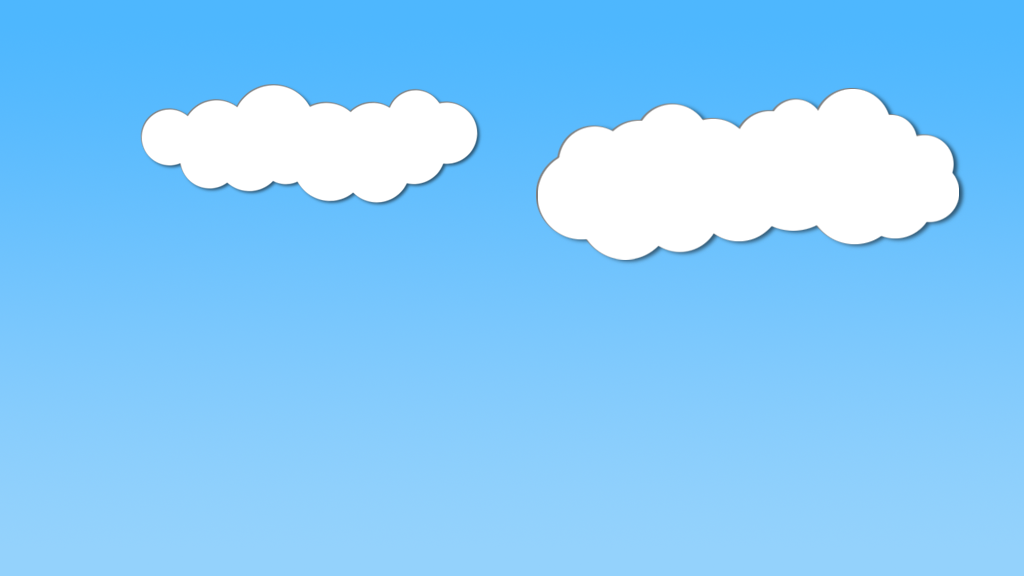
let blue_sky = makeSprite("Art/blue_sky.png");
blue_sky.position.set(0, 0);
stage.addChild(blue_sky);
}
function updateGame(diff) {
}Detalhe: Eu escondi todo o código que cria o jogo. Se vocês estiverem curiosos, nosso jogo utiliza um framekwork chamado PixiJS e todo o meu código extra está encapsulado no arquivo plumbing.js. Vamos ignorá-lo por agora.
Há duas funções com as quais vamos trabalhar.
Uma função é basicamente um comando que você pode dar ao computador. Você pode por o quanto quiser dentro de uma função, muito ou pouco, e pode nomeá-la como preferir. É como uma forma de agrupar pensamentos. “Tudo isso aqui, vamos chamar de MinhaRotinaDeCaféDaManhã ou OrganizarQuarto.”
Para fazer uma função você deve escrever a palavra “function”, seguida de um nome, seguida de alguns ( ) parênteses, onde você pode por alguma informação extra que desejar passar com o seu comando. Então, tudo entre os { } colchetes é o que a função realmente faz.
initializeGame é executada uma vez, assim que o jogo inicia.
Não há nada entre os ( ) parênteses porque ela não precisa de nenhuma informação extra.
Entre os colchetes há três comandos. Primeiramente, criamos um novo sprite utilizando makeSprite (outra função que está escondida no arquivo plumbing.js). Damos a ela um nome de arquivo, “Art/blue_sky.png”, que é a imagem para o céu azul, e ela cria um sprite.
Nós, então, definimos a posição do céu azul para (0, 0). Explicarei isso em um minuto.
Então, adicionamos o céu azul ao stage. O stage é onde você põe coisas na tela. Se você disser ao computador para por algo no stage, ele vai aparecer na tela. (A palavra stage vem de stage – palco, em inglês – de teatro)
Um sprite é uma imagem que você pode movimentar. Por hora há apenas uma imagem do céu azul, mas nós vamos adicionar o sprite para Mia em seguida.
Você pode movimentar sprites usando números. Por exemplo, você pode MOVER O CÉU.
Encontre a linha que contém “blue_sky.position.set(0, 0);” e mude os números. Tente (50, 50). Então, reinicie o jogo ou peça para seu pai reinicá-lo pressionando Command-R em um Mac ou Control-R no Windows. O céu deve ter se movido e você verá escuridão no canto superior esquerdo da janela.
Experimente mudar os números e veja o para onde o céu se move.
Agora, vamos adicionar Mia ao jogo.
Adicione as segunites linhas ao código do seu jogo:
// Bem-vindos! É aqui que vocês escreverão seu jogo.
// Qualquer coisa iniciando com duas // barras na frente é um comentário.
// O computador ignora comentários. Eles servem para humanos
// explicarem coisas a outros humanos.

let mia = null;

function initializeGame() {

  let blue_sky = makeSprite("Art/blue_sky.png");
  blue_sky.position.set(0, 0);
  stage.addChild(blue_sky);

  mia = makeAnimatedSprite("Art/mia_animations.json", "run");
  mia.position.set(200, 200);
  stage.addChild(mia);
}


function updateGame(diff) {

}
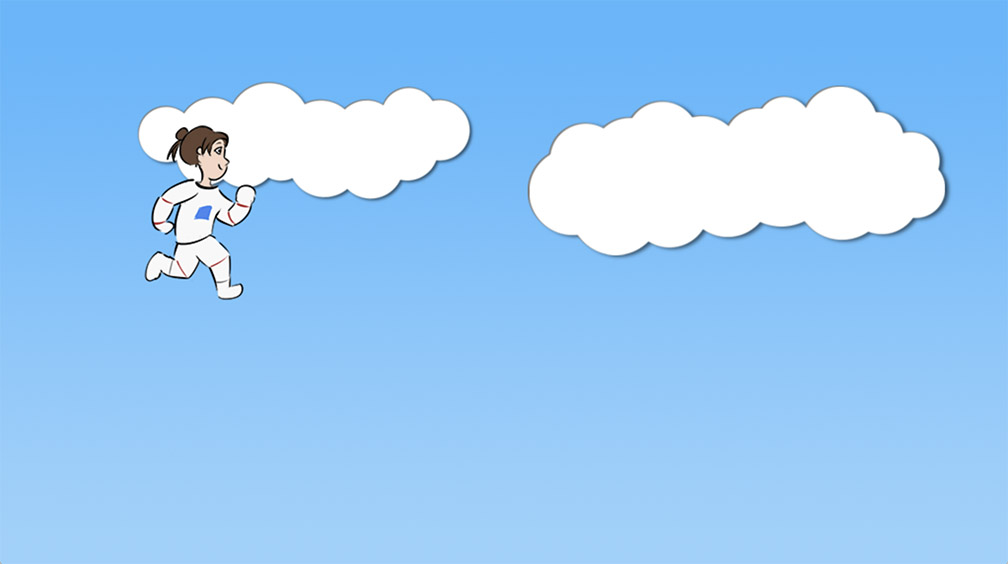
Parece o mesmo, exceto que estamos usando uma função diferente para fazer um sprite animado. Ela também precisa que nós escolhamos uma animação específica. Mia tem animações para correr (“run”), subir (“rise”), cair (“fall”) e ficar parada (“idle”). Nós escolhmos correr. Você pode mudar isso e ver como as partes de subida e descida de um pulo são.
Também, próximo ao início do arquivo, escrevemos “let mia = null”.
A palavra mia é uma variável. Variáveis armazenam informação, sejam números, texto ou sprites. Elas são chamadas variáveis porque você pode modificá-las. Por exemplo, você pode dizer “cat_weight = 10;” e em algum momento posterior no programa, “cat_weight = 15;” e mudar a variável; agora é 15 ao invés de 10.
Depois vamos aprender sobre “let” e “null” e por que pusemos essa linha fora da função.
E lá está! Mia está na tela! Mas ela está parada, não se movendo.
Vamos adicionar mais duas linhas.
// Bem-vindos! É aqui que vocês escreverão seu jogo.
// Qualquer coisa iniciando com duas // barras na frente é um comentário.
// O computador ignora comentários. Eles servem para humanos
// explicarem coisas a outros humanos.

let mia = null;

function initializeGame() {

  let blue_sky = makeSprite("Art/blue_sky.png");
  blue_sky.position.set(0, 0);
  stage.addChild(blue_sky);

  mia = makeAnimatedSprite("Art/mia_animations.json", "run");
  mia.position.set(200, 200);
  stage.addChild(mia);
  mia.animationSpeed = 0.3;
  mia.play();
}


function updateGame(diff) {

}
Muito melhor. Agora Mia corre sem se mover.
Movimente a Mia um pouco usando diferente valores para a posição na linha mia.position.set(200, 200).
Tente mudar a velocidade da animação (mia.animationSpeed). Qual seria um número bem rápido? Qual seria um número lento? 0.1 é muito lento?
Os números que mudam a posição de Mia são parte de um sistema de coordenadas. Você pode pensar em pixels numa tela como um pedaço de papel quadriculado:
Para controlar a posição de um sprite, usamos coordenadas. A primeira, x, controla esquerda e direita. A segunda, y, controla cima e baixo.
Em Fuga Ousada de Mia, a tela tem 1024 pixels de largura e 576 pixels de altura.
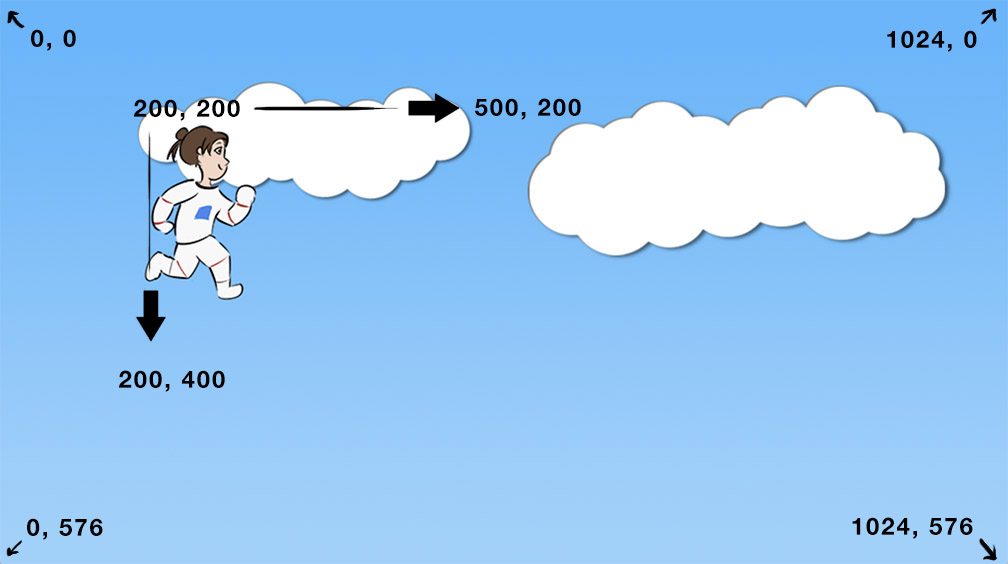
Neste sistema de coordenadas, começamos no canto superior esquerdo da tela. Isso significa 0 no eixo esquerda-direita e 0 no eixo cima-baixo.
Se você mover para a direita, o primeiro número aumenta. Então, se você mudar Mia de 200, 200 para 500, 200, ela se moverá para a direita.
Se você mover para baixo, o segundo número aumenta. Então, se você mover Mia de 200, 200 para 200, 400, ela se moverá para baixo na tela.
Segunda Tarefa: Adicionar um tijolo ou dois!
Que tal alguns tijolos? Adicione o seguinte código ao jogo.
// Bem-vindos! É aqui que vocês escreverão seu jogo.
// Qualquer coisa iniciando com duas // barras na frente é um comentário.
// O computador ignora comentários. Eles servem para humanos
// explicarem coisas a outros humanos.

let mia = null;
let brick_1 = null;
let brick_2 = null;

function initializeGame() {

  let blue_sky = makeSprite("Art/blue_sky.png");
  blue_sky.position.set(0, 0);
  stage.addChild(blue_sky);

  mia = makeAnimatedSprite("Art/mia_animations.json", "run");
  mia.position.set(200, 200);
  stage.addChild(mia);
  mia.animationSpeed = 0.3;
  mia.play();

  brick_1 = makeSprite("Art/brick.png");
  brick_1.position.set(500, 200);
  brick_1.tint = color(1,0,0);
  stage.addChild(brick_1);

  brick_2 = makeSprite("Art/brick.png");
  brick_2.position.set(200, 400);
  brick_2.tint = color(0,0,1);
  stage.addChild(brick_2);
}


function updateGame(diff) {

}
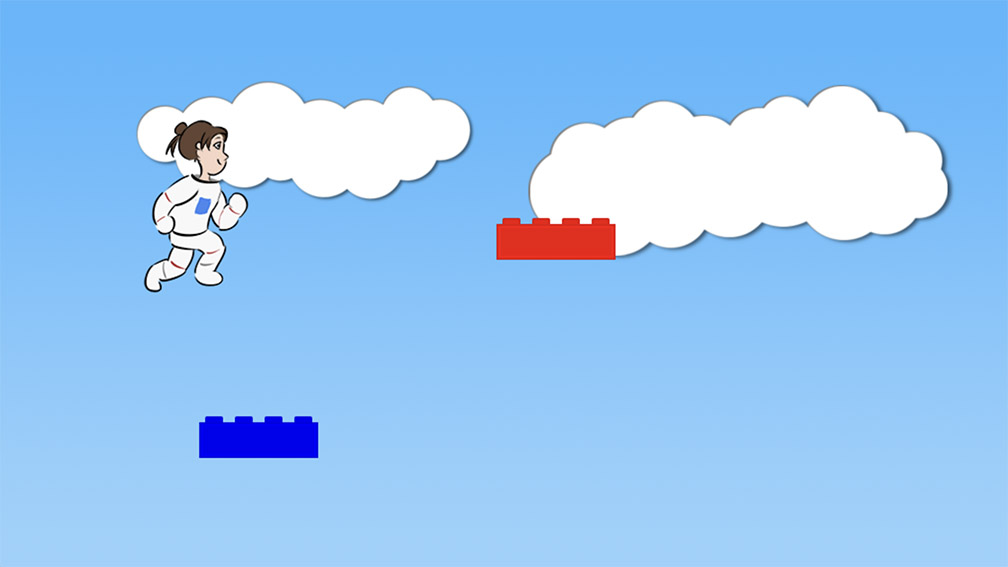
Basicamente a mesma coisa de antes. Nós criamos dois novos sprites e os pusemos na tela. Nós os nomeamos brick_1 e brick_2 (brick significa tijolo em inglês) para que nós (e o computador) possamos distingui-los.
Se você olhar para a figura que estamos usando, o tijolo é branco.

No código, nós tingimos (tint) os tijolos usando uma cor.
brick_1.tint = color(1,0,0);
color (cor, em inglês) é outra função. Ela espera três valores (vermelho, verde e azul) e retorna um número de cor que o computador consegue entender.
Os valores variam de 0 a 1. Então, para o primeiro valor, 0 é nada de vermelho, 1 é tudo de vermelho e assim sucessivamente.
Experimente um pouco mudar os valores da função color. Você consegue criar um tijolo verde?
E se nós tingirmos Mia? Tente escrever
mia.tint = color(0,1,0);
Mia alienígena!
Última Tarefa: Faça Mia se mover!
A última coisa que vamos fazer hoje é usar o teclado para mover Mia por aí.
Você provavelmente está cansado, então eu não vou explicar a próxima parte em muito detalhe.
<— vê? Você está cansado. Eu sei disso.
Adiciona o segunite à função updateGame (atualizar código, em inglês):
function updateGame(diff) {

  // Se a seta direita do teclado for pressionada, mova Mia para a direita
  if (key_down["ArrowRight"]) {
    mia.x = mia.x + 5;
  }

  // Se a seta esquerda do teclado for pressionada, mova Mia para a esquerda
  if (key_down["ArrowLeft"]) {
    mia.x = mia.x - 5;
  }

  // Se a seta para baixo for pressionada, mova Mia para baixo
  if (key_down["ArrowDown"]) {
    mia.y = mia.y + 5;
  }

  // Se a seta para cima for pressionada, mova Mia para cima
  if (key_down["ArrowUp"]) {
    mia.y = mia.y - 5;
  }
}
Se jogo está desenhando e atualizando aproximadamente 60 vezes por segundo. Toda vez que ele desenha e atualiza, ele chama a função updateGame. Tudo o que você puser aqui vai acontecer aproximadamente 60 vezes por segundo.
Então estamos colocando teclas de ação no teclado nesse carinha. Há código no plumbing.js que escreve toda a informação de teclado em um dicionário chamado key_down. Basicamente, key_down é algo que consegue dizer se várias teclas foram pressionadas.
Não se preocupe muito sobre a estrutura desse código. O que ele faz é “se a seta direita do teclado tiver sido pressionada, mova a Mia no eito x em 5 pixels” etc
A propósito, a razão de pormos “let mia = null” fora da função initializeGame é para que nós possamos usar a variável “mia” em updateGame também. “blue_sky” só existe dentro da função updateGame. Mas “mia” está disponível para nós em todo lugar.
E lá está! Mia está se movendo.
O programa “monitora” seu teclado para ver se alguma tecla foi pressionada. O código que acabamos de escrever diz ao computador o que fazer se essas teclas forem pressionadas.
Usamos o sistema de coordenadas para mover Mia. x é esquerad e direita e y é cima e baixo.
Quando o jogador pressiona a seta direita do teclado, adicionamos 5 para x e então Mia se move 5 pixels para a direita.
Tente mudar o número de pixels! Se você mover Mia em 10 pixels, como vai ficar?
E se você usar números diferentes para cada tecla?
Você pode desligar o movimento cima/baixo deletando alguma parte do código?
Grande desafio: você consegue mudar o código para mover um dos tijolos ao invés de Mia?
Ufa. É muita coisa para o primeiro dia. Nós nos vemos novamente amanhã, quando vamos dar a Mia um chão de tijolos onde ela poderá correr e pular!
Detalhe: O sprite de Mia é um layout que fiz a partir deste Cavaleiro de Fantasia de itch.io. Veja lá!
(Activity time: about 60 minutes)
(Download the Day Seven Files here)
Previous posts:
Game Jam Day 1
Game Jam Day 2
Game Jam Day 3
Game Jam Day 4
Game Jam Day 5
Game Jam Day 6
Intro
Hello, and welcome to the seventh and final day of the Dad and Daughter Quarantine Game Jam Tutorial!
We’re making a game called Mia’s Daring Escape.
On day 1, we set up the game and put Mia on the screen.
On day 2, we gave Mia a brick level to run, and a jumping skill.
On day 3, we made falling bricks that stacked up on the ground or bopped Mia on the head.
On day 4, we added sounds and effects and gave Mia different poses for jumping and falling and standing still.
On day 5, we made some baddies.
On day 6, we made the rocket.
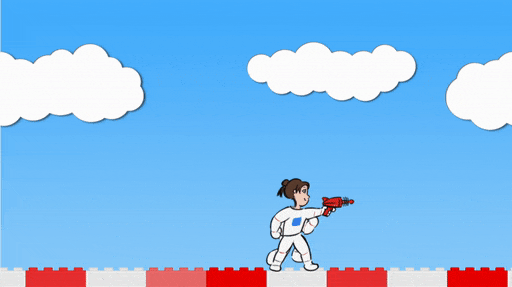
Today, for the finale, we’re going to add the ray gun and the end screen.
For the last time, you’re definitely going to have to download the day seven files, so you can get the ray gun effects, the end screen, and Mia’s new pose.
You can keep the game.js file you’ve been working on, but be sure to replace everything in the Art folder, because I’ve changed Mia’s sprite file, and be sure to swap out plumbing.js, because I’ve added a function for making blast effects.
Also, you’re almost done, guy. You’re doing a great job if you’ve come this far. Just a little further. Your kid will thank you some day.
First Task: New State, New Pose!
Mia’s getting a new state called “blasting”, and a new animation pose. Be sure to use the new Mia image file, or this code won’t work.
The blaster pose looks like this:
Let’s start by adding the new sprite to the initializeGame function:
function initializeGame() {

  ...
  ...
  ...

  mia.run = makeAnimatedSprite("Art/mia_animations.json", "run");
  mia.run.anchor.set(0.5, 0.9);
  mia.run.animationSpeed = 0.3;
  mia.run.play();
  mia.addChild(mia.run);

  mia.fall = makeAnimatedSprite("Art/mia_animations.json", "fall");
  mia.fall.anchor.set(0.5, 0.9);
  mia.fall.animationSpeed = 0.3;
  mia.fall.play();
  mia.addChild(mia.fall);

  mia.rise = makeAnimatedSprite("Art/mia_animations.json", "rise");
  mia.rise.anchor.set(0.5, 0.9);
  mia.addChild(mia.rise);

  mia.idle = makeAnimatedSprite("Art/mia_animations.json", "idle");
  mia.idle.anchor.set(0.5, 0.9);
  mia.addChild(mia.idle);

  mia.blasting = makeAnimatedSprite("Art/mia_animations.json", "blasting");
  mia.blasting.anchor.set(0.5, 0.9);
  mia.addChild(mia.blasting);

  // Change mia's state
  mia.setState = function(state) {
    mia.state = state;

    // Set all sprites invisible
    mia.run.visible = false;
    mia.fall.visible = false;
    mia.rise.visible = false;
    mia.idle.visible = false;

    // Then set the right state back to visible
    if (mia.state == "running") mia.run.visible = true;
    if (mia.state == "falling") mia.fall.visible = true;
    if (mia.state == "jumping") mia.rise.visible = true;
    if (mia.state == "idle" || mia.state == "kaput") mia.idle.visible = true;
  }

  mia.position.set(200, game_height - 40);
  mia.setState("idle");
  mia.y_velocity = 0;
  mia.x_velocity = 0;
  mia.max_x_velocity = 8;
  stage.addChild(mia);
}
Whoops. It looks like the new pose is sitting in front of all the other poses.
That’s because we haven’t incorporated it into Mia’s setState function.
Change the setState function like this:
  // Change mia's state
  mia.setState = function(state) {
    mia.state = state;

    // Set all sprites invisible
    mia.run.visible = false;
    mia.fall.visible = false;
    mia.rise.visible = false;
    mia.idle.visible = false;
    mia.blasting.visible = false;

    // Then set the right state back to visible
    if (mia.state == "running") mia.run.visible = true;
    if (mia.state == "falling") mia.fall.visible = true;
    if (mia.state == "jumping") mia.rise.visible = true;
    if (mia.state == "blasting") mia.blasting.visible = true;
    if (mia.state == "idle" || mia.state == "kaput") mia.idle.visible = true;
  }
There. Now that setState accounts for the new blasting pose, it no longer sits on top of everything else.
Now we need a way to trigger the pose.
First, let’s give Mia an extra property called last_blast to keep the time that she last fired the blaster.
Add this one line of code at the very bottom of initializeGame:
  mia.position.set(200, game_height - 40);
  mia.setState("idle");
  mia.y_velocity = 0;
  mia.x_velocity = 0;
  mia.max_x_velocity = 8;
  mia.last_blast = Date.now();
  stage.addChild(mia);
Now we need to do a lot of little bits of bookkeeping to make sure the new state doesn’t break the old program.
Change this line in miaVsShakos:
function miaVsShakos() {
  for (shako_num = 0; shako_num < shakos.length; shako_num += 1) {
    let shako = shakos[shako_num];

    if (shako.state != "kaput" && mia.state == "running") {
    if (shako.state != "kaput" && ["running","jumping","blasting"].includes(mia.state)) {

      if (mia.x < shako.x && mia.scale.x == 1 && shako.scale.x == 1 && mia.x > shako.x - 80
        && shako.stance == "forward" && Math.abs(mia.y - shako.y) < 100) {
        mia.setState("kaput");
        mia.scale.y = -1;
        mia.y_velocity = -5;
        mia.y = mia.y - 175;
        soundEffect("negative_2");
      }
...
...
...
Remember, there’s one set of things that happens if Mia is falling onto the shako heads, and another if Mia is running.
We want that running code to trigger if Mia is running, or blasting, or even jumping (that is, the upward half of her jump, before she starts falling).
Let’s do something similar in updateGame:
  // If the right key got pushed, move Mia to the right
  if (key_down["ArrowRight"]) {
    if (mia.state == "idle") mia.setState("running");
    if (mia.state == "idle" || mia.state == "blasting") mia.setState("running");
    if (mia.x_velocity < 0) {
      mia.x_velocity = 0;
      makeSmoke(stage, mia.x - 20, mia.y - 40, 1.4, 1.4);
    }
    mia.x_velocity += 1;
    if (mia.x_velocity > mia.max_x_velocity) mia.x_velocity = mia.max_x_velocity;
    if (mia.state != "kaput") mia.scale.set(1,1);
  }

  // If the left key got pushed, move Mia to the left
  if (key_down["ArrowLeft"]) {
    if (mia.state == "idle") mia.setState("running");
    if (mia.state == "idle" || mia.state == "blasting") mia.setState("running");
    if (mia.x_velocity > 0) {
      mia.x_velocity = 0;
      makeSmoke(stage, mia.x + 20, mia.y - 40, 1.4, 1.4);
    }
    mia.x_velocity -= 1;
    if (mia.x_velocity < -1 * mia.max_x_velocity) mia.x_velocity = -1 * mia.max_x_velocity;
    if (mia.state != "kaput") mia.scale.set(-1,1);
  }

  mia.last_x = mia.x;
  mia.x += mia.x_velocity;
  mia.x_velocity *= 0.93;
  if (mia.state == "running" && Math.abs(mia.x_velocity) < 0.5) mia.setState("idle");

  if (mia.x < 0) mia.x = 0;
  if (mia.x > 84 * 120) mia.x = 84 * 120;

  // If the space bar got pushed, make Mia jump
  if (key_down[" "]) {
    if (mia.state == "running" || mia.state == "idle") {
    if (mia.state == "running" || mia.state == "idle" || mia.state == "blasting") {
      mia.setState("jumping");
      mia.y_velocity = -20;
      soundEffect("jump_3");
      makeSmoke(stage, mia.x - 3 * mia.x_velocity, mia.y - 40, 1.4, 1.4);
    }
  }
Mia should be able to take off running from both the idle state and the blasting state.
Also, she should be able to jump from the running, idle, and blasting states.
Now we’re ready to write the actual blaster action. Put this in at the end of updateGame:
  mia.last_x = mia.x;
  mia.x += mia.x_velocity;
  mia.x_velocity *= 0.93;
  if (mia.state == "running" && Math.abs(mia.x_velocity) < 0.5) mia.setState("idle");

  if (mia.x < 0) mia.x = 0;
  if (mia.x > 84 * 120) mia.x = 84 * 120;

  // If the space bar got pushed, make Mia jump
  if (key_down[" "]) {
    if (mia.state == "running" || mia.state == "idle" || mia.state == "blasting") {
      mia.setState("jumping");
      mia.y_velocity = -20;
      soundEffect("jump_3");
      makeSmoke(stage, mia.x - 3 * mia.x_velocity, mia.y - 40, 1.4, 1.4);
    }
  }

  if (key_down["Enter"] || key_down["v"] || key_down["b"]) {
    if (["running", "idle"].includes(mia.state) && Date.now() - mia.last_blast > 300) {
      mia.setState("blasting");
      mia.last_blast = Date.now();
      mia.x += -5 * mia.scale.x;
    }
  }

  if (mia.state == "blasting" && Date.now() - mia.last_blast > 300) {
    mia.setState("idle");
  }
If the player presses the Enter key, or the v key, or the b key, the blaster action will trigger, but only if Mia is either idle or running (not jumping, falling, or kaput), and only if the time since her last blast is greater than 300 milliseconds (“Date.now() – mia.last_blast > 300“).
For now, we just change Mia’s state so she makes the blaster pose, and we set the last blast to right now, and we move her back a few pixels.
The second if statement checks if Mia is in the blasting state and has been there for 300 milliseconds, in which case, she is returned to idle.
Second Task: The Blaster Actually Fires!
Let’s make some blasts.
Blaster is your job.
I’ve given you a convenient new function called makeBlastEnergy. It’s similar to makeSmoke and makeExplosion: you give it a position and a scale, and it just automatically makes a nice animated effect.
There’s also a new blast animated sprite.
Also, you can color both of these.
Let’s add to the blaster code at the end of the updateGame function:
if (key_down["Enter"] || key_down["v"] || key_down["b"]) {
    if (["running", "idle"].includes(mia.state) && Date.now() - mia.last_blast > 300) {
      mia.setState("blasting");
      mia.last_blast = Date.now();
      mia.x += -5 * mia.scale.x;
      soundEffect("jump_4");
      makeBlastEnergy(stage, color(0,0,1), mia.x + 124 * mia.scale.x, mia.y - 138, 0.75, 0.75);

      let blast = makeAnimatedSprite("Art/blast.json", "blast");
      blast.scale.set(2,2);
      blast.tint = color(0,0,1);
      blast.position.set(mia.x + 124 * mia.scale.x, mia.y - 134);
      blast.animationSpeed = 0.3;
      blast.state = "active";
      blast.direction = mia.scale.x;
      blast.x_velocity = 20 * blast.direction;
      blast.original_x = blast.x;
      blast.play();
      stage.addChild(blast);
    }
  }
First, we make a sound effect for the blaster by calling the soundEffect function. I like “jump_4” as a blaster sound, but you should pick one for yourself.
Then, we call the makeBlastEnergy function with some coordinates that are close to Mia. I’ve picked out ones that are close to the actual position of her blaster, but you can experiment with these numbers.
Notice also that makeBlastEnergy takes a color. I chose color(0, 0, 1), which is total blue, but you can pick your own.
Then, we make an animated sprite called blast.
We set its scale to 2,2, which means double the size x and double the size y, because it’s a darned small picture.
We set its position to almost the same place as the blaster.
I’ve chosen to set the tint of the blast to color(0, 0, 1) to match the blast energy, but you can pick your own and it doesn’t have to match the energy.
Heck, if you want to get really clever, write:
blast.tint = color( dice(100) / 100, dice(100) / 100, dice(100) / 100)
That will set the blast to a random color every time!
We give the blast some velocity in the right direction, which is based on Mia’s scale (1 is facing right, -1 is facing left).
Finally, we start the animation playing, and add the blast to the stage.
It’s not going to move yet. It’s just going to hover in place, weirdo style.
To make the blasts move, we’re going to do the same pattern we did with bricks and shakos.
We’re going to make a list of blasts, add each new blast to the list, and update all the blasts every frame.
Start by adding the list at the very top of the code, and putting the new blast into the list at the very bottom, and clearing blasts when we reset the game:
let mia = null;
let rocket = null;
let rocket_door = null;
let bricks = [];
let shakos = [];
let stacks = {};
let blasts = [];
let colors = [
  // Red brick color scheme
  color(0.97, 0.97, 0.97),
  color(0.97, 0.72, 0.72),
  color(0.97, 0.48, 0.48),
  color(0.97, 0.23, 0.23),
  color(0.97, 0.00, 0.00),
]

...
...
... very many lines ...
...
...

  if (key_down["Enter"] || key_down["v"] || key_down["b"]) {
    if (["running", "idle"].includes(mia.state) && Date.now() - mia.last_blast > 300) {
      mia.setState("blasting");
      mia.last_blast = Date.now();
      mia.x += -5 * mia.scale.x;
      soundEffect("jump_4");
      makeBlastEnergy(stage, color(0,0,1), mia.x + 124 * mia.scale.x, mia.y - 138, 0.75, 0.75);

      let blast = makeAnimatedSprite("Art/blast.json", "blast");
      blast.scale.set(2,2);
      blast.tint = color(0,0,1);
      blast.position.set(mia.x + 124 * mia.scale.x, mia.y - 134);
      blast.animationSpeed = 0.3;
      blast.state = "active";
      blast.direction = mia.scale.x;
      blast.x_velocity = 20 * blast.direction;
      blast.original_x = blast.x;
      blast.play();
      stage.addChild(blast);
      blasts.push(blast);
    }
  }

...
...
...

if (mia.y > 1200 || rocket.y < -9000) {
    stage.removeChildren();
    bricks = [];
    shakos = [];
    stacks = {};
    blasts = [];
    initializeGame();
  }
Now add an empty function called updateBlasts and call it from the bottom of updateGame:
function updateBlasts() {

}

function updateShakos() {
  ...
  ...
  ...
}

...
...
...

  // If Mia is jumping, move her upwards, use gravity to pull her downwards,
  // and if she reaches the ground, stop the jump.
  if (mia.state == "jumping" || mia.state == "falling" || mia.state == "kaput") {
    mia.y = mia.y + mia.y_velocity;
    mia.y_velocity = mia.y_velocity + 0.8;

    if (mia.y_velocity > 0 && mia.state == "jumping") {
      // switch to falling
      mia.setState("falling");
    }
  }

  updateBlasts();
  updateShakos();
  miaVsShakos();
  updateRocket();

  testBricks();
Inside the updateBlasts function, we’re going to do one loop where we move every blast by that blast’s x velocity.
Then we’re going to do a second loop (in reverse) where we delete any blasts that are done or have moved far away from where they started.
Don’t worry about understanding all of this. It’s good experience just to write it out and see that it works. If you keep doing game programming, you’ll gradually come to understand all the bits and pieces.
function updateBlasts() {

  for (blast_num = 0; blast_num < blasts.length; blast_num += 1) {
    let blast = blasts[blast_num];

    blast.x = blast.x + blast.x_velocity;
  }


  for (blast_num = blasts.length - 1; blast_num >= 0; blast_num += -1) {
    let blast = blasts[blast_num];

    if (blast.state == "done" || blast.x > blast.original_x + 900 || blast.x < -1000) {
      blasts.splice(blast_num, 1);
      stage.removeChild(blast);
    }
  }
}
We have a working blaster! Except… it passes through shakos instead of getting them. We’re going to have to fix that next.
Third Task: Get Those Shakos!
We’ve done code to check collisions before. This is no different. Add the following to updateBlasts:
function updateBlasts() {

  for (blast_num = 0; blast_num < blasts.length; blast_num += 1) {
    let blast = blasts[blast_num];

    blast.x = blast.x + blast.x_velocity;

    for (shako_num = 0; shako_num < shakos.length; shako_num += 1) {
      let shako = shakos[shako_num];

      if (Math.abs(blast.x - shako.x) < 60
        && blast.y > shako.y - 170
        && blast.y < shako.y
        && shako.state != "kaput") {

        shako.state = "kaput";
        shako.scale.y = -1;
        shako.y_velocity = -5;
        shako.y = shako.y - 175;
        if (Math.abs(mia.x - shako.x) < 700) soundEffect("hurt");

        blast.state = "done";
        blast.visible = false;
        makeBlastEnergy(stage, color(0,0,1), blast.x, blast.y, 0.75, 0.75);
      }
    }
  }


  for (blast_num = blasts.length - 1; blast_num >= 0; blast_num += -1) {
    let blast = blasts[blast_num];

    if (blast.state == "done" || blast.x > blast.original_x + 900 || blast.x < -1000) {
      blasts.splice(blast_num, 1);
      stage.removeChild(blast);
    }
  }
}
Inside the loop for every blast, we do a loop that checks every shako.
If the shako and the blast are close to each other on the x axis (“Math.abs(blast.x – shako.x) < 60″) and the blast is between the shako’s feet and head on the y axis, and the shako isn’t kaput, then we have a collision.
We make the shako kaput the same as we’ve done before, giving it some y velocity and turning it upside down and stuff. If Mia is nearby, we play the shako kaput sound.
We also set this blast to done so it will be recycled during the loop at the end of the function, and we make it invisible for good measure.
Finally, we make another blast energy effect at the source of the collision.

Final Task: Final Screen!
No, seriously, this is it. This is the last thing to do.
We’re going to give the game an end screen. I’ve made one for you, called victory_screen. I based it off of this nice stock photo by Cheremuha.
Hey, y’all, you’ve almost climbed a whole mountain together.
First, add this to the start of updateGame:
function updateGame(diff) {

  // Don't try to update the game until we've created Mia,
  // or the game will crash.
  if (mia == null) return;

  if (mia.state == "victory") {
    stage.x = 0;

    if (key_down["Enter"]) {
      stage.removeChildren();
      bricks = [];
      shakos = [];
      stacks = {};
      blasts = [];
      initializeGame();
    }

    return;
  }

  dropBricks();

...
...
...
We’re going to set a “victory” state for Mia. If we find ourselves in this state, first, make sure the stage x coordinate is set to 0, instead of, say, 9536.
Then, check to see if the player has pressed enter. If so, reset all the lists and dictionaries and reset the game.
Finally, return. That word means “quit out of this function”. We want to return here instead of doing all the other stuff, because on the victory screen, all that other stuff is wrong.
We also have to make sure the player can’t move Mia around while the rocket is moving, so make these changes later in updateGame to prevent left and right (jump is already only allowed on specific states, so we can ignore it):
// If the right key got pushed, move Mia to the right
  if (key_down["ArrowRight"]) {
  if (mia.state != "rocket" && key_down["ArrowRight"]) {
    if (mia.state == "idle" || mia.state == "blasting") mia.setState("running");
    if (mia.x_velocity < 0) {
      mia.x_velocity = 0;
      makeSmoke(stage, mia.x - 20, mia.y - 40, 1.4, 1.4);
    }
    mia.x_velocity += 1;
    if (mia.x_velocity > mia.max_x_velocity) mia.x_velocity = mia.max_x_velocity;
    if (mia.state != "kaput") mia.scale.set(1,1);
  }

  // If the left key got pushed, move Mia to the left
  if (key_down["ArrowLeft"]) {
  if (mia.state != "rocket" && key_down["ArrowLeft"]) {
    if (mia.state == "idle" || mia.state == "blasting") mia.setState("running");
    if (mia.x_velocity > 0) {
      mia.x_velocity = 0;
      makeSmoke(stage, mia.x + 20, mia.y - 40, 1.4, 1.4);
    }
    mia.x_velocity -= 1;
    if (mia.x_velocity < -1 * mia.max_x_velocity) mia.x_velocity = -1 * mia.max_x_velocity;
    if (mia.state != "kaput") mia.scale.set(-1,1);
  }
Whew.
Last thing.
The game reset code at the end of updateGame currently happens if Mia falls too low or the rocket rises too high. The rocket rising needs to trigger something else instead:
...
...
...

  if (mia.y > 1200 || rocket.y < -9000) {
  if (mia.y > 1200) {
    stage.removeChildren();
    bricks = [];
    shakos = [];
    stacks = {};
    blasts = [];
    initializeGame();
  }

  if (rocket.y < -4500) {
    if (mia.state == "rocket") {
      mia.state = "victory";

      let victory_screen = makeSprite("Art/victory_screen.png");
      victory_screen.position.set(0, 0);
      stage.addChild(victory_screen);
    }
  }

...
...
...
It’s just a simple matter of changing Mia’s state to victory, and then pasting a victory screen on top of everything.
But it looks really nice:
You
Are
DONE!
Congratulations! You’ve climbed the mountain, and you’ve done it together! You made a game!
Now go make another one 🙂
<3 Matthew Carlin
Postscript 1: Game Mod Ideas
Here are some ideas for extending or modifying Mia’s Daring Escape:
- Mia’s jump breaks the bricks
- Ray gun breaks the bricks
- Second type of enemy (see postscript 2 for some nice sprite files)
- Some kind of powerup for Mia (like a better jump, or a brick busting tool, or a jump that busts bricks)
- TWO PLAYERS AT ONCE (using two copies of Mia with different keyboard controls)
- A different level, not bricks
Postscript 2: Resources for future Game Programmers
Here are a bunch of things, loosely organized by category.
Programming Languages and Editors
- Python is the programming language of math and science, it’s good for making fast prototypes, and it’s one of the easiest languages to learn. You can do game programming in python with pygame, but it’s not the best way.
- Javascript is what you’ve been doing in this tutorial. It’s the language of the web. This tutorial has used Pixi.JS behind the scenes. Personally I like javascript and Pixi a lot, and after years of professional mathy programming in a number of languages, I’ve chosen javascript and Pixi as my go-to tools for making games. Using electron and a bit of elbow grease, you can make full applications that run on any computer or device, instead of on websites.
- Don’t learn Java. It’s not a great idea.
- Learn C# instead if you’re using a Windows machine. It has flaws, but it also has very strong application building features, and the Visual Studio tool is the best heavyweight editor for writing programs.
- Speaking of editors, Sublime Text is the best lightweight one, and other than periodically asking for your support, it’s free! If you haven’t used it, this is what code looks like in Sublime:
Visual Studio is similar, except it’s a beast and a memory hog and it has hundreds of little magic conveniences that tell you how your own code works and when you’re making mistakes and where to find things you’ve lost.
Free or Nearly Free Game Programming Tools
- Pixelator turns images into pixelated images. It’s magical.
- Texture Packer turns multiple images into one animated sprite sheet, and gives you a nice json file which lets your program understand the sheet and animate things. Use the free version; you don’t need the features in the paid version.
- Inkscape is maybe the best free drawing program.
- Audacity lets you record and edit sounds. It’s great for turning a sound into a different sound.
- LeoCad is a free lego building/drawing program. It’s not really game programming, but I wanted to let you know about it because IT’S A FREE LEGO BUILDING/DRAWING PROGRAM, and also because if you’re creative, you can actually use it to draw game objects.
- I haven’t tried PyxelEdit, but it’s supposed to be very good.
- Here are one hojillion 2d sprite art tutorials, presented as cute gifs.
- ezgif.com is an incredible free site for making gifs out of videos. I did all the Mia gifs with it.
- If you’re on a Mac, Quicktime comes with your machine, and you can open it and choose “New Screen Recording” from the file menu and it will record your screen or part of your screen and make a video of your game.
- Unity sucks.
- Github is the standard way to keep different versions of your project. For instance, Mia’s Daring Escape.
- Godot is the hot new game engine for when you get good and you want to make something professional. It’s like Unity but not sucky.
- Here’s a guide to all the tools and tutorials you can use to make art for a game. Very useful if you want to know your options.
- Here’s a big list of tools.
- Youtube has so many GOOD game programming tutorials.
Not Free, Still Really Good
- Asesprite is a good 2d sprite editor. It’s something like $20. Get this if you want to make retro 2d games, SNES style, etc.
- Adobe Photoshop is $20 a month. That can add up, but it can also be pretty cheap if you just want to do a targeted project.
- Adobe Illustrator is the same. Apparently students can get both for $20 a month.
- Photoshop and Illustrator do different kinds of art. I drew Mia in Photoshop, and the shakos and bricks in Illustrator.
- FL Studio is an amazing music making tool for $99, but honestly music is everywhere now, and you should just use cheap or free music tracks in your project.
- Drawing tablets aren’t cheap, but at $129, they’re no longer totally unaffordable.
- Spine does 2d character animation. It’s $69 for the basic version. You can use it to make cartoons, for real.
Cheap or Free Art and Music for your projects
- freesound.org is amazing. It has free sounds. Be sure to check the licenses! Some you need to credit, some you can just use, some you can’t use commercially, etc.
- opengameart.org has free art. It’s okay for art. Does have some nice music.
- splice.com will give you professional grade sound effects, tons and tons and tons of them, but it costs $10 a month. Maybe you and a friend can pool and share it ^_^
- itch.io doesn’t just have games, it has game assets, both free and paid. I found the Free Knight that I used as a template for Mia on itch.
- gamedevmarket has some good stuff.
- pond5.com has good sound effects, typically costing around $3 or $5 apiece. Good for when you really need that goat sound and you can’t find it anywhere for free.
- Similarly, gamedevelopersstudio.com has lots of cheap $3 and $5 art packs. I got most of the little smoke and explosion type effects from a single pack on that site.
- People on Reddit’s r/gamedev community frequently post free assets (art and music and 3d models and stuff) and you can find a lot of them through a google search.
- https://www.1001freefonts.com/
- AbstractionMusic makes a loooot of royalty free music you can use. Some of Mia’s music tracks are from Abstraction.
- I’m going to plug itch again: itch.io’s selection of chiptune (ie retro) music is great.
- You can actually get pretty far by searching google for “royalty free music” and “royalty free sprites” etc, although you’ll have to wade through some sites that want you to buy stuff.
- Kenney.nl has a lot of excellent free 2d and 3d stuff.
- HEY! You can use the assets from Mia’s Daring Escape whenever you want, wherever you want. (But if you’re using the music files, you have to give credit to the original authors).
- Also, you can use art or code or anything you want from my old bugsby.net game, which I’ve packaged here.
Hopefully that’s enough to get you started on your journey.
Please feel free to leave comments on this blog, or email matt dot carlin at alphazoollc.com. I don’t always have time, but I am always happy to help.
(Activity time: about 60 minutes)
(Download the Day Six Files here)
Previous posts:
Game Jam Day 1
Game Jam Day 2
Game Jam Day 3
Game Jam Day 4
Game Jam Day 5
Intro
Hello, and welcome to day 6 of the Dad and Daughter Quarantine Game Jam Tutorial!
We’re making a game called Mia’s Daring Escape.
On day 1, we set up the game and put Mia on the screen.
On day 2, we gave Mia a brick level to run, and a jumping skill.
On day 3, we made falling bricks that stacked up on the ground or bopped Mia on the head.
On day 4, we added sounds and effects and gave Mia different poses for jumping and falling and standing still.
On day 5, we made some baddies.
Today we add the rocket. Today, Mia can finally escape!
For the third time, you’re definitely going to have to download the day six files, so you can get the rocket images, the explosion images, and the new plumbing.js, which lets you make explosions.
You can keep the game.js file you’ve been working on, but be sure to add rocket.png, rocket_door.png, explosion.json, and explosion.png to the Art folder, and be sure to swap out plumbing.js, because I’ve added a function for making explosions.
First Task: Minor Edits
Uh, so.
Before we get to the good stuff, I feel like we need to fix a few things.
Mia should get a little bounce when she bops a shako on the head.
When Mia gets hit by a brick, it should trigger the same sound effect as when she gets hit by a shako spear.
And those brick colors. Ech. We need some nicer colors.
Time to fly solo, kid. These edits are your job.
First, we’re going to go to the bottom of the miaVsShakos function, where Mia lands on a shako, and give Mia a little bounce by setting her state to “jumping”, giving her some y velocity, and playing the jump sound effect.
Add this code to miaVsShakos:
if (shako.state != "kaput" && mia.state == "falling") {
  if (Math.abs(mia.x - shako.x) < 80 && mia.y < shako.y - 30 && mia.y > shako.y - 160) {
    if (shako.stance == "up") {
      mia.setState("kaput");
      mia.scale.y = -1;
      mia.y_velocity = -5;
      mia.y = mia.y - 175;
      soundEffect("negative_2");
    } else if (shako.stance == "forward") {
      shako.state = "kaput";
      shako.scale.y = -1;
      shako.y_velocity = -5;
      shako.y = shako.y - 175;
      soundEffect("hurt");

      mia.setState("jumping");
      mia.y_velocity = -10;
      soundEffect("jump_3");
    }
  }
}
Reset the game using Command-R (on Mac) or Ctrl-R (on Windows) and make sure Mia gets a nice bounce when she lands on a shako.
Then, let’s play add negative sound when Mia gets hit by a brick.
Go to the bottom of the testBricks function and add one line for a sound effect:
else if (brick.y_velocity > 0 && mia.state != "kaput") {
  // If Mia is too close to a falling brick, she goes kaput.
  if (Math.abs(mia.x - brick.x) < 80
    && brick.y < mia.y - 10
    && brick.y > mia.y - 175) {
    mia.setState("kaput");
    mia.scale.y = -1;
    mia.y_velocity = -5;
    mia.y = mia.y - 175;
    soundEffect("negative_2");
  }
}
Last, let’s change the brick colors.
Remember that color takes three numbers: a Red number, a Green number, and a Blue number.
I may have forgotten to mention this: all colors on a computer are made by mixing red, green, and blue. The little pixels in your monitor screen are actually little groups of red, green, and blue light, and you control the color by choosing how much of each.
1 = max color
0 = no color
So if you say color(1, 0, 0), that’s max red, no green, no blue.
If you say color(1, 0, 1), that’s max red, no green, max blue, and you actually get pink! You need to turn down the values to get purple.
If you say color (0.5, 0, 0.5), that’s half red, no green, half blue, and that gets you purple.
You get to pick the colors for the bricks, but if you want, I’ve provided you a nice menu of color schemes to pick from. You can copy and paste these into the code.
Here’s your color menu:
// Pastel Color Scheme
color(0.38, 0.68, 1.00),
color(0.94, 0.80, 0.21),
color(1.00, 0.50, 0.05),
color(0.85, 0.12, 0.03),
color(1.00, 0.51, 0.71),
color(0.65, 0.24, 0.65),
color(0.20, 0.70, 0.38),
// Blue brick color scheme
color(0.96, 1.00, 1.00),
color(0.74, 0.94, 1.00),
color(0.42, 0.84, 0.99),
color(0.00, 0.57, 0.78),
color(0.00, 0.84, 0.99),
color(0.00, 0.33, 0.79),
// Pink brick color scheme
color(1.00, 0.96, 1.00),
color(1.00, 0.74, 0.94),
color(0.99, 0.42, 0.84),
color(0.78, 0.00, 0.57),
color(0.99, 0.00, 0.84),
color(0.79, 0.00, 0.33),
// Red brick color scheme
color(0.97, 0.97, 0.97),
color(0.97, 0.72, 0.72),
color(0.97, 0.48, 0.48),
color(0.97, 0.23, 0.23),
color(0.97, 0.00, 0.00),
// Green brick color scheme
color(0.74, 0.90, 0.74),
color(0.64, 0.83, 0.63),
color(0.51, 0.75, 0.52),
color(0.31, 0.56, 0.33),
color(0.17, 0.33, 0.19),
// Desert color scheme
color(0.25, 0.11, 0.18),
color(0.94, 0.63, 0.38),
color(0.95, 0.51, 0.35),
color(0.54, 0.13, 0.12),
color(0.84, 0.24, 0.24),
You can copy and paste the code for whichever colors you want, or make up your own. For the rest of this tutorial, I’m going to use red.
Remove the old colors, and add your colors to the code at the top of the file, like this:
let colors = [
  color(1,0,0), // Red
  color(0,1,0), // Green
  color(0,0,1), // Blue
  // Red brick color scheme
  color(0.97, 0.97, 0.97),
  color(0.97, 0.72, 0.72),
  color(0.97, 0.48, 0.48),
  color(0.97, 0.23, 0.23),
  color(0.97, 0.00, 0.00),
]
There, all the things that needed fixing are fixed.
Second Task: Bigger level, but with boundaries.
Before we add the rocket, we also want to stop Mia from running into the black screen on either side of the level, and we want to make an extra bit of level at the end where the rocket will sit, with no bricks or shakos around.
We’ve set all our code to 70 brick columns, and for the shakos and falling bricks, we can leave it that way.
But we’re going to lengthen the level at the end to 90 columns, and put the rocket somewhere out there at the end.
This one is just a lot of bookkeeping, so I think you can handle it.
First, change these lines at the beginning of the initializeGame function:
function initializeGame() {

  for (num = -1; num < 8; num += 1) {
  for (num = -1; num < 11; num += 1) {
    let blue_sky = makeSprite("Art/blue_sky.png");
    blue_sky.position.set(game_width * num, 0);
    stage.addChild(blue_sky);
  }

  for (num = -8; num < 70; num += 1) {
  for (num = -8; num < 90; num += 1) {

    if (num % 16 < 14) {
      let brick = makeSprite("Art/brick.png");
      brick.anchor.set(0.5,1);
      brick.position.set(120 * num, game_height);
      brick.tint = pick(colors);
      stage.addChild(brick);
      bricks.push(brick);

      brick.column = num;
      brick.y_velocity = 0;
      stacks[brick.column] = 1;
    }
    else {
      stacks[num] = -100;
    }
  }
...
...
...
Next, change this line in the testBricks function:
function testBricks() {

  // Don't test anything if Mia is already kaput
  if (mia.state == "kaput") return;

  mia.column = Math.floor((mia.x + 60) / 120);

  // Don't test bricks if Mia is too far to the left or right.
  if (mia.column < -8 || mia.column >= 70) return;
  if (mia.column < -8 || mia.column >= 90) return;

  // Figure out the floor for Mia's current column.
  let floor_height = game_height - 36 * stacks[mia.column] - 4;

  // First, check if Mia has run into thin air,
  // like Wile E Coyote, and make her fall.
  if (mia.y < floor_height && mia.y_velocity >= 0) {
    mia.setState("falling")
  }
...
...
...
Finally, add some if statements to the updateGame function to stop Mia from going too far left or right:
// If the left key got pushed, move Mia to the left
  if (key_down["ArrowLeft"]) {
    if (mia.state == "idle") mia.setState("running");
    if (mia.x_velocity > 0) {
      mia.x_velocity = 0;
      makeSmoke(stage, mia.x + 20, mia.y - 40, 1.4, 1.4);
    }
    mia.x_velocity -= 1;
    if (mia.x_velocity < -1 * mia.max_x_velocity) mia.x_velocity = -1 * mia.max_x_velocity;
    if (mia.state != "kaput") mia.scale.set(-1,1);
  }

  mia.last_x = mia.x;
  mia.x += mia.x_velocity;
  mia.x_velocity *= 0.93;
  if (mia.state == "running" && Math.abs(mia.x_velocity) < 0.5) mia.setState("idle");

  if (mia.x < 0) mia.x = 0;
  if (mia.x > 84 * 120) mia.x = 84 * 120;

  // If the space bar got pushed, make Mia jump
  if (key_down[" "]) {
    if (mia.state == "running" || mia.state == "idle") {
      mia.setState("jumping");
      mia.y_velocity = -20;
      soundEffect("jump_3");
      makeSmoke(stage, mia.x - 3 * mia.x_velocity, mia.y - 40, 1.4, 1.4);
    }
  }
Whew. Now Mia can’t run off into the black parts of the screen. There’s nothing interesting about this, so I’m not going to show a picture of it.
Third Task: Add the rocket!
And now for the main event! We’re going to add the rocket to the game.
I’ve given you one picture for the rocket, and one matching picture for the door:
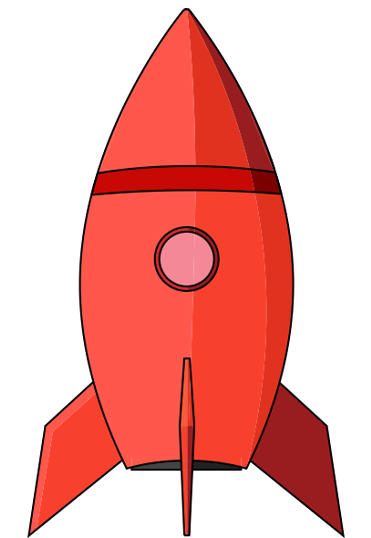
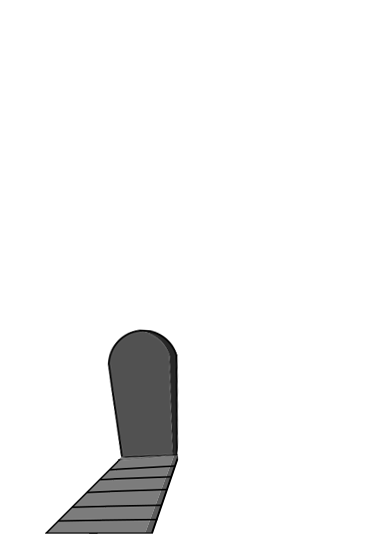
The code for this one is actually pretty simple, in the sense that we’ve done all this before a few times.
We have to keep track of the rocket and the door in multiple places, so we’re going to write “let rocket” etc at the top of the code so our variables are available everywhere.
Add this to the beginning of game.js:
...
...
...
let mia = null;
let rocket = null;
let rocket_door = null;
let bricks = [];
let shakos = [];
let stacks = {};
...
...
...
Now add the rocket itself to initializeGame, and put it just before Mia, so that on the stage, Mia’s sprite will show up on top of the rocket sprite:
...
...
...

  rocket = makeSprite("Art/rocket.png");
  rocket.anchor.set(0.5, 1);
  rocket.position.set(9960, game_height - 34);
  rocket.y_velocity = 0;
  rocket.state = "ground";
  stage.addChild(rocket);

  rocket_door = makeSprite("Art/rocket_door.png");
  rocket_door.anchor.set(0.5, 1);
  rocket_door.position.set(9960, game_height - 34);
  stage.addChild(rocket_door);

  mia = makeContainer();

  mia.run = makeAnimatedSprite("Art/mia_animations.json", "run");
  mia.run.anchor.set(0.5, 0.9);
  mia.run.animationSpeed = 0.3;
  mia.run.play();
  mia.addChild(mia.run);

  mia.fall = makeAnimatedSprite("Art/mia_animations.json", "fall");
  mia.fall.anchor.set(0.5, 0.9);
  mia.fall.animationSpeed = 0.3;
  mia.fall.play();
  mia.addChild(mia.fall);

...
...
...
We make a rocket sprite, set a position, give it a state and a velocity, add it to the stage, yada yada yada, the rocket is…
Wait, the rocket is all the way on the other side of the level at x = 9960.
I’m not sure you can beat the game yet. I’m not sure I can beat the game yet! I’m definitely totally sure you don’t want to have to beat the game every time you want to test some code.
Time to go back to that handy dandy debug console! Remember, if you press Command-Option-I on a Mac or Ctrl-Shift-J on Windows, you’ll open up a little side window where you can print information or see any errors. You can press the same keys to close it again. Alternately, you can go to the View menu above and choose “Toggle Developer Tools”.
Do that now, and drag the window a bit larger so you can still see your whole game.

There’s a little prompt where you can type stuff. Click it, and type “mia.x = 8000”. Boom, Mia has been teleported close to the end of the level. You’ll have to click back on the game before you can control it with the keyboard, so do that.
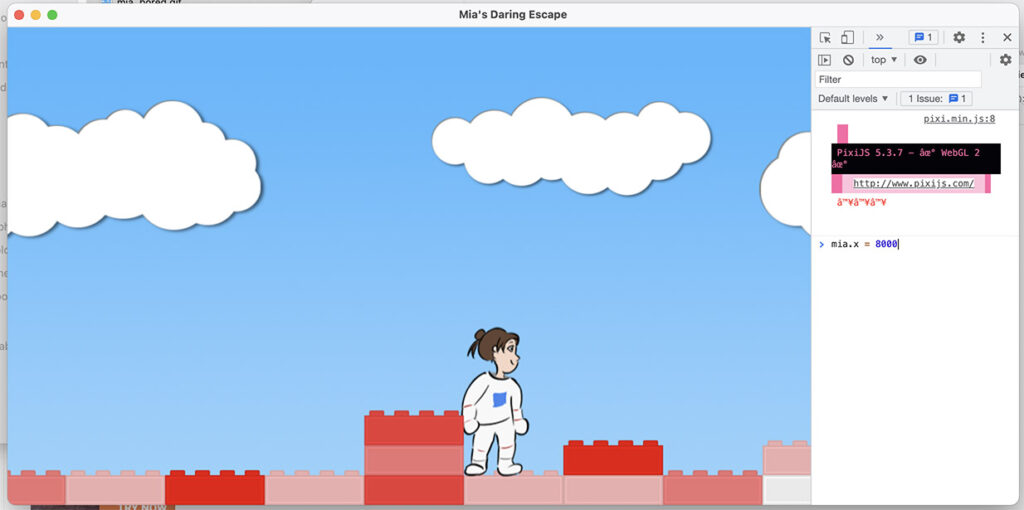
And now, there is a rocket! And you can test it by changing Mia’s position.
Detail: I drew this rocket in Adobe Illustrator following a wonderful tutorial by Spoon Graphics. If you use Illustrator and you want to get good at it, I recommend this channel.
Final Task: LIFTOFF!
We’re going to make a function called updateRocket, which does exactly what you think it does.
If Mia isn’t dead, and she isn’t already in the rocket, and her x value is larger than the rocket’s x value, we’re going to put her in the rocket. What this actually means is hide Mia, hide the door, set Mia’s state to “rocket”, and play some sound effects.
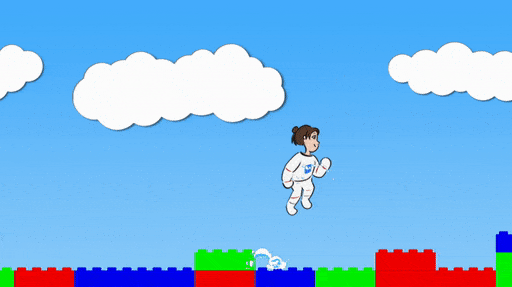
Then, if Mia is in the rocket, we’re going to shake it, we’re going to make it rise by giving it some y velocity (slow at first, then faster), and we’re going to make a ton of smoke and explosions (using the new makeExplosions function I’ve given you, and the old makeSmoke).
Also, at the veeeery end of updateGame, we’re going to change the reset code so that it resets either if Mia has fallen enough or if the rocket has rise enough. That’s because, for today, we want the game to loop back to the beginning when you finish.
So, add the whole updateRocket function:
function miaVsShakos() {
  ...
  ...
  ...
}


function updateRocket() {
  if (mia.state == "kaput") return;

  if (mia.state != "rocket") {
    if (mia.x > rocket.x) {
      mia.state = "rocket";
      mia.visible = false;
      soundEffect("rocket_2");
      soundEffect("victory_3");
      rocket_door.visible = false;
    }
  }

  if (mia.state == "rocket") {
    // Shake between -2 and 2 pixels both x and y axes.
    rocket.x += -2 + dice(100) / 25;
    rocket.y += -2 + dice(100) / 25;

    // Go up
    rocket.y += rocket.y_velocity;

    // Start slow, then get faster
    if (rocket.y_velocity > -0.1) {
      rocket.y_velocity -= 0.001;
    } else {
      rocket.y_velocity -= 0.05;
    }

    // Make a ton of explosions and smoke near the bottom of the rocket
    for (num = 0; num < 3; num += 1) {
      makeExplosion(stage, rocket.x - 30 + dice(60), rocket.y - 30 - dice(25), 1.4, 1.4);
    }
    for (num = 0; num < 5; num += 1) {
      makeSmoke(stage, rocket.x - 60 + dice(120), rocket.y - 30 - dice(25), 1.4, 1.4);
    }
  }
}

function testBricks() {
  ...
  ...
  ...
}
And finally, make these changes at the bottom of updateGame:
...
...
...

  updateShakos();
  miaVsShakos();
  updateRocket();

  testBricks();

  if (mia.y > 1200) {
  if (mia.y > 1200 || rocket.y < -9000) {
    stage.removeChildren();
    bricks = [];
    shakos = [];
    stacks = {};
    initializeGame();
  }

  followMia();
}
Try it out! Make sure to use the debug console and set Mia’s position to 8000 or so so you can test it easily.
Woohoo!
This is now a complete game. Or is it?! Come back tomorrow for the end screen… and the ray gun.
(Activity time: about 60 minutes)
(Download the Day Five Files Here)
Previous posts:
Game Jam Day 1
Game Jam Day 2
Game Jam Day 3
Game Jam Day 4
Intro
Hello, and welcome to day 5 of the Dad and Daughter Quarantine Game Jam Tutorial!
We’re making a game called Mia’s Daring Escape.
On day 1, we set up the game and put Mia on the screen.
On day 2, we gave Mia a brick level to run, and a jumping skill.
On day 3, we made falling bricks that stacked up on the ground or bopped Mia on the head.
On day 4, we added sounds and effects and gave Mia different poses for jumping and falling and standing still.
Today we add baddies.
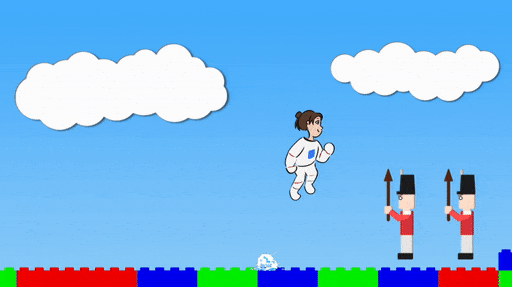
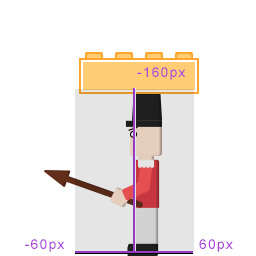
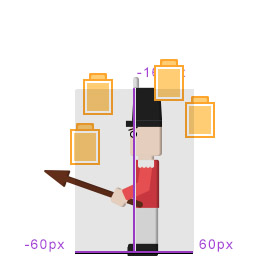
These are our baddies.
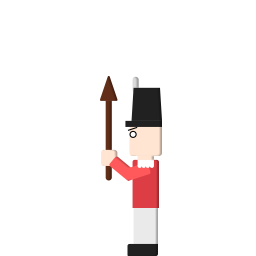
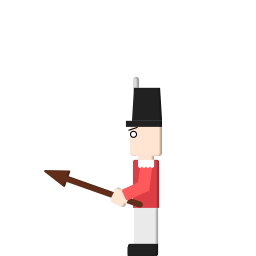
They’re called shakos, after the little hats they’re wearing.
Once again, you’re definitely going to have to download the day five files, so you can get the shako images.
You can keep the game.js file you’ve been working on, but be sure to add the two shako images and the brick_bit image to the Art folder, and be sure to swap out plumbing.js, because I’ve added a function that makes brick bits out of broken bricks.
First Task: Put Some Baddies on the Screen!
Much like Mia, the shakos have multiple poses. So we’re going to use another container, and inside it, we’re going to put two sprites: spear forward and spear up.
The shakos will bounce around the level waving their spears up and down.
If Mia runs into a shako spear or falls onto a shako spear, she’ll go kaput. However, if she runs into a shako with his spear up, or she falls into a shako with his spear down, he’ll go kaput.
For now, we’re just going to put the shakos on the screen.
Add this code to game.js:
let mia = null;
let bricks = [];
let shakos = [];
let stacks = {};
let colors = [
  color(1,0,0), // Red
  color(0,1,0), // Green
  color(0,0,1), // Blue
]

...
...
...

  testBricks();

  if (mia.y > 1200) {
    stage.removeChildren();
    bricks = [];
    shakos = [];
    stacks = {};
    initializeGame();
  }

  followMia();
}
We’re just making a list of shakos at the beginning of the game, and at the end, where we reset the game when Mia goes kaput, we’re making sure to reset the list of shakos.
So now we have shakos that we can track, and when the game resets, we don’t have any stray shakos running around.
Now let’s make the shakos. Add this code to initializeGame:
function initializeGame() {

  for (num = -1; num < 8; num += 1) {
    let blue_sky = makeSprite("Art/blue_sky.png");
    blue_sky.position.set(game_width * num, 0);
    stage.addChild(blue_sky);
  }

  for (num = -8; num < 70; num += 1) {

    if (num % 16 < 14) {
      let brick = makeSprite("Art/brick.png");
      brick.anchor.set(0.5,1);
      brick.position.set(120 * num, game_height);
      brick.tint = pick(colors);
      stage.addChild(brick);
      bricks.push(brick);

      brick.column = num;
      brick.y_velocity = 0;
      stacks[brick.column] = 1;
    }
    else {
      stacks[num] = -100;
    }
  }

  for (num = 1; num <= 8; num += 1) {

    // pick a random column,
    let column = 5 + dice(65);

    // and only make the shako if that column isn't a pit.
    if (stacks[column] > 0) {

      let shako = makeContainer();
      shako.spear_forward = makeSprite("Art/shako_spear_forward.png");
      shako.spear_forward.anchor.set(0.5, 1);
      shako.addChild(shako.spear_forward);

      shako.spear_up = makeSprite("Art/shako_spear_up.png");
      shako.spear_up.anchor.set(0.5, 1);
      shako.addChild(shako.spear_up);

      shako.position.set(120 * column, game_height - 36);
      shako.y_velocity = 0;
      shako.x_velocity = 0;
      shako.state = "ground";
      shako.ground_time = 0;
      shako.jumps = 0;

      stage.addChild(shako);
      shakos.push(shako);
  }

  mia = makeContainer();

...
...
...
We run a loop that makes 8 shakos. (It starts at num = 1 and ends when num <= 8, so that’s 1 to 8)
Inside, we pick a random column for the shako by calling the dice function. Instead of saying dice(70), which gives a number between 1 and 70, we say 5 + dice(65), which starts with 5 and adds a random number, giving us a number between 6 and 70.
We do this because shakos in columns 1 – 5 would be too close to Mia’s starting position.
Remember that stacks is a dictionary that keeps track of the stack of bricks in each column. If stacks[3] == 5, that tells us that there are 5 bricks stacked in column 3.
So we use an if statement, “if (stacks[column] > 0)“, to check if the stack is bigger than zero in the new column we’ve picked. This is so that we don’t make a shako over an empty pit.
If the stack is bigger than zero, then we actually make the shako.
To do that, we make a container, then we make two sprites, one for spear forward, and one for spear up, and put them both in the container.
Finally, we set the position of the shako to match the column (120 * column, and game_height – 36, which is the ground), then we add some variables we’re going to use later, then we add the shako to the stage, as well as to the list of shakos.
Whew!
Uh. But our shako has two arms.
That’s because both sprites are visible. We haven’t hidden either sprite yet.
We’re going to give the shako a function which lets us switch it from spear up to spear forward.
Add this code:
if (stacks[column] > 0) {

      let shako = makeContainer();
      shako.spear_forward = makeSprite("Art/shako_spear_forward.png");
      shako.spear_forward.anchor.set(0.5, 1);
      shako.addChild(shako.spear_forward);

      shako.spear_up = makeSprite("Art/shako_spear_up.png");
      shako.spear_up.anchor.set(0.5, 1);
      shako.addChild(shako.spear_up);

      shako.position.set(120 * column, game_height - 36);
      shako.y_velocity = 0;
      shako.x_velocity = 0;
      shako.state = "ground";
      shako.ground_time = 0;
      shako.jumps = 0;

      stage.addChild(shako);
      shakos.push(shako);

      shako.setStance = function(stance) {
        if (stance == "up") {
          shako.stance = "up";
          shako.spear_up.visible = true;
          shako.spear_forward.visible = false;
        } else if (stance == "forward") {
          shako.stance = "forward";
          shako.spear_up.visible = false;
          shako.spear_forward.visible = true;
        }
      }

      shako.setStance("up");
    }
We make a new function for the shako called setStance, which allows us to change the stance by calling either setStance(“up”) or setStance(“forward”).
This sets a variable called “stance” which we’ll use later, and it makes one sprite visible and the other sprite invisible.
Finally, we call shako.setStance(“up”) to set the new shako to spear up.
We have shakos, but they’re getting buried under bricks, and we don’t like that!
Second Task: Shakos break falling bricks!
From now on, when we drop bricks, we are going to measure every brick against every shako.
If a falling brick is close to any shako, we’re going to delete it from the brick list, remove it from the stage, and replace it with a bunch of cute little brick bits:
The box will extend 60 pixels left and right from the shako’s x position, and starting from the feet, it will extend 160 pixels upwards to the shako’s head.
Since we’re checking every brick against every shako, we’re writing a double loop, also known as a nested loop.
That means we write a loop that checks every brick, and inside that loop, we write another loop that checks every shako.
Detail: It’s a very bad idea to delete things from a list while you’re looping through that list. It messes up the variable you’re using to count how many loops you’ve done, and the loop will skip items without even telling you. For example, if you delete item #5, then the old item #6 becomes the new #5, but on your next go around, your counter will jump to #6, skipping that item.
There are two ways to safely delete things from a loop. One is to make a new list that only has the stuff you don’t want to delete, then switch lists.
The other is to go backwards. When you delete something, it doesn’t matter that you shift all the later elements of the list, because you’ve already seen them. We’ll be using this method in our code.
Also, in javascript, there isn’t a nice delete function for lists. We use a function called splice to cut one element out of the list. splice(23, 1) means “cut one element out, starting at place #23”. It’s silly, but it works, and you can ignore it.
Here’s the code. Add it to the dropBricks function:
// Every 250 milliseconds, drop a brick.
function dropBricks() {

  if (Date.now() - last_brick > 250) {

    // Make a new brick
    let brick = makeSprite("Art/brick.png");
    brick.anchor.set(0.5,1);
    brick.tint = pick(colors);

    // Set it in the right place and give it some drop speed.
    brick.column = dice(70);
    brick.position.set(120 * brick.column, -50);
    brick.y_velocity = 1;

    // Add it to the stage, and add it to the list of bricks.
    stage.addChild(brick);
    bricks.push(brick);

    last_brick = Date.now();
  }

  // For every brick, if it has y_velocity, drop it.
  for (i = 0; i < bricks.length; i += 1) {
    let brick = bricks[i];

    if (brick.y_velocity > 0) {
      brick.y = brick.y + brick.y_velocity;
      brick.y_velocity = brick.y_velocity + 0.25;

      // If it goes past the brick stack, stop it,
      // and increase the stack value.
      if (brick.y >= game_height - 36 * stacks[brick.column]) {
        brick.y = game_height - 36 * stacks[brick.column];
        brick.y_velocity = 0;
        stacks[brick.column] = stacks[brick.column] + 1;
      }
    }
  }

  // Delete every brick that's hit a shako.
  // Note that we run the loop BACKWARDS.
  for (brick_num = bricks.length - 1; brick_num >= 0; brick_num += -1) {
    let brick = bricks[brick_num];

    if (brick.y_velocity > 0) {
      // By default, assume the brick hasn't hit a shako
      let hit_a_shako = false;

      // Loop through all the shakos
      for (shako_num = 0; shako_num < shakos.length; shako_num += 1) {
        let shako = shakos[shako_num];

        // If the shako and the brick are close together,
        if (Math.abs(shako.x - brick.x) <= 60 && brick.y > game_height - 36 - 160) {
          hit_a_shako = true;
        }
      }

      // If the brick has touched any shako, hit_a_shako will be true.
      if (hit_a_shako) {

        // This line is like "delete item number such and such from the list"
        bricks.splice(brick_num, 1);

        // Remove the brick from the stage
        stage.removeChild(brick);

        // Make a bunch of little brick debris!
        makeBrickBit(stage, brick.x - 45, brick.y, brick.tint);
        makeBrickBit(stage, brick.x - 15, brick.y, brick.tint);
        makeBrickBit(stage, brick.x + 15, brick.y, brick.tint);
        makeBrickBit(stage, brick.x + 45, brick.y, brick.tint);

        // If mia is close enough, make some popping sounds.
        if (Math.abs(brick.x - mia.x) < 700) {
          soundEffect("pop_1");
          soundEffect("pop_2");
        }
      }
    }
  }
}
You don’t have to use the sounds I put here. Remember, you have a whole bunch of sounds to choose from, and you can use whichever sounds you want, or no sounds at all!
As promised, it’s a double loop.
We check if the brick has y_velocity > 0 to make sure it’s falling.
Then we assume it hasn’t hit a shako by making a variable called hit_a_shako and setting it false.
Then we search through all the shakos. If the brick and the shako are nearby, we set hit_a_shako to true.
We do it this way because we don’t want to run the “hit a shako” code a bunch of times if we hit a bunch of shakos. Just once. So no matter how many shakos we hit, we just know, oh, we hit a shako.
Anyway, after that check, if hit_a_shako is true, we delete the brick from bricks and remove it from the stage.
Then we make a bunch of little brick bits using the new makeBrickBits function I added to plumbing, staggering them a few pixels apart. That new function takes care of throwing them off in random directions and getting rid of them later, so don’t worry about it.
Finally, if Mia is close to the brick, we play a few sounds.

Third Task: Move Those Shakos!
Now we’re going to move the shakos around on the level.
I think it’ll be cutest if the shakos move by doing bouncy little jumps.
Let’s start by making an empty function called updateShakos and calling it from updateGame. Add the following code to game.js:
// Every 250 milliseconds, drop a brick.
function dropBricks() {

  ...
  ...
  ...

}


function updateShakos() {

}


function testBricks() {

  ...
  ...
  ...

}

function updateGame(diff) {

  ...
  ...
  ...

  updateShakos();

  testBricks();

  if (mia.y > 1200) {
    stage.removeChildren();
    bricks = [];
    shakos = [];
    stacks = {};
    initializeGame();
  }

  followMia();
}
updateShakos is called late in updateGame, after Mia has been updated.
Let’s start writing updateShakos by adding the little jumps.
When we first made the shakos, we gave them a few extra properties like x and y velocity and state, and we’re going to use those properties now.
A shako can be “jumping”, “ground”, or “kaput”.
If the shako has been on the ground for a while, we want to set it to jumping and give it some negative y velocity (remember, negative is upwards because the top of the screen is 0) as well as some x velocity to move around the level.
If the shako is jumping, we want to update the x and y position using the x and y velocity. If the shako comes back down to the ground height, we want to switch its state to ground again. We do this so that the shako has a little pause between jumps. It looks better than insta-bounce.
Detail: One more thing. It would be cute if the shakos always land perfectly on one of the brick studs. It looks better than if they slide around halfway between two studs.
So, in the time it takes to do a hop, the shakos have to travel exactly from one stud to the next. Since each brick is 120 pixels, and each brick has 4 studs, the distance between each stud is 30 pixels.
Using our jump velocity and gravity, we can calculate the total time of the jump.
height = jump_velocity * time – gravity * time^2 / 2.
We want height of 0, so we solve:
0 = jump_velocity * time – gravity * time^2 / 2
and a little algebra gives:
time = 2 * jump_velocity / gravity
This works in frames just as well as seconds, as long as you add two extra frames for the start and end of the jump.
We’re going to use a nice little hop with 5 velocity and 0.5 gravity.
So time = 2 * 5 / 0.5 = 20.
So we need to move 30 pixels in 22 frames, and our x velocity will be 30/22.
Add this code to updateShakos:
function updateShakos() {
  for (num = 0; num < shakos.length; num += 1) {
    let shako = shakos[num];

    if (shako.state == "ground" && Date.now() - shako.ground_time > 150) {
      shako.state = "jumping";
      shako.y_velocity = -5;
      shako.x_velocity = -1 * 30/22;
      if (Math.abs(mia.x - shako.x) < 700) soundEffect("jump_2")
    }

    if (shako.state == "jumping") {
      shako.y += shako.y_velocity;
      shako.x += shako.x_velocity;

      shako.y_velocity += 0.5;

      if (shako.y > game_height - 36) {
        shako.y = game_height - 36;
        shako.y_velocity = 0;
        shako.state = "ground";
        shako.ground_time = Date.now();
        shako.jumps += 1;
      }
    }
  }
}
Do a loop through all of the shakos.
For each shako, if the shako has been on the ground for more than 150 milliseconds, set the state to jumping, the y velocity to -5 (that’s 5 pixels per frame in the upward direction), and the x velocity to -30/22 (that’s 30/22 moving to the left).
Also give the shako a jumpy sound if it’s close to Mia. As always, you can try other sounds. I think “sheep” is particularly fun.
If the shako is jumping, update the x and y positions using velocity. Then, add 0.5 to the y velocity (this is “gravity”). If the shako has fallen past the ground height (bottom of the screen – 36 pixels), put it at the right height, stop it from falling, set the state to ground, and set the last ground landing time to right now.
Oh, and add one to the total number of jumps the shako has done.
The shakos are certainly jumping, but they don’t respect the level boundaries!
They should avoid pits, they should never jump through brick stacks, and they should turn around sometimes.
Change updateShakos like so:
function updateShakos() {
  for (num = 0; num < shakos.length; num += 1) {
    let shako = shakos[num];

    if (shako.state == "ground" && Date.now() - shako.ground_time > 150) {
      shako.state = "jumping";
      shako.y_velocity = -5;
      shako.x_velocity = -1 * 30/22;
      shako.x_velocity = -1 * shako.scale.x * 30/22;
      if (Math.abs(mia.x - shako.x) < 700) soundEffect("jump_2")
    }

    if (shako.state == "jumping") {
      shako.y += shako.y_velocity;
      shako.x += shako.x_velocity;

      shako.y_velocity += 0.5;

      if (shako.y > game_height - 36) {
        shako.y = game_height - 36;
        shako.y_velocity = 0;
        shako.state = "ground";
        shako.ground_time = Date.now();
        shako.jumps += 1;

        if (dice(100) < 10) {
          shako.scale.x = -1 * shako.scale.x;
          shako.x -= 30 * shako.scale.x;
        }

        if (shako.scale.x == 1) shako.next_col = Math.floor((shako.x + 61 - 30) / 120);
        if (shako.scale.x == -1) shako.next_col = Math.floor((shako.x + 61) / 120);

        if (shako.next_col < 0 || shako.next_col > 70 || stacks[shako.next_col] != 1) {
          shako.scale.x = -1 * shako.scale.x;
          shako.x -= 30 * shako.scale.x;
        }
      }
    }
  }
}
Now we’re using the shako’s x scale to know which way it’s facing. Since the sprite starts out facing left, 1 means it’s facing left, -1 means it’s flipped, and facing right.
We roll a 100 sided dice by calling dice(100), and if the result is less than 10, we turn the shako around.
We also compute the next column the shako is jumping towards, depending on the direction.
If that column is outside bounds (0 to 70) or the height of that column is not 1 (stacks[shako.next_col] != 1), meaning it’s a tall stack or a pit, we turn the shako around.
Detail: please don’t worry about the weird bits of math here where we’re moving the shako around or calculating from 61 pixels instead of 60. The shako sprite has weird footing. If you want to see what I mean, play with those numbers yourself and see what happens to the shako!
Fourth Task: Spears Up, Spears Down
This one is easy. We just need to add a few lines of code that call the shakos’ setStance function.
Remember modular arithmetic?
Modular arithmetic!
num % 6 is read as “num mod 6″. Mod means you wrap around, like days of the week, or hours on a clock.
5 mod 6 is 5.
6 mod 6 is 0.
7 mod 6 is 1.
8 mod 6 is 2.
9 mod 6 is 3.
We want the spears to change every three jumps. We can use mod 3.
Add this code to updateShakos:
function updateShakos() {
  for (num = 0; num < shakos.length; num += 1) {
    let shako = shakos[num];

    if (shako.state == "ground" && Date.now() - shako.ground_time > 150) {
      shako.state = "jumping";
      shako.y_velocity = -5;
      shako.x_velocity = -1 * shako.scale.x * 30/22;
      if (Math.abs(mia.x - shako.x) < 700) soundEffect("jump_2")
    }

    if (shako.state == "jumping") {
      shako.y += shako.y_velocity;
      shako.x += shako.x_velocity;

      shako.y_velocity += 0.5;

      if (shako.y > game_height - 36) {
        shako.y = game_height - 36;
        shako.y_velocity = 0;
        shako.state = "ground";
        shako.ground_time = Date.now();
        shako.jumps += 1;

        if (shako.jumps % 3 == 1) {
          if (shako.stance == "forward") {
            shako.setStance("up");
          } else {
            shako.setStance("forward");
          }
        }

        if (dice(100) < 10) {
          shako.scale.x = -1 * shako.scale.x;
          shako.x -= 30 * shako.scale.x;
        }

        if (shako.scale.x == 1) shako.next_col = Math.floor((shako.x + 61 - 30) / 120);
        if (shako.scale.x == -1) shako.next_col = Math.floor((shako.x + 61) / 120);

        if (shako.next_col < 0 || shako.next_col > 70 || stacks[shako.next_col] != 1) {
          shako.scale.x = -1 * shako.scale.x;
          shako.x -= 30 * shako.scale.x;
        }
      }
    }
  }
}
Every third jump (on jumps 1, 4, 7, 10, 13, etc), this code triggers.
If the shako is spear forward, make it spear up. Otherwise, make it spear forward.
Final Task: Mia vs the Shakos
We’re going to add a new function called miaVsShakos to handle the cases where Mia bumps into a shako.
There are five scenarios:
If Mia runs into the shako spear forward, Mia goes kaput.
If Mia runs into the shako spear up, shako goes kaput.
If Mia runs into the back of the shako, shako goes kaput.
If Mia jumps onto the shako spear up, Mia goes kaput.
If Mia jumps onto the shako spear forward, shako goes kaput.
We will add these one at a time.
First, let’s add the new function to the game, and call it from updateGame:
function miaVsShakos() {

}


function testBricks() {

  ...
  ...
  ...
}


function updateGame(diff) {

  ...
  ...
  ...

  updateShakos();
  miaVsShakos();

  testBricks();

  if (mia.y > 1200) {
    stage.removeChildren();
    bricks = [];
    shakos = [];
    stacks = {};
    initializeGame();
  }

  followMia();
}
Now, let’s add the scenario where Mia runs into a shako spear forward.
We loop through all the shakos, and only test when both Mia and the shako are not already kaput.
If Mia’s x position is less than the shako, and she’s facing right and he’s facing left and they’re close, or, if Mia’s x position is greater than the shako, and she’s facing left and he’s facing right and they’re close, Mia goes kaput.
Let’s write that in code:
function miaVsShakos() {
  for (shako_num = 0; shako_num < shakos.length; shako_num += 1) {
    let shako = shakos[shako_num];

    if (shako.state != "kaput" && mia.state == "running") {


      if (mia.x < shako.x && mia.scale.x == 1 && shako.scale.x == 1 && mia.x > shako.x - 80
        && shako.stance == "forward" && Math.abs(mia.y - shako.y) < 100) {
        mia.setState("kaput");
        mia.scale.y = -1;
        mia.y_velocity = -5;
        mia.y = mia.y - 175;
        soundEffect("negative_2");
      }

      if (mia.x > shako.x && mia.scale.x == -1 && shako.scale.x == -1 && mia.x < shako.x + 80
        && shako.stance == "forward" && Math.abs(mia.y - shako.y) < 100) {
        mia.setState("kaput");
        mia.scale.y = -1;
        mia.y_velocity = -5;
        mia.y = mia.y - 175;
        soundEffect("negative_2");
      }
    }
  }
}
The number 100 determines how close Mia and the shako have to be in order for Mia to go kaput. Try making it smaller or larger. If it’s larger, Mia will go kaput from further away. If it’s smaller, Mia will be able to get closer before going kaput.
Let’s add the second scenario.
function miaVsShakos() {
  for (shako_num = 0; shako_num < shakos.length; shako_num += 1) {
    let shako = shakos[shako_num];

    if (shako.state != "kaput" && mia.state == "running") {

      if (mia.x < shako.x && mia.scale.x == 1 && shako.scale.x == 1 && mia.x > shako.x - 80
        && shako.stance == "forward" && Math.abs(mia.y - shako.y) < 100) {
        mia.setState("kaput");
        mia.scale.y = -1;
        mia.y_velocity = -5;
        mia.y = mia.y - 175;
        soundEffect("negative_2");
      }

      if (mia.x > shako.x && mia.scale.x == -1 && shako.scale.x == -1 && mia.x < shako.x + 80
        && shako.stance == "forward" && Math.abs(mia.y - shako.y) < 100) {
        mia.setState("kaput");
        mia.scale.y = -1;
        mia.y_velocity = -5;
        mia.y = mia.y - 175;
        soundEffect("negative_2");
      }

      if (mia.x < shako.x && mia.scale.x == 1 && shako.scale.x == 1 && mia.x > shako.x - 80
        && shako.stance == "up" && Math.abs(mia.y - shako.y) < 70) {
        shako.state = "kaput";
        shako.scale.y = -1;
        shako.y_velocity = -5;
        shako.y = shako.y - 175;
        soundEffect("hurt");
      }

      if (mia.x > shako.x && mia.scale.x == -1 && shako.scale.x == -1 && mia.x < shako.x + 80
        && shako.stance == "up" && Math.abs(mia.y - shako.y) < 70) {
        shako.state = "kaput";
        shako.scale.y = -1;
        shako.y_velocity = -5;
        shako.y = shako.y - 175;
        soundEffect("hurt");
      }

    }
  }
}
You may know enough programming to know that this is a messy way to do things.
In general, it would be good to reorganize these statements so that they’re less copy-paste.
As I’ve said before, I want you to have fun and make progress, rather than getting bogged down in details or formal programming practices.
That stuff comes later, when you already enjoy programming and have the habit.
Also! Separately! A good way to understand complex if statements like the ones above is to read them like they’re in normal language.
“If Mia’s x position is greater than the shako’s x position, and Mia’s scale is minus 1, and the shako’s scale is minus 1, and Mia’s x position is less than shako’s plus 80, aaaand shako’s stance is up, and the absolute value of the y positions is less than 70, then…. whew, jeez.”
Now let’s add the third scenario, where Mia runs through shakos with their backs turned. It looks almost the same, but with the shako scale flipped and no mention of the spears.
Add this to miaVsShakos:
function miaVsShakos() {
  for (shako_num = 0; shako_num < shakos.length; shako_num += 1) {
    let shako = shakos[shako_num];

    if (shako.state != "kaput" && mia.state == "running") {

      if (mia.x < shako.x && mia.scale.x == 1 && shako.scale.x == 1 && mia.x > shako.x - 80
        && shako.stance == "forward" && Math.abs(mia.y - shako.y) < 100) {
        mia.setState("kaput");
        mia.scale.y = -1;
        mia.y_velocity = -5;
        mia.y = mia.y - 175;
        soundEffect("negative_2");
      }

      if (mia.x > shako.x && mia.scale.x == -1 && shako.scale.x == -1 && mia.x < shako.x + 80
        && shako.stance == "forward" && Math.abs(mia.y - shako.y) < 100) {
        mia.setState("kaput");
        mia.scale.y = -1;
        mia.y_velocity = -5;
        mia.y = mia.y - 175;
        soundEffect("negative_2");
      }

      if (mia.x < shako.x && mia.scale.x == 1 && shako.scale.x == 1 && mia.x > shako.x - 80
        && shako.stance == "up" && Math.abs(mia.y - shako.y) < 70) {
        shako.state = "kaput";
        shako.scale.y = -1;
        shako.y_velocity = -5;
        shako.y = shako.y - 175;
        soundEffect("hurt");
      }

      if (mia.x > shako.x && mia.scale.x == -1 && shako.scale.x == -1 && mia.x < shako.x + 80
        && shako.stance == "up" && Math.abs(mia.y - shako.y) < 70) {
        shako.state = "kaput";
        shako.scale.y = -1;
        shako.y_velocity = -5;
        shako.y = shako.y - 175;
        soundEffect("hurt");
      }

      if (mia.x < shako.x && mia.scale.x == 1 && shako.scale.x == -1 && mia.x > shako.x - 80
        && Math.abs(mia.y - shako.y) < 70) {
        shako.state = "kaput";
        shako.scale.y = -1;
        shako.y_velocity = -5;
        shako.y = shako.y - 175;
        soundEffect("hurt");
      }

      if (mia.x > shako.x && mia.scale.x == -1 && shako.scale.x == 1 && mia.x < shako.x + 80
        && Math.abs(mia.y - shako.y) < 70) {
        shako.state = "kaput";
        shako.scale.y = -1;
        shako.y_velocity = -5;
        shako.y = shako.y - 175;
        soundEffect("hurt");
      }
    }
  }
}
Almost done!
We can do scenarios four and five (Mia jumps on the shako) together. Add this to miaVsShakos:
function miaVsShakos() {
  for (shako_num = 0; shako_num < shakos.length; shako_num += 1) {
    let shako = shakos[shako_num];

    if (shako.state != "kaput" && mia.state == "running") {

      if (mia.x < shako.x && mia.scale.x == 1 && shako.scale.x == 1 && mia.x > shako.x - 80
        && shako.stance == "forward" && Math.abs(mia.y - shako.y) < 100) {
        mia.setState("kaput");
        mia.scale.y = -1;
        mia.y_velocity = -5;
        mia.y = mia.y - 175;
        soundEffect("negative_2");
      }

      if (mia.x > shako.x && mia.scale.x == -1 && shako.scale.x == -1 && mia.x < shako.x + 80
        && shako.stance == "forward" && Math.abs(mia.y - shako.y) < 100) {
        mia.setState("kaput");
        mia.scale.y = -1;
        mia.y_velocity = -5;
        mia.y = mia.y - 175;
        soundEffect("negative_2");
      }

      if (mia.x < shako.x && mia.scale.x == 1 && shako.scale.x == 1 && mia.x > shako.x - 80
        && shako.stance == "up" && Math.abs(mia.y - shako.y) < 70) {
        shako.state = "kaput";
        shako.scale.y = -1;
        shako.y_velocity = -5;
        shako.y = shako.y - 175;
        soundEffect("hurt");
      }

      if (mia.x > shako.x && mia.scale.x == -1 && shako.scale.x == -1 && mia.x < shako.x + 80
        && shako.stance == "up" && Math.abs(mia.y - shako.y) < 70) {
        shako.state = "kaput";
        shako.scale.y = -1;
        shako.y_velocity = -5;
        shako.y = shako.y - 175;
        soundEffect("hurt");
      }

      if (mia.x < shako.x && mia.scale.x == 1 && shako.scale.x == -1 && mia.x > shako.x - 80
        && Math.abs(mia.y - shako.y) < 70) {
        shako.state = "kaput";
        shako.scale.y = -1;
        shako.y_velocity = -5;
        shako.y = shako.y - 175;
        soundEffect("hurt");
      }

      if (mia.x > shako.x && mia.scale.x == -1 && shako.scale.x == 1 && mia.x < shako.x + 80
        && Math.abs(mia.y - shako.y) < 70) {
        shako.state = "kaput";
        shako.scale.y = -1;
        shako.y_velocity = -5;
        shako.y = shako.y - 175;
        soundEffect("hurt");
      }
    }

    if (shako.state != "kaput" && mia.state == "falling") {
      if (Math.abs(mia.x - shako.x) < 80 && mia.y < shako.y - 30 && mia.y > shako.y - 160) {
        if (shako.stance == "up") {
          mia.setState("kaput");
          mia.scale.y = -1;
          mia.y_velocity = -5;
          mia.y = mia.y - 175;
          soundEffect("negative_2");
        } else if (shako.stance == "forward") {
          shako.state = "kaput";
          shako.scale.y = -1;
          shako.y_velocity = -5;
          shako.y = shako.y - 175;
          soundEffect("hurt");
        }
      }
    }
  }
}
If Mia is falling, and the shako isn’t kaput, then we check for the jump collision.
If Mia’s x position is within 80 of the shako, and Mia’s y position is higher than shako’s y minus 30, and lower than shako’s y minus 160, then we have a collision.
If the shako’s spear is up, Mia goes kaput, and if it’s forward, the shako goes kaput.
And just like that, we’re done.
Tomorrow, we’ll add… the rocket.
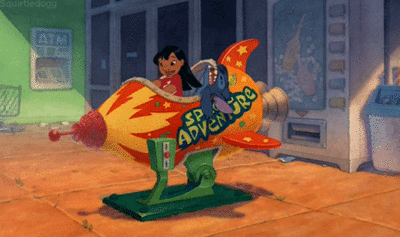
Hang in there!
(Activity time: about 60 minutes)
(Download the Day Four Files Here)
Previous posts:
Game Jam Day 1
Game Jam Day 2
Game Jam Day 3
Intro
Hello, and and welcome to day 4 of the Dad and Daughter Quarantine Game Jam Tutorial!
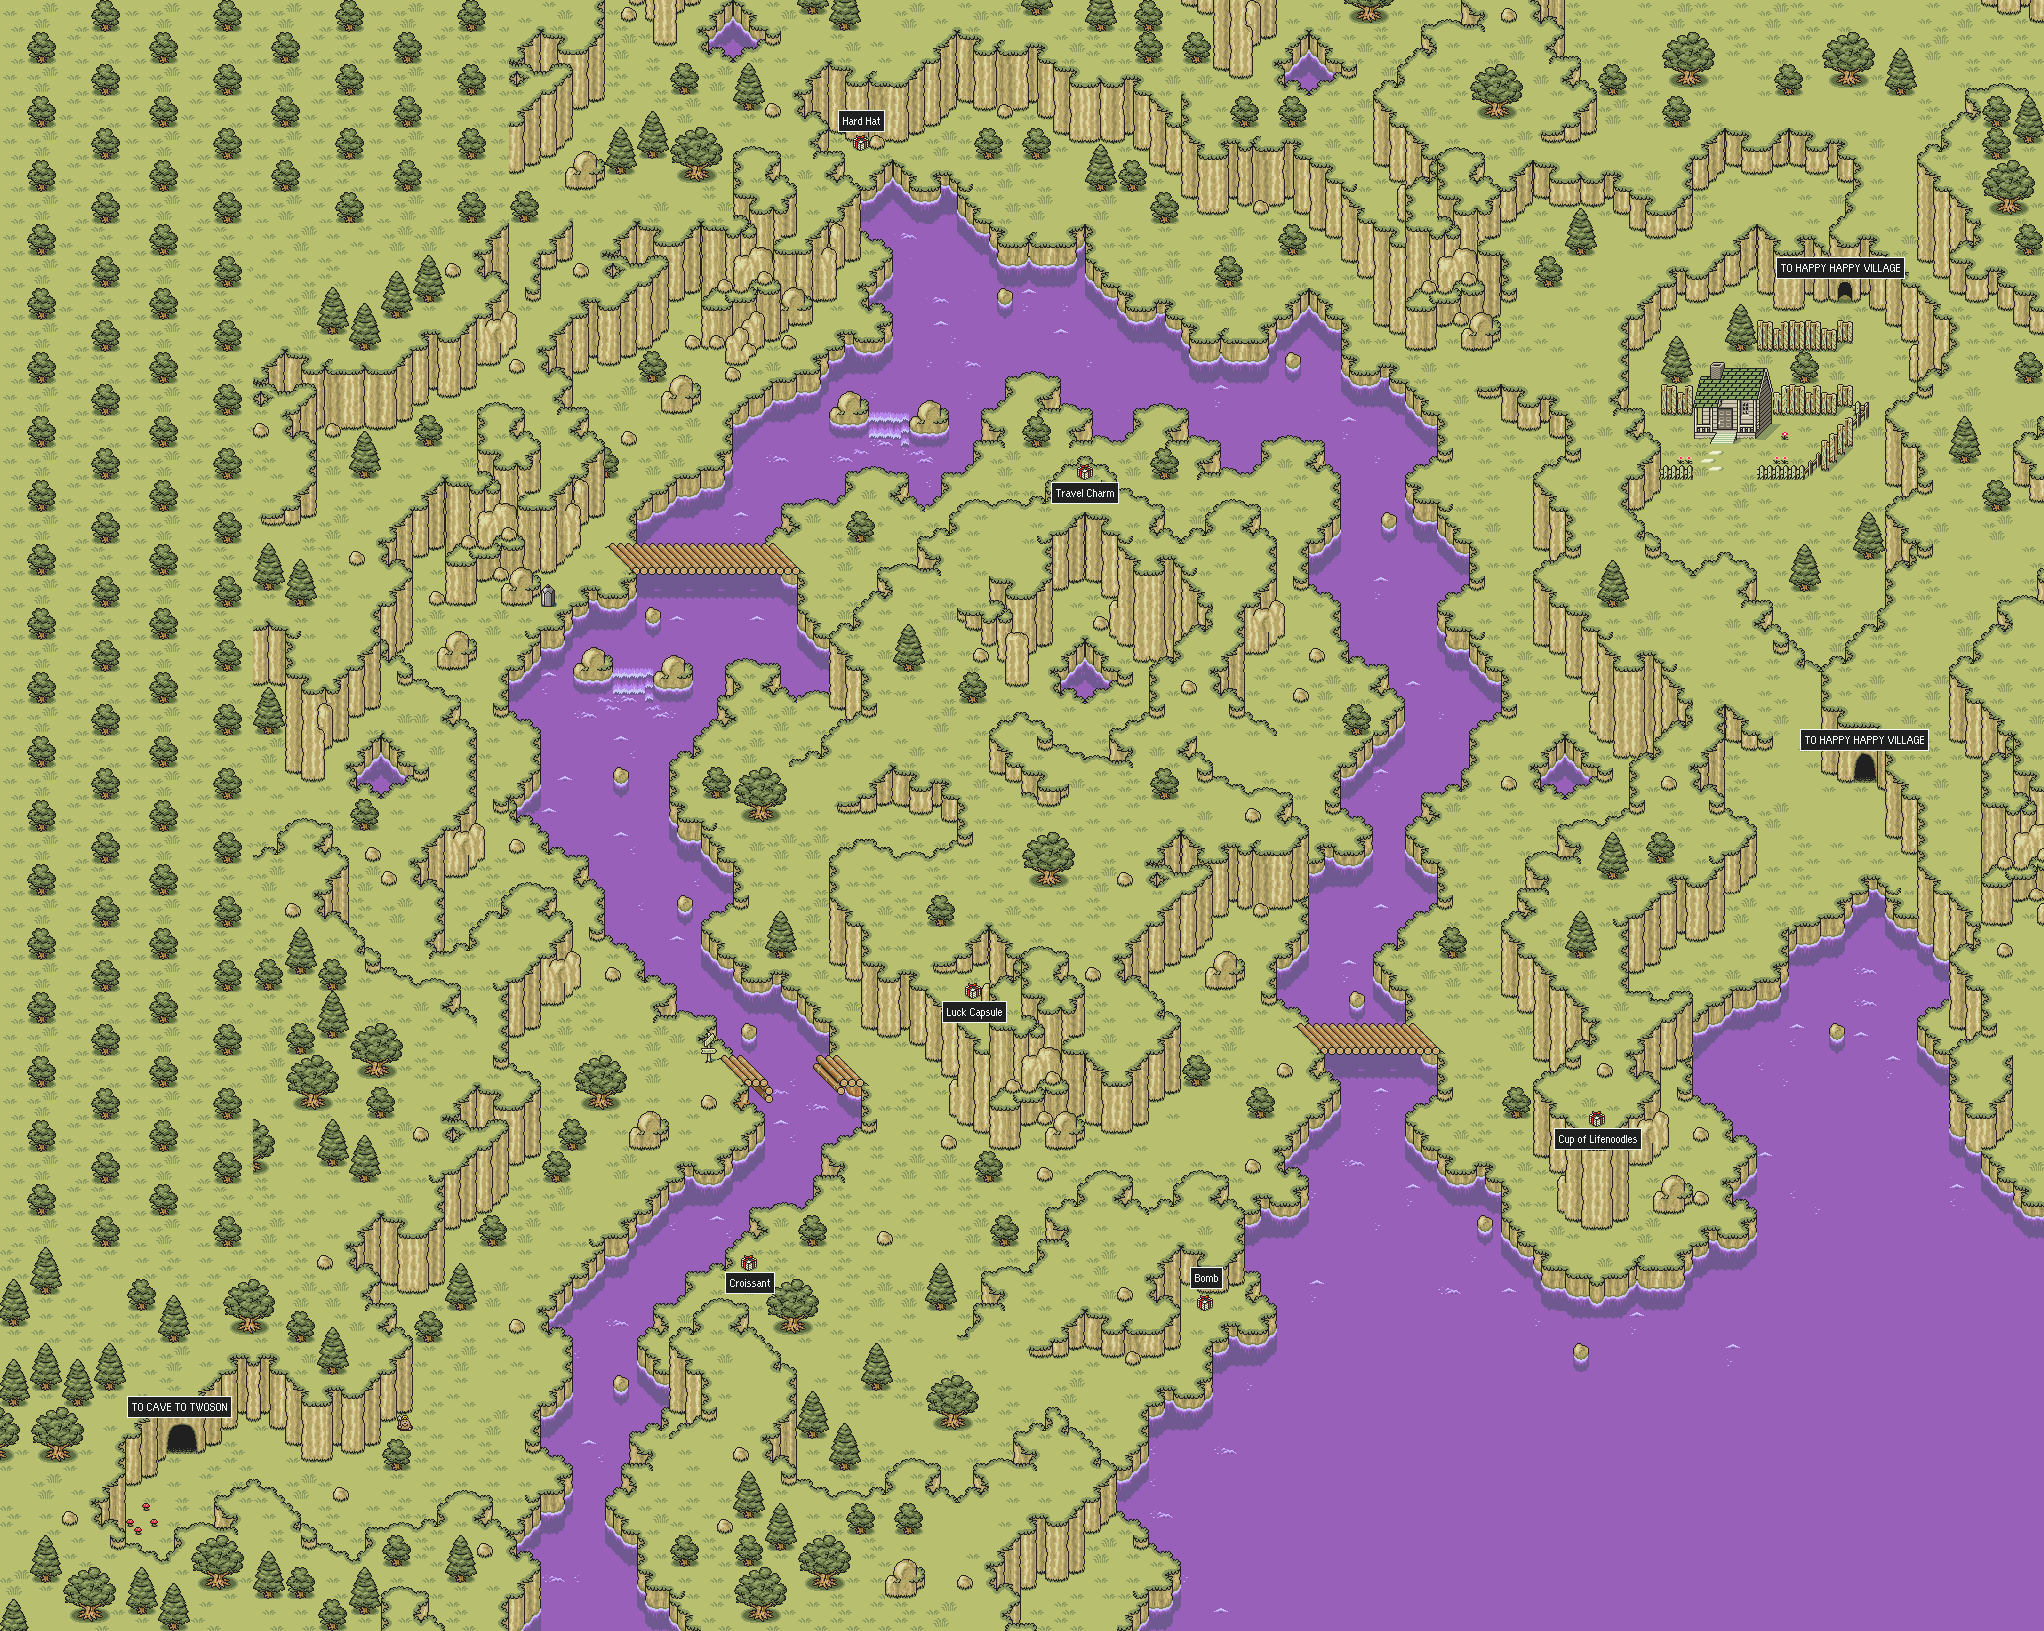
We’re making a game called Mia’s Daring Escape. On day 1, we set up the game and put Mia on the screen. On day 2, we gave Mia a brick level to run, and a jumping skill. On day 3, we made falling bricks that stacked up on the ground or bopped Mia on the head.
Today’s pure fun day. Today we add flavor!
You’re definitely going to have to download the day four files, so you can get the new sounds and new sprites!
You can keep the game.js file you’ve been working, but be sure to swap out index.html for the new one, because it has some code to load those sounds.
First Task: Have fun with sounds!
Games are always better with sound. I’ve added a lot of sound files to the project.
Grab the Sound folder from the today’s project files and put it in your game folder.
Then, grab the new copy of index.html and replace your old copy.
Detail: if you look at the two copies of index.html, you’ll see that the only difference is loading a bunch of sound files in html, like this:
<audio preload="auto" id="coin" ><source src="Sound/coin.wav" type="audio/wav"></audio>There’s already code in plumbing.js to let you play sound and music.
Try it out by adding these lines to game.js:
let mia = null;
let bricks = [];
let stacks = {};
let colors = [
  color(1,0,0), // Red
  color(0,1,0), // Green
  color(0,0,1), // Blue
]

let tracker = 0;

let last_brick = Date.now();


music_volume = 0.4;
sound_volume = 0.6;
setMusic("music_6");

...
...
...


  // Check if Mia has fallen on top of the current stack.
  if (mia.state == "falling" && mia.y >= floor_height && mia.y_velocity > 0) {
    mia.y = floor_height;
    mia.y_velocity = 0;
    mia.state = "running";
    soundEffect("hyah_3");
  }

...
...
...

  // If the space bar got pushed, make Mia jump
  if (key_down[" "] && mia.state == "running") {
    mia.state = "jumping";
    mia.y_velocity = -20;
    soundEffect("jump_3");
  }

...
...
...
Zounds! Sounds!
Kid, here’s your sound menu:
airhorn
cat
chicken
clunk
coin_1
coin_2
countdown
damage_1
damage_2
ding_ding_ding
dog
explosion
fairy_down
fairy_up
fireball_1
fireball_2
game_over
goat
hey
horse
hurt
hyah_1
hyah_2
hyah_3
hyah_4
jump_1
jump_2
jump_3
jump_4
listen
negative_1
negative_2
pickup_1
pickup_2
pickup_3
pickup_4
plink_1
plink_2
poops
pop_1
pop_2
positive
punch
rocket_1
rocket_2
seal
shatter
sheep
splash
success
swing
throw
toot
train_whistle
tree_shake
victory_1
victory_2
victory_3
yak
zam
You’ve also got 6 pieces of music:
music_1
music_2
music_3
music_4
music_5
music_6
You can play a sound anywhere in your code with the soundEffect function, eg, soundEffect(“sheep”). You can set the music at the top of your code with setMusic(“music_6”).
Take all the time you want. Put the sounds wherever you want. GO NUTS!
Second Task: Little Smokies
A nice effect in platformers is to have little puffs of smoke when the character changes direction. I’ve added a nice function called makeSmoke in plumbing.js.
To use it, you have to supply a container (more on that later, but for now, just the stage), x and y coordinates, and x and y scale (so you can control the size of it).
We’re going to give Mia some smoke puffs. Change updateGame like so:
function updateGame(diff) {

  // Don't try to update the game until we've created Mia,
  // or the game will crash.
  if (mia == null) return;

  dropBricks();

  // If the right key got pushed, move Mia to the right
  if (key_down["ArrowRight"]) {
    mia.last_x = mia.x;
    mia.x = mia.x + 7;
    if (mia.state != "kaput") mia.scale.set(1,1);
    if (mia.state == "running" && mia.last_arrow == "left") makeSmoke(stage, mia.x - 20, mia.y - 40, 1.4, 1.4);
    mia.last_arrow = "right";
  }

  // If the left key got pushed, move Mia to the left
  if (key_down["ArrowLeft"]) {

    mia.last_x = mia.x;
    mia.x = mia.x - 7;
    if (mia.state != "kaput") mia.scale.set(-1,1);
    if (mia.state == "running" && mia.last_arrow == "right") makeSmoke(stage, mia.x + 20, mia.y - 40, 1.4, 1.4);
    mia.last_arrow = "left";
  }

  // If the space bar got pushed, make Mia jump
  if (key_down[" "] && mia.state == "running") {
    mia.state = "jumping";
    mia.y_velocity = -20;
    soundEffect("jump_3");
    if (mia.last_arrow == "left") makeSmoke(stage, mia.x + 20, mia.y - 40, 1.4, 1.4);
    if (mia.last_arrow == "right") makeSmoke(stage, mia.x - 20, mia.y - 40, 1.4, 1.4);
  }

...
...
...
When Mia changes direction or jumps, we make a little puff of smoke.

Optional Third Task: Color the Sky!
This one’s totally optional.
If you look in the Art folder from today’s new files, you’ll see that there are some new pictures.
Find the place in your code where you make the blue sky:
for (num = -1; num < 8; num += 1) {
  let blue_sky = makeSprite("Art/blue_sky.png");
  blue_sky.position.set(game_width * num, 0);
  stage.addChild(blue_sky);
}
Instead, try orange_sky, pink_sky, purple_sky, or green_sky.
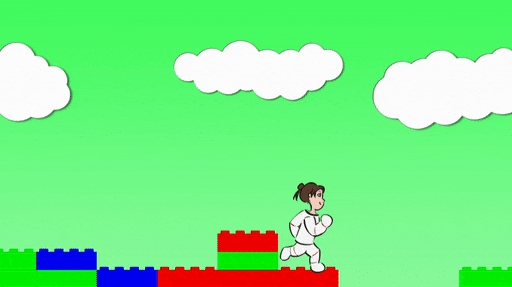
Fourth Task: Give Mia different poses.
Mia is always running, running running running.
We should make her stand still when the player isn’t pressing any buttons, and we should give her jumping and falling poses.
In order to do that, we’re going to learn about containers. A container is something that can contain multiple sprites, which you can still move around and scale and rotate.
Maybe in a future game, you have an end boss with two robot octopus arms. You draw the arms separately from the head, so you have three sprites to manage. Instead of moving all three sprites around the level, you can make a container, put the three sprites inside it, and then just move that around instead. It’s easier.
We’re going to change Mia from a sprite to a container, and then we’re going to put Mia’s four sprites (running, rising, falling, and idle) into that container.
All of the code for moving Mia around will stay the same. We’ll just have to add some code to change which animation is visible at any given time.
First, let’s make the container and add all the animations. Change initializeGame as follows:
function initializeGame() {

  for (num = -1; num < 8; num += 1) {
    let blue_sky = makeSprite("Art/blue_sky.png");
    blue_sky.position.set(game_width * num, 0);
    stage.addChild(blue_sky);
  }

  for (num = -8; num < 70; num += 1) {

    if (num % 16 < 14) {
      let brick = makeSprite("Art/brick.png");
      brick.anchor.set(0.5,1);
      brick.position.set(120 * num, game_height);
      brick.tint = pick(colors);
      stage.addChild(brick);
      bricks.push(brick);

      brick.column = num;
      brick.y_velocity = 0;
      stacks[brick.column] = 1;
    }
    else {
      stacks[num] = -100;
    }
  }

  mia = makeAnimatedSprite("Art/mia_animations.json", "run");
  mia.anchor.set(0.5, 0.9);
  mia.position.set(200, game_height - 40);
  stage.addChild(mia);
  mia.animationSpeed = 0.3;
  mia.play();
  mia.state = "running";
  mia.y_velocity = 0;

  mia = makeContainer();

  mia.run = makeAnimatedSprite("Art/mia_animations.json", "run");
  mia.run.anchor.set(0.5, 0.9);
  mia.run.animationSpeed = 0.3;
  mia.run.play();
  mia.addChild(mia.run);

  mia.fall = makeAnimatedSprite("Art/mia_animations.json", "fall");
  mia.fall.anchor.set(0.5, 0.9);
  mia.fall.animationSpeed = 0.3;
  mia.fall.play();
  mia.addChild(mia.fall);

  mia.rise = makeAnimatedSprite("Art/mia_animations.json", "rise");
  mia.rise.anchor.set(0.5, 0.9);
  mia.addChild(mia.rise);

  mia.idle = makeAnimatedSprite("Art/mia_animations.json", "idle");
  mia.idle.anchor.set(0.5, 0.9);
  mia.addChild(mia.idle);

  // Change mia's state
  mia.setState = function(state) {
    mia.state = state;

    // Set all sprites invisible
    mia.run.visible = false;
    mia.fall.visible = false;
    mia.rise.visible = false;
    mia.idle.visible = false;

    // Then set the right state back to visible
    if (mia.state == "running") mia.run.visible = true;
    if (mia.state == "falling") mia.fall.visible = true;
    if (mia.state == "jumping") mia.rise.visible = true;
    if (mia.state == "idle" || mia.state == "kaput") mia.idle.visible = true;
  }

  mia.position.set(200, game_height - 40);
  mia.setState("idle");
  mia.y_velocity = 0;
  stage.addChild(mia);
}
Here we’re making Mia into a container, then making four animations and adding each of them to the container by using the function addChild.
After that, we’re giving Mia a new function called setState which both changes Mia’s state and makes sure the right sprite is visible.
Then we’re calling setState to set Mia to the idle state.
After that, we’re doing the same stuff we did before: give Mia a position and a y velocity, and adding Mia to the stage.
But when we do that, we’re going to see that Mia stays idle no matter how we move her.
That’s because all of the rest of our code is still using mia.state = something, instead of calling the new function mia.setState(something).
Let’s change testBricks:
function testBricks() {

  // Don't test anything if Mia is already kaput
  if (mia.state == "kaput") return;

  mia.column = Math.floor((mia.x + 60) / 120);

  // Don't test bricks if Mia is too far to the left or right.
  if (mia.column < -8 || mia.column >= 70) return;

  // Figure out the floor for Mia's current column.
  let floor_height = game_height - 36 * stacks[mia.column] - 4;

  // First, check if Mia has run into thin air,
  // like Wile E Coyote, and make her fall.
  if (mia.y < floor_height) {
    mia.state = "falling"
  }
  if (mia.y < floor_height && mia.y_velocity >= 0) {
    mia.setState("falling")
  }

  // Check if Mia has fallen on top of the current stack.
  if (mia.state == "falling" && mia.y >= floor_height && mia.y_velocity > 0) {
    mia.y = floor_height;
    mia.y_velocity = 0;
    mia.state = "running";
    mia.setState("running");
    soundEffect("hyah_3")
  }

  // Then, loop through the whole brick list
  for (i = 0; i < bricks.length; i += 1) {
    let brick = bricks[i];

    // If a brick is not falling, make sure Mia can't run through it.
    if (brick.y_velocity == 0) {

      // Calculate the floor height of this particular brick
      this_brick_floor_height = game_height - 36 * stacks[brick.column] - 4;
      // If Mia is below this brick's floor height, and she's too close
      // to the brick, push her back out.
      if (Math.abs(mia.x - brick.x) < 90 && mia.y > this_brick_floor_height) {
        if (mia.x < brick.x) mia.x = mia.x - 7;
        if (mia.x > brick.x) mia.x = mia.x + 7;
      }
    }
    else if (brick.y_velocity > 0 && mia.state != "kaput") {
      // If Mia is too close to a falling brick, she goes kaput.
      if (Math.abs(mia.x - brick.x) < 80
        && brick.y < mia.y - 10
        && brick.y > mia.y - 175) {
        mia.state = "kaput";
        mia.setState("kaput");
        mia.scale.y = -1;
        mia.y_velocity = -5;
        mia.y = mia.y - 175;
      }
    }
  }
}
Finally, let’s change updateGame:
We have to change the logic a little bit to keep up with Mia’s new states, but this is basically mostly just changing to use the setState function.
Et voila,
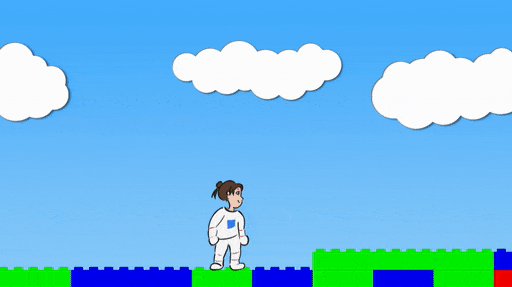
And there we have it! The game is juicy.
Tomorrow we’ll add some baddies.
Detail: the sound effects for this tutorial come from Splice.com. Credit for the music files is as follows:
music_1: Abstraction – The Skies of 20X9
music_2: Abstraction – Underwater Cave
music_3: Celestialghost8 – Breaking the Barrier
music_4: Disyman – Adventure
music_5: Juhani Junkala – Stage 2
music_6: Juhani Junkala – Stage Select
Optional Bonus Task, mostly for Dad: Smooth Motion!
If you play a lot of platformers, you’ve probably noticed that Mia’s movements are a bit basic and clunky.
If you want, here’s a quick change which will make Mia’s motion smoother.
Feel free to skip this section entirely.
Mia has y velocity. To make smooth motion, we’ll add x velocity as well.
When the left or right keys are pressed, the x velocity will be increased, up to a maximum.
At all times, the x velocity will also be decayed, and if it falls close to zero, we’ll set Mia back to idle.
Add the following code, try it out, and then tweak the values until you get something you like.
...
...
...

  mia.position.set(200, game_height - 40);
  mia.setState("idle");
  mia.y_velocity = 0;
  mia.x_velocity = 0;
  mia.max_x_velocity = 8;
  stage.addChild(mia);

...
...
...


function updateGame(diff) {

  // Don't try to update the game until we've created Mia,
  // or the game will crash.
  if (mia == null) return;

  dropBricks();

  if (mia.state == "running") {
    mia.setState("idle");
  }

  // If the right key got pushed, move Mia to the right
  if (key_down["ArrowRight"]) {
    if (mia.state == "idle") mia.setState("running");
    mia.last_x = mia.x;
    mia.x = mia.x + 7;
    if (mia.state != "kaput") mia.scale.set(1,1);
    if (mia.state == "running" && mia.last_arrow == "left") makeSmoke(stage, mia.x - 20, mia.y - 40, 1.4, 1.4);
    mia.last_arrow = "right";
  }

  // If the left key got pushed, move Mia to the left
  if (key_down["ArrowLeft"]) {
    if (mia.state == "idle") mia.setState("running");
    mia.last_x = mia.x;
    mia.x = mia.x - 7;
    if (mia.state != "kaput") mia.scale.set(-1,1);
    if (mia.state == "running" && mia.last_arrow == "right") makeSmoke(stage, mia.x + 20, mia.y - 40, 1.4, 1.4);
    mia.last_arrow = "left";
  }


  // If the right key got pushed, move Mia to the right
  if (key_down["ArrowRight"]) {
    if (mia.state == "idle") mia.setState("running");
    if (mia.x_velocity < 0) {
      mia.x_velocity = 0;
      makeSmoke(stage, mia.x - 20, mia.y - 40, 1.4, 1.4);
    }
    mia.x_velocity += 1;
    if (mia.x_velocity > mia.max_x_velocity) mia.x_velocity = mia.max_x_velocity;
    if (mia.state != "kaput") mia.scale.set(1,1);
  }

  // If the left key got pushed, move Mia to the left
  if (key_down["ArrowLeft"]) {
    if (mia.state == "idle") mia.setState("running");
    if (mia.x_velocity > 0) {
      mia.x_velocity = 0;
      makeSmoke(stage, mia.x + 20, mia.y - 40, 1.4, 1.4);
    }
    mia.x_velocity -= 1;
    if (mia.x_velocity < -1 * mia.max_x_velocity) mia.x_velocity = -1 * mia.max_x_velocity;
    if (mia.state != "kaput") mia.scale.set(-1,1);
  }

  mia.last_x = mia.x;
  mia.x += mia.x_velocity;
  mia.x_velocity *= 0.93;
  if (mia.state == "running" && Math.abs(mia.x_velocity) < 0.5) mia.setState("idle");

  // If the space bar got pushed, make Mia jump
  if (key_down[" "]) {
    if (mia.state == "running" || mia.state == "idle") {
      mia.setState("jumping");
      mia.y_velocity = -20;
      soundEffect("jump_3");
      if (mia.last_arrow == "left") makeSmoke(stage, mia.x - 20, mia.y - 40, 1.4, 1.4);
      if (mia.last_arrow == "right") makeSmoke(stage, mia.x + 20, mia.y - 40, 1.4, 1.4);
      makeSmoke(stage, mia.x - 3 * mia.x_velocity, mia.y - 40, 1.4, 1.4);
    }
  }

  // If Mia is jumping, move her upwards, use gravity to pull her downwards,
  // and if she reaches the ground, stop the jump.
  if (mia.state == "jumping" || mia.state == "falling" || mia.state == "kaput") {
    mia.y = mia.y + mia.y_velocity;
    mia.y_velocity = mia.y_velocity + 0.8;

    if (mia.y_velocity > 0 && mia.state == "jumping") {
      // switch to falling
      mia.setState("falling");
    }
  }

  testBricks();

  if (mia.y > 1200) {
    stage.removeChildren();
    bricks = [];
    stacks = {};
    initializeGame();
  }

  followMia();
}
Motion works a little bit differently now.
When an arrow key is pushed down, first we check if we’re running in the other direction. If so, we drop the velocity back to zero and add a little puff of smoke (this is basically a quick turn).
Then, we add 1 to the velocity. If it’s larger than the max, we set it to the max. (For the left key, if it’s less than -1 * max, we set it to -1 * max).
The jump smoke now depends on x velocity; if you’re going 8 pixels to the right per frame, the jump smoke is placed 24 pixels to the left.
Play around with these numbers until you get something you really like!
(Activity time: about 90 minutes)
(Download the Day Three Files Here)
Previous posts:
Game Jam Day 1
Game Jam Day 2
Intro
Hello, and welcome to day 3 of the Dad and Daughter Quarantine Game Jam Tutorial!
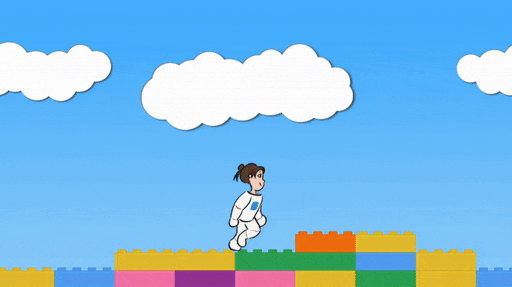
We’re making a game called Mia’s Daring Escape. On day 1, we set up the game and put Mia on the screen. On day 2, we gave Mia a brick level to run, and a jumping skill.

Today we’re add falling bricks and death and stuff.
First Task: Falling bricks!
We begin where we left off yesterday. You can use the files you already have, or download the day three files and start from there. The day three files have today’s code changes to help you if you get lost.
We’re going to make a new function called dropBricks which drops a brick every 0.25 seconds.
Let’s start by making an empty function. Add this to your code:
// Keep Mia roughly in the center of the screen by using a tracker
// which stays within 100 pixels of Mia, and then moving the whole stage
// so that the tracker stays in the center of the screen.
function followMia() {

  if (mia.x - tracker > 100) {
    tracker = mia.x - 100;
  }

  if (tracker - mia.x > 100) {
    tracker = mia.x + 100;
  }

  stage.x = (game_width / 2 - tracker);
}


// Every 250 milliseconds, drop a brick.
function dropBricks() {

}


function updateGame(diff) {

  // Don't try to update the game until we've created Mia,
  // or the game will crash.
  if (mia == null) return;

  dropBricks();

  // If the right key got pushed, move Mia to the right
  if (key_down["ArrowRight"]) {
    mia.x = mia.x + 7;
    mia.scale.set(1,1);
  }

  // If the left key got pushed, move Mia to the left
  if (key_down["ArrowLeft"]) {
    mia.x = mia.x - 7;
    mia.scale.set(-1,1);
  }
...
...
...
We have an empty function, and it gets called from updateGame (so, about 60 times a second).
It’s time to learn about time.
Whatever happens in dropBricks, we want don’t want it to happen on every frame. We only want it to happen every 250 milliseconds.
In javascript, you can call a function called Date.now() to get the current time. What you get back is a weird large number, but it doesn’t matter, because if you call it two seconds later, you get a number which is 2000 milliseconds larger:
first_time = Date.now()
...
...
// do stuff for 2 seconds
...
...
second_time = Date.now
difference = second_time - first_time
// difference will be 2000
Detail: The number you get from Date.now() is the number of milliseconds elapsed since January 1, 1970. This is sort of a standard across all computers for reckoning the current time. I can send this number to a server on the other side of the world, and we’ll both agree on what it means.
Let’s add a variable to track the last time we dropped a brick, and let’s put it at the top of the code:
let mia = null;
let bricks = [];
let colors = [
  color(1,0,0), // Red
  color(0,1,0), // Green
  color(0,0,1), // Blue
]

let tracker = 0;

let last_brick = Date.now();


function initializeGame() {

  for (num = -1; num < 8; num += 1) {
    let blue_sky = makeSprite("Art/blue_sky.png");
    blue_sky.position.set(game_width * num, 0);
    stage.addChild(blue_sky);
  }
...
...
...
Then, let’s add this code inside the dropBricks function:
// Every 250 milliseconds, drop a brick.
function dropBricks() {
  if (Date.now() - last_brick > 250) {

    console.log(last_brick + " cookies")
    last_brick = Date.now();

  }
}
We take the time right now and subtract the last brick drop time. If the answer is more than 250, then enough time has passed. For now, we just print “359072350987345 cookies” or whatever the time value is.
Then, we set the last brick drop time to right now, so that in 250 more milliseconds, this stuff will happen again.
When you run this code, press Command-Option-J on a Mac or Ctrl-Shift-J on Windows to bring up the debug console. (Edit: it’s Command-Option-I on a Mac. I use a Mac. I don’t know why I got this wrong)
We’re using console.log, a function that prints things to the debug console.
We want to see if that code prints something a few times a second.
Sorry if you already know this, but milliseconds are tiny bits of time. 1000 milliseconds is one second, so 250 milliseconds is a quarter of a second.
With the debug console open, you should see something like this:
Every quarter of a second, the program prints out the next number of cookies. If you subtracted two numbers in a row, the answer should be about 250. It’s not exact, because the computer can’t guarantee it will take the same exact amount of time between frames. But it’s close enough for our purposes.
Detail: Yes, computers in general can guarantee exact times at much smaller fractions of a second, but it takes extra work, and it’s typically not worth the trouble for making games.
If that 250 millisecond delay is working, let’s add the actual brick drop code:
// Every 250 milliseconds, drop a brick.
function dropBricks() {
  if (Date.now() - last_brick > 250) {

    console.log(last_brick + " cookies")
    last_brick = Date.now();

  }

  if (Date.now() - last_brick > 250) {

    // Make a new brick
    let brick = makeSprite("Art/brick.png");
    brick.anchor.set(0.5,1);
    brick.tint = pick(colors);

    // Set it in the right place and give it some drop speed.
    brick.column = dice(70);
    brick.position.set(120 * brick.column, -50);
    brick.y_velocity = 1;

    // Add it to the stage, and add it to the list of bricks.
    stage.addChild(brick);
    bricks.push(brick);

    last_brick = Date.now();
  }

  // For every brick, if it has y_velocity, drop it.
  for (i = 0; i < bricks.length; i += 1) {
    let brick = bricks[i];

    if (brick.y_velocity > 0) {
      brick.y = brick.y + brick.y_velocity;
      brick.y_velocity = brick.y_velocity + 0.25;
    }
  }
}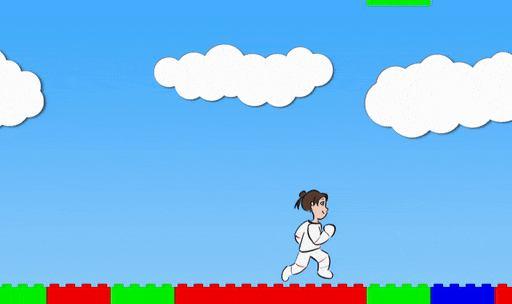
Is this a good amount of brick droppage? Try setting the time delay to 25 milliseconds instead!
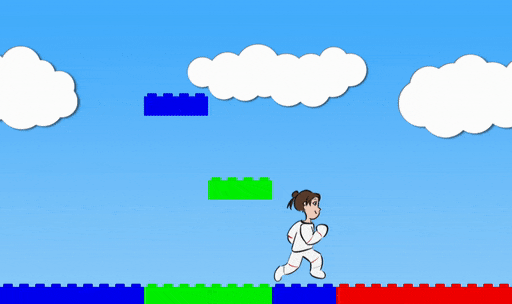
Too much! Too much! Go back!
Okay. So. Here are some things to note about the code:
We start the new bricks with a y position of -50. That’s above the top of the screen. We do this so that the bricks won’t be visible when they pop into existence.
We’ve given every brick a “column” value, because once the bricks start stacking up, we’re going to need to keep track of which column we’re working with:
To make things convenient for ourselves, we’re only going to line up all the brick drops so that each new brick goes into a specific column. No overlaps.
Detail: Yes, I know you would never build like this with your *cough* plastic bricks *cough*. Very unstable. But very easy to program.
In plumbing.js, I’ve added a function called dice which rolls a dice of whatever size you give it. Give it dice(10), it will roll for a random number between 1 and 10. Give it dice(70), it will roll for a random number between 1 and 70.
Since our old brick making loop went from -8 to 70, there are negative columns. We’re going to ignore these, and roll the dice on the 70 positive columns.
Each new brick gets assigned to a column. We set the brick’s x position to 120 * column.
In the second part of the code, we do a loop, but instead of looping on a number, we loop the list.
for (i = 0; i < bricks.length; i += 1) {
  let brick = bricks[i];

  ...
  ...
  ...
}
This loop command says “go through all the bricks in the list, and do the code in { } curly braces once for each thing.”
The first thing we do inside that loop is “let brick = bricks[i]”.
That just means “make a temporary variable for the current item in the list”.
We loop over every brick in the list, and if the brick has y velocity, we drop it.
Now we want to add brick stacking. To stack the bricks, we just need to keep track of columns, and convert a falling brick to a stacked brick at the right time.
Let’s add a variable that tracks each of the stacks:
let mia = null;
let bricks = [];
let stacks = {};
let colors = [
  color(1,0,0), // Red
  color(0,1,0), // Green
  color(0,0,1), // Blue
]

let tracker = 0;

let last_brick = Date.now();
...
...
...
Note the curly braces.
Bricks is a list (bananas, oranges, apples).
Stacks is a dictionary (bananas: 3, oranges: 17, apples: 5).
Looking back at the column diagram,
The dictionary for these columns would look like this:
{
  1: 3,
  2: 2,
  3: 6,
  4: 1
}
Now let’s make sure that our original floor of bricks correspond to columns, and that they have y velocity of 0:
function initializeGame() {

  for (num = -1; num < 8; num += 1) {
    let blue_sky = makeSprite("Art/blue_sky.png");
    blue_sky.position.set(game_width * num, 0);
    stage.addChild(blue_sky);
  }

  for (num = -8; num < 70; num += 1) {
    let brick = makeSprite("Art/brick.png");
    brick.anchor.set(0.5,1);
    brick.position.set(120 * num, game_height);
    brick.tint = pick(colors);
    stage.addChild(brick);
    bricks.push(brick);

    brick.column = num;
    brick.y_velocity = 0;
    stacks[brick.column] = 1;
  }

  mia = makeAnimatedSprite("Art/mia_animations.json", "run");
  mia.anchor.set(0.5, 0.9);
  mia.position.set(200, game_height - 40);
  stage.addChild(mia);
  mia.animationSpeed = 0.3;
  mia.play();
  mia.state = "running";
  mia.y_velocity = 0;
}
We give each brick a column number, then set the y velocity to 0 (meaning these bricks aren’t falling), then we set the stack height for that column to 1.
That means, at the start of the game, all the stacks are at a height of 1 brick.
To finish brick stacking, we just need to go back to where the bricks are falling, check when they’ve landed, stop them, and change the stack height:
Add this code to dropBricks:
// Every 250 milliseconds, drop a brick.
function dropBricks() {

  if (Date.now() - last_brick > 250) {

    // Make a new brick
    let brick = makeSprite("Art/brick.png");
    brick.anchor.set(0.5,1);
    brick.tint = pick(colors);

    // Set it in the right place and give it some drop speed.
    brick.column = dice(70);
    brick.position.set(120 * brick.column, -50);
    brick.y_velocity = 1;

    // Add it to the stage, and add it to the list of bricks.
    stage.addChild(brick);
    bricks.push(brick);

    last_brick = Date.now();
  }

  // For every brick, if it has y_velocity, drop it.
  for (i = 0; i < bricks.length; i += 1) {
    let brick = bricks[i];

    if (brick.y_velocity > 0) {
      brick.y = brick.y + brick.y_velocity;
      brick.y_velocity = brick.y_velocity + 0.25;

      // If it goes past the brick stack, stop it,
      // and increase the stack value.
      if (brick.y >= game_height - 36 * stacks[brick.column]) {
        brick.y = game_height - 36 * stacks[brick.column];
        brick.y_velocity = 0;
        stacks[brick.column] = stacks[brick.column] + 1;
      }
    }
  }
}
Each brick is 36 pixels tall, so to check when a falling brick has hit the ground, we see if the y value is greater than (game_height – 36 * stack height).
We stop the fall by setting y velocity to 0, and add 1 to the stack height.
Wheeee!
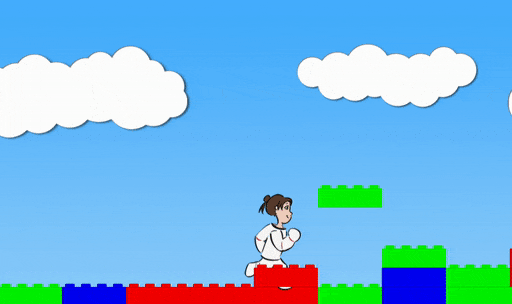
Second Task: Help Mia stand on bricks!
Next, we’re going to make Mia stand on the bricks.
Remember when we added jumping, we gave Mia two states that she could be in: running or jumping. We’re going to add third and fourth states: falling, and kaput. Falling is when Mia is moving downwards, and kaput is when she gets bopped by a brick.
We’re adding a new function called testBricks. This function will check all of Mia’s interactions with the bricks.
For starters, let’s just make an empty function, and the new falling state:
// Every 250 milliseconds, drop a brick.
function dropBricks() {
  ...
  ...
  ...
}


function testBricks() {

}


function updateGame(diff) {

  ...
  ...

  // If the space bar got pushed, make Mia jump
  if (key_down[" "] && mia.state == "running") {
    mia.state = "jumping";
    mia.y_velocity = -20;
  }

  // If Mia is jumping, move her upwards, use gravity to pull her downwards,
  // and if she reaches the ground, stop the jump.
  if (mia.state == "jumping") {
  if (mia.state == "jumping" || mia.state == "falling") {
    mia.y = mia.y + mia.y_velocity;
    mia.y_velocity = mia.y_velocity + 0.8;
    if (mia.y > game_height - 40) {
      mia.y = game_height - 40;
      mia.y_velocity = 0;
      mia.state = "running";
    }

    if (mia.y_velocity > 0 && mia.state == "jumping") {
      // switch to falling
      mia.state = "falling";
    }
  }

  testBricks();

  followMia();
}
The game should look the same as before. But inside the code, Mia now switches from jumping to falling when her y velocity goes from negative to positive, and on every frame, we call the testBricks function.
Before we get Mia to stand on the brick stacks, we’re also going to have to remove our old landing code.
Delete this stuff:
function updateGame(diff) {

  ...
  ...

  // If the space bar got pushed, make Mia jump
  if (key_down[" "] && mia.state == "running") {
    mia.state = "jumping";
    mia.y_velocity = -20;
  }

  // If Mia is jumping, move her upwards, use gravity to pull her downwards,
  // and if she reaches the ground, stop the jump.
  if (mia.state == "jumping" || mia.state == "falling") {
    mia.y = mia.y + mia.y_velocity;
    mia.y_velocity = mia.y_velocity + 0.8;
    if (mia.y > game_height - 40) {
      mia.y = game_height - 40;
      mia.y_velocity = 0;
      mia.state = "running";
    }

    if (mia.y_velocity > 0 && mia.state == "jumping") {
      // switch to falling
      mia.state = "falling";
    }
  }

  testBricks();

  followMia();
}
Now Mia falls right through the floor, and to fix that, we will write the code for testBricks.
Here’s how testBricks works:
First, we do some math to figure out which column Mia is supposed to be standing on. As Mia runs from left to right, she will cross each column: 0, 1, 2, 3, et cetera.
Second, we do some math to figure out the floor height for that column. Each brick is 36 pixels high. If the column has two bricks, the stack is 2 * 36 pixels high. But we’re starting from the bottom of the screen and going upwards, so it’s game_height – 2 * 36. And we’re also going up by 4 more pixels, because it makes Mia’s footing look slightly better. So the floor height is game_height – brick_number * 36 – 4.
Third, we check if Mia’s y position is way above the floor height. In this case, she’s doing a Wile E Coyote and running over thin air, so we’ll switch her to falling.
Fourth, if Mia is falling and her y position is at or below the floor height, Mia has just landed, and we’ll set her to exactly the floor height, then switch her to running.
Add this code to testBricks:
function testBricks() {

  mia.column = Math.floor((mia.x + 60) / 120);

  // Don't test bricks if Mia is too far to the left or right.
  if (mia.column < -8 || mia.column >= 70) return;

  // Figure out the floor for Mia's current column.
  let floor_height = game_height - 36 * stacks[mia.column] - 4;

  // First, check if Mia has run into thin air,
  // like Wile E Coyote, and make her fall.
  if (mia.y < floor_height) {
    mia.state = "falling"
  }

  // Check if Mia has fallen on top of the current stack.
  if (mia.state == "falling" && mia.y >= floor_height && mia.y_velocity > 0) {
    mia.y = floor_height;
    mia.y_velocity = 0;
    mia.state = "running";
  }
}
There’s a lot of math here.
Don’t worry too much about understanding the code in specific detail. I want you to get the experience of making a game, and learn some programming, not to perfectly understand each piece of what you’re doing and get bogged down.
If the example doesn’t work and you’re getting stuck on bugs, remember that I’ve included example files. The code in game_step_4.js should work. You can copy the testBricks function, or just replace all of game.js with the code in game_step_4.js.
I think the best way to learn the math in game programming is to play with the numbers together and see what changes.
If you pretend the brick height is 46 instead of 36, Mia will stand too high above the bricks, and the higher the stack gets, the worse it will look.
If you get rid of the little -4 adjustment to account for Mia’s foot placement, it’ll mostly look okay, but… slightly off.
The “+ 60” from the column calculation is to offset from the bricks, which are all 120 pixels wide, but positioned at their centers. If you take this out, Mia will only stand correctly on half the brick.
If you change the 120 in the column calculation, you’ll effectively be changing the length of the bricks, so she’ll look like she’s running on a different level.
Whew.
Third Task: Don’t let Mia run through bricks!
To stop Mia from running through the bricks, we need to check every brick in the list, see if Mia is too close to it, and push her back.
For this, we’re going to loop through the brick list again. Add this code to testBricks:
function testBricks() {

  mia.column = Math.floor((mia.x + 60) / 120);

  // Don't test bricks if Mia is too far to the left or right.
  if (mia.column < -8 || mia.column >= 70) return;

  // Figure out the floor for Mia's current column.
  let floor_height = game_height - 36 * stacks[mia.column] - 4;

  // First, check if Mia has run into thin air,
  // like Wile E Coyote, and make her fall.
  if (mia.y < floor_height) {
    mia.state = "falling"
  }

  // Check if Mia has fallen on top of the current stack.
  if (mia.state == "falling" && mia.y >= floor_height && mia.y_velocity > 0) {
    mia.y = floor_height;
    mia.y_velocity = 0;
    mia.state = "running";
  }

  // Then, loop through the whole brick list
  for (i = 0; i < bricks.length; i += 1) {
    let brick = bricks[i];

    // If a brick is not falling, make sure Mia can't run through it.
    if (brick.y_velocity == 0) {

      // Calculate the floor height of this particular brick
      this_brick_floor_height = game_height - 36 * stacks[brick.column] - 4;
      // If Mia is below this brick's floor height, and she's too close
      // to the brick, push her back out.
      if (Math.abs(mia.x - brick.x) < 90 && mia.y > this_brick_floor_height) {
        if (mia.x < brick.x) mia.x = mia.x - 7;
        if (mia.x > brick.x) mia.x = mia.x + 7;
      }
    }
  }
}
We loop through all the bricks in the list. For now, we only check the ones that aren’t falling. For each such brick, we do math to find the floor height of the brick.
Then, if Mia is below the brick’s floor height, and she’s too close to the brick, we push her back out.
Detail: We’re using a function called Math.abs to check the absolute value. Mia’s x position may be larger than the brick’s x position, or it may be smaller, but we just want to see if the difference (positive or negative) is less than 90. So we take the absolute value of the difference; abs(-87) would be less than 90, and abs(87) would also be less than 90.
Why 90? The brick is 60 pixels wide from the center, and Mia is about 30 pixels wide from her center. Using 30+60 = 90 means the outer edge of Mia and the outer edge of the brick will be prevented from crossing.
In truth, Mia is probably just a bit wider than 30 pixels, which means by using 90, I’m letting them cross just a little bit. You can experiment with 80, 85, 90, 95, 100, et cetera, to see what margin of overlap looks best to you.
Finally, note that we check which side of the brick Mia’s on, then push her forwards or backwards depending on the side.
This is starting to look like a game!
Now that we have bricks to jump on, it’s a good time to go back and mess with gravity and jump powers.
In the updateGame function, there’s a line, mia.y_velocity = -20, which sets the intensity of Mia’s jumps.
There’s also a line, mia.y_velocity = mia.y_velocity + 0.8, which sets the strength of gravity.
You can mess with both of those numbers to change Mia’s jump style. If you want this planet to feel like the Moon, try setting the jump to -15 and the gravity to 0.3.
Last Task: Bop Mia on the head with falling bricks!

To give Mia some danger, we’re going to let her fall into pits and get bopped on the head by falling bricks.
Before we do this, let’s talk about if statements.
We’ve written a lot of things in our code like
if (mia.y < floor_height) {
  mia.state = "falling"
}
and these are straight forward if you read them like English language: “if Mia’s y value is less than floor_height, Mia is now falling.”
But we can do much more complicated things with if statements. We can put anything that might be true or false into those ( ) parentheses, and the program will be happy to check, and then run the code if the thing is currently true.
We can put if statements inside other if statements:
if (shirt.color == "blue") {
  print("Found a blue shirt.");
  if (shirt.size = "small") {
    print("Oh hey, it's a small blue shirt.")
  }
}Detail: in most programming languages, the = symbol means “assign a new value”.
x = 5 means “x is now 5”.
The == symbol means “these two different things are equal”.
x == 5 means “the variable x is currently 5, right?”
The != symbol means “these two different things are not equal”
x != 5 means “the variable x is not currently 5, right?”
We can also give the program two different options, like a fork in the road, by using if and else:
if (shirt.color == "blue") {
  print("Nice blue shirt! My favorite!");
} else if (shirt.color == "green") {
  print("Ew, green shirt.");
} else {
  print("Ah, nice shirt.")
}
We’re going to use an if statement to give Mia some danger zones. Add this to the initializeGame function:
function initializeGame() {

  for (num = -1; num < 8; num += 1) {
    let blue_sky = makeSprite("Art/blue_sky.png");
    blue_sky.position.set(game_width * num, 0);
    stage.addChild(blue_sky);
  }

  for (num = -8; num < 70; num += 1) {

    if (num % 16 < 14) {
      let brick = makeSprite("Art/brick.png");
      brick.anchor.set(0.5,1);
      brick.position.set(120 * num, game_height);
      brick.tint = pick(colors);
      stage.addChild(brick);
      bricks.push(brick);

      brick.column = num;
      brick.y_velocity = 0;
      stacks[brick.column] = 1;
    }
    else {
      stacks[num] = -100;
    }
  }

  mia = makeAnimatedSprite("Art/mia_animations.json", "run");
  mia.anchor.set(0.5, 0.9);
  mia.position.set(200, game_height - 40);
  stage.addChild(mia);
  mia.animationSpeed = 0.3;
  mia.play();
  mia.state = "running";
  mia.y_velocity = 0;
}
Instead of starting every column with one brick, we will now leave some columns empty (using -100 to represent a deep pit). Now there are gaps where Mia can fall.
Detail: Which columns? Modular arithmetic! Modular arithmetic!
num % 7 is read as “num mod 7″. Mod means you wrap around, like days of the week, or hours on a clock.
5 mod 7 is 5.
6 mod 7 is 6.
7 mod 7 is 0.
8 mod 7 is 1.
9 mod 7 is 2.
…
14 mod 7 is 0.
15 mod 7 is 1.
In the game, we use mod 16. if (num % 16 < 14) just means “for every 16 things, the first 14 things look like this”, and then you make bricks.
“else”, or “otherwise”, you make no bricks, and just leave a deep pit.
So the last two spots out of every 16 spots are deep pit spots.
Next up, we make sure to reset the game whenever Mia has fallen too far, and make sure updateGame works right when Mia’s state is kaput. Add this code to updateGame:
function updateGame(diff) {

  // Don't try to update the game until we've created Mia,
  // or the game will crash.
  if (mia == null) return;

  dropBricks();

  // If the right key got pushed, move Mia to the right
  if (key_down["ArrowRight"]) {
    mia.last_x = mia.x;
    mia.x = mia.x + 7;
    mia.scale.set(1,1);
    if (mia.state != "kaput") mia.scale.set(1,1);
  }

  // If the left key got pushed, move Mia to the left
  if (key_down["ArrowLeft"]) {
    mia.last_x = mia.x;
    mia.x = mia.x - 7;
    mia.scale.set(-1,1);
    if (mia.state != "kaput") mia.scale.set(-1,1);
  }

  // If the space bar got pushed, make Mia jump
  if (key_down[" "] && mia.state == "running") {
    mia.state = "jumping";
    mia.y_velocity = -20;
  }

  // If Mia is jumping, move her upwards, use gravity to pull her downwards,
  // and if she reaches the ground, stop the jump.
  if (mia.state == "jumping" || mia.state == "falling") {
  if (mia.state == "jumping" || mia.state == "falling" || mia.state == "kaput") {
    mia.y = mia.y + mia.y_velocity;
    mia.y_velocity = mia.y_velocity + 0.8;

    if (mia.y_velocity > 0 && mia.state == "jumping") {
      // switch to falling
      mia.state = "falling";
    }
  }

  testBricks();

  if (mia.y > 1200) {
    stage.removeChildren();
    bricks = [];
    stacks = {};
    initializeGame();
  }

  followMia();
}
When Mia’s y position gets too far below the screen, this code removes everything from the stage, empties the brick list, empties the brick stacks, and calls the initializeGame function, which starts the game over.
Very last for today, add this head bopping code to testBricks:
function testBricks() {

  ...
  ...
  ...

  // Then, loop through the whole brick list
  for (i = 0; i < bricks.length; i += 1) {
    let brick = bricks[i];

    // If a brick is not falling, make sure Mia can't run through it.
    if (brick.y_velocity == 0) {

      // Calculate the floor height of this particular brick
      this_brick_floor_height = game_height - 36 * stacks[brick.column] - 4;
      // If Mia is below this brick's floor height, and she's too close
      // to the brick, push her back out.
      if (Math.abs(mia.x - brick.x) < 90 && mia.y > this_brick_floor_height) {
        if (mia.x < brick.x) mia.x = mia.x - 7;
        if (mia.x > brick.x) mia.x = mia.x + 7;
      }
    }
    else if (brick.y_velocity > 0 && mia.state != "kaput") {
      // If Mia is too close to a falling brick, she goes kaput.
      if (Math.abs(mia.x - brick.x) < 80
        && brick.y < mia.y - 10
        && brick.y > mia.y - 175) {
        mia.state = "kaput";
        mia.scale.y = -1;
        mia.y_velocity = -5;
        mia.y = mia.y - 175;
      }
    }
  }
}
Inside the loop which checks all the bricks, there’s already an if statement to make sure Mia can’t run through a brick that’s stopped.
Below that, we add an else statement; “otherwise, if the brick has y velocity, and Mia isn’t already kaput, do this”.
What we do is check if Mia’s x position is too close to the brick, and if her y position is roughly the same as the brick. In that case, we flip her upside down, set her state to kaput, and give her a tiny upwards bump so the upside down falling animation looks good.
Good job! You’ve got a real game going now.
Tomorrow we’re going to make it juicy.
(Activity time: about 60 minutes)
(Download the Day Two Files Here)
Previous Posts:
Game Jam Day 1
Intro
Hello, and welcome to day 2 of the Dad and Daughter Quarantine Game Jam Tutorial!
Yesterday we started making Mia’s Daring Escape. We set up the game, added Mia and a few bricks to the screen, and used the keyboard to move Mia around.
Today we’re going to continue by giving Mia a floor of bricks where she can run and jump!
First Task: Put Mia in the right place
We begin where we left off yesterday. You can use the files you already have, or download the day two files and start from there. The day two files have today’s code changes to help you if you get lost.
This is what the game looks like right now:
We need to start by deleting those bricks and moving Mia to the bottom of the screen, where she’ll spend most of her time.
Open game.js, and delete the following lines:
// Welcome! This is where you'll write your game code.
// Anything with two // slashes in front is a comment.
// The computer ignores comments. They're for humans
// to explain things to other humans.

let mia = null;
let brick_1 = null;
let brick_2 = null;


function initializeGame() {

  let blue_sky = makeSprite("Art/blue_sky.png");
  blue_sky.position.set(0, 0);
  stage.addChild(blue_sky);

  mia = makeAnimatedSprite("Art/mia_animations.json", "run");
  mia.position.set(200, 200);
  stage.addChild(mia);
  mia.animationSpeed = 0.3;
  mia.play();

  brick_1 = makeSprite("Art/brick.png");
  brick_1.position.set(500, 200);
  brick_1.tint = color(1,0,0);
  stage.addChild(brick_1);

  brick_2 = makeSprite("Art/brick.png");
  brick_2.position.set(200, 400);
  brick_2.tint = color(0,0,1);
  stage.addChild(brick_2);
}


function updateGame(diff) {

  // If the right key got pushed, move Mia to the right
  if (key_down["ArrowRight"]) {
    mia.x = mia.x + 5;
  }

  // If the left key got pushed, move Mia to the left
  if (key_down["ArrowLeft"]) {
    mia.x = mia.x - 5;
  }

  // If the down key got pushed, move Mia down
  if (key_down["ArrowDown"]) {
    mia.y = mia.y + 5;
  }

  // If the up key got pushed, move Mia up
  if (key_down["ArrowUp"]) {
    mia.y = mia.y - 5;
  }
}
Now it’s just Mia on the screen, and we’ve gotten rid of the code that lets us move up and down.
Before we put Mia on the bottom of the screen, we need to talk about anchors.
This is one of the images in Mia’s animation:
There’s a lot of empty space around Mia.
This is what that picture looks like on the screen:
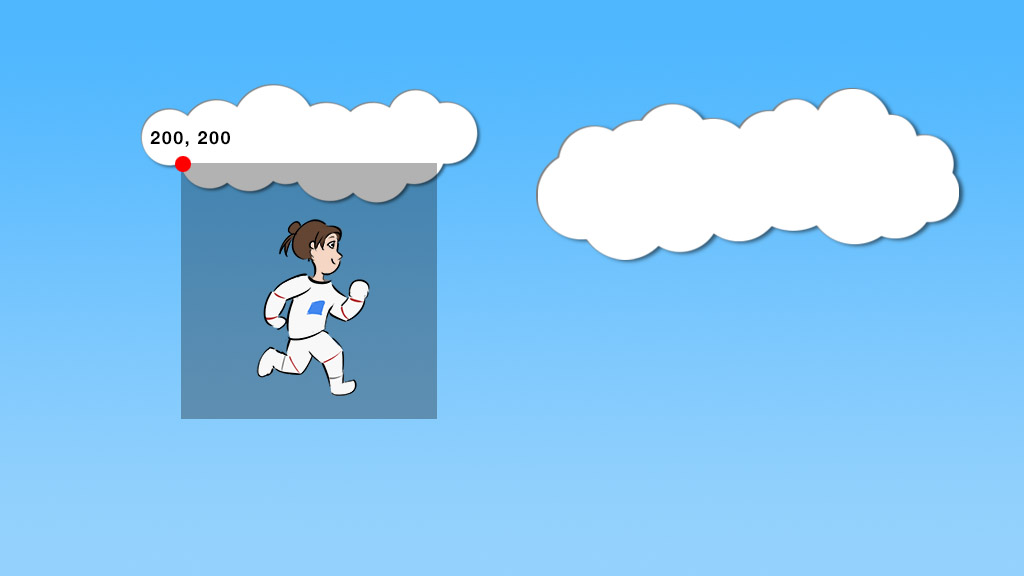
When we give x, y coordinates for Mia, the computer starts drawing from the top left corner of her image.
But we’re making a jumping game, which means we want to work with the coordinates right beneath where Mia is standing:
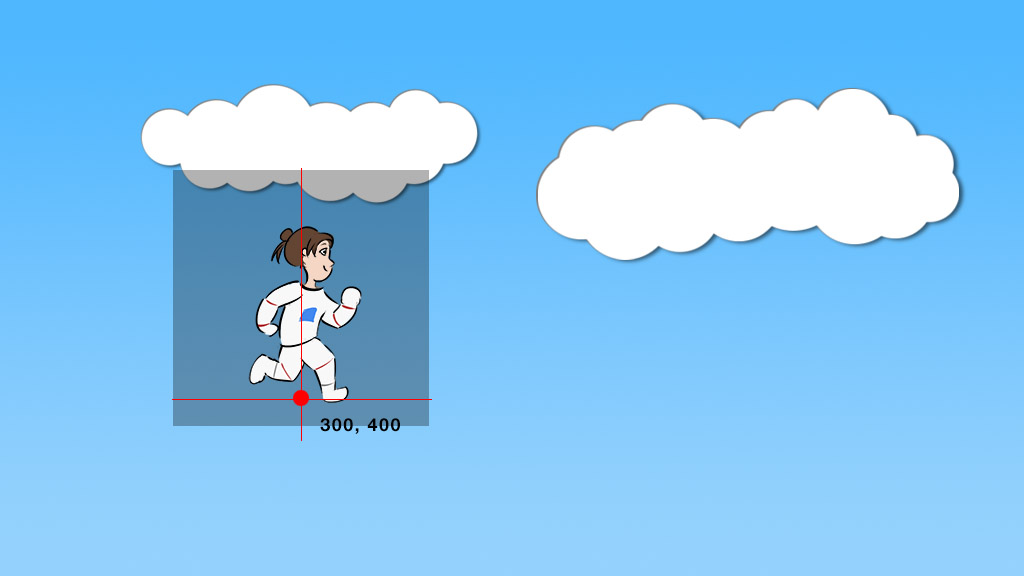
Instead of having to do a lot of extra calculations, we tell the computer to change Mia’s anchor point.
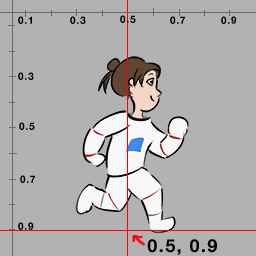
An anchor point is the point in an image that the computer uses for drawing. When you tell the computer to draw something at coordinates 300, 400, the computer moves 300 pixels to the right, then 400 pixels down, then draws the image so that the anchor point is right at that center spot.
Anchor points are given in fractions. Look at the image above. That point just below the center of Mia is halfway between the left and right sides of the image, or 0.5.
And it’s 90% of the way towards the bottom of the image, or 0.9.
If your child hasn’t learned about number lines and decimals yet, this is an excellent example for teaching.
So we’re going to set Mia’s anchor point at 0.5, 0.9, and then put her almost at the bottom of the screen.
Go ahead and add this code together:
function initializeGame() {

  let blue_sky = makeSprite("Art/blue_sky.png");
  blue_sky.position.set(0, 0);
  stage.addChild(blue_sky);

  mia = makeAnimatedSprite("Art/mia_animations.json", "run");
  mia.position.set(200, 200);
  mia.anchor.set(0.5, 0.9);
  mia.position.set(200, game_height - 40);
  stage.addChild(mia);
  mia.animationSpeed = 0.3;
  mia.play();
}
Remember, you can always press Command-R on a Mac or Ctrl-R on Windows to reset the game.
Also, now is a great time to talk about the debug console. If you press Command-Option-J (edit: it’s Command-Option-I) on a Mac or Ctrl-Shift-J on Windows, you’ll open up a little side window where you can print information or see any errors. You can press the same keys to close it again. Alternately, you can go to the View menu above and choose “Toggle Developer Tools”.
The errors usually show up as red text, and you can usually google the red text for some good answers to your problems.
But of course, if you get really stuck, please feel free to post questions in the comments below, or mail me at matt.carlin@alphazoollc.com, and I’ll do my best to help out.
Make sure you delete the old position line to make room for the new one.
I’ve provided some nice variables for working with the edges of the screen. game_width and game_height are 1024 and 576, and you can use these instead of having to do the math to figure out stuff near the right and bottom sides of the screen.
So we’ve set Mia’s anchor beneath her feet, and we’ve set her y position to game_height – 40, which means 40 pixels from the bottom of the screen.
Mia should look like this now:
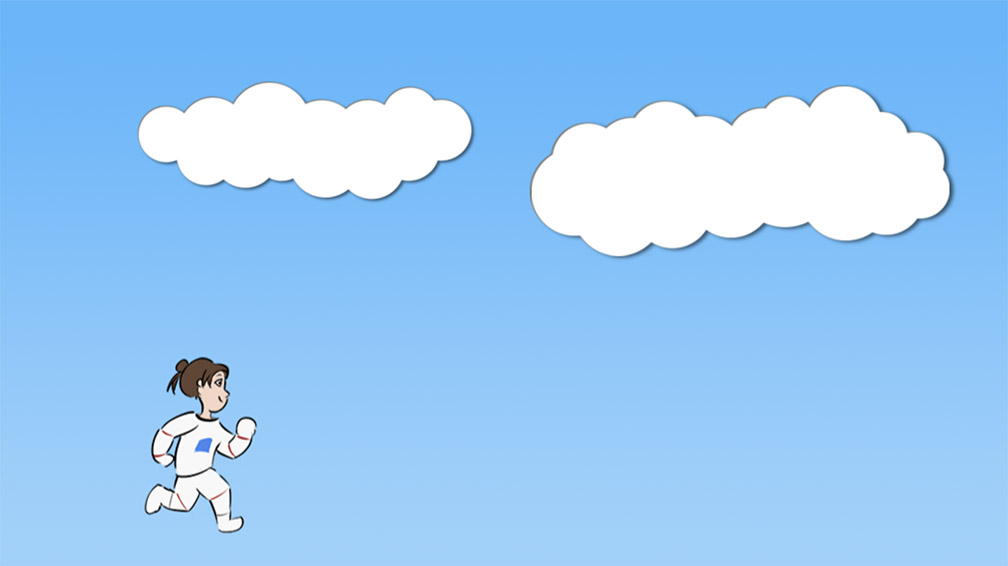
What do you think will happen if you set Mia’s anchor to 0.5, 1.0?
Make a guess, then try it out!
We also want to make Mia a little bit faster, and we want to make her turn around if she’s running to the left. Add this code together:
function updateGame(diff) {

  // If the right key got pushed, move Mia to the right
  if (key_down["ArrowRight"]) {
    mia.x = mia.x + 5;
    mia.x = mia.x + 7;
    mia.scale.set(1,1);
  }

  // If the left key got pushed, move Mia to the left
  if (key_down["ArrowLeft"]) {
    mia.x = mia.x - 5;
    mia.x = mia.x - 7;
    mia.scale.set(-1,1);
  }
}
Now when you press the left key to run left, Mia should face left:
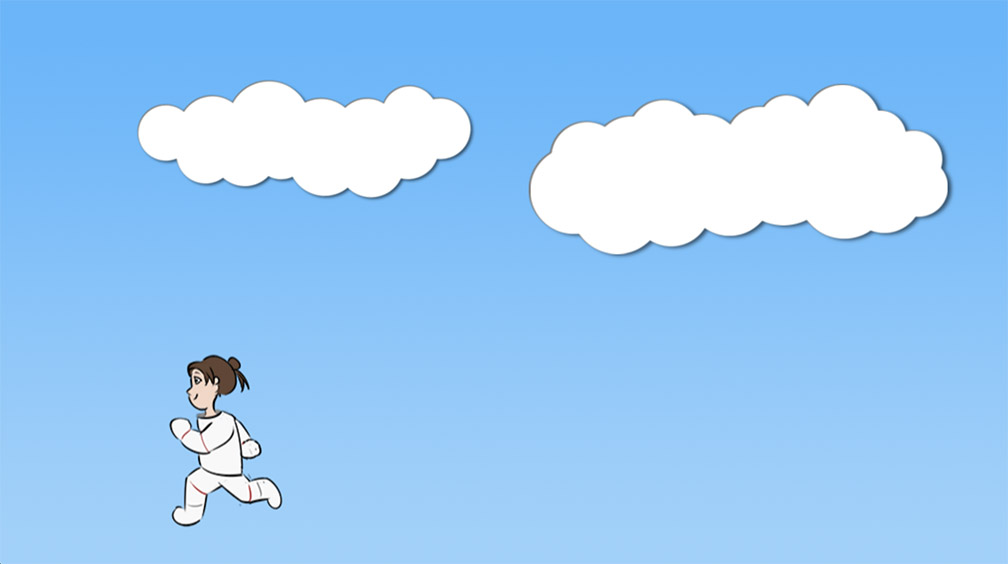
First, we make Mia a little faster by changing the distance she moves when we push the keys.
Second, in addition to position and anchor, we can change the scale of a sprite. This means making it bigger or smaller.
1 is the normal value. 2 is twice as wide, or twice as tall. 0.5 is half as wide, or half as tall. Finally, -1 means “flip it backwards”.
We’ve set Mia to -1 on the x axis, so her left and right are flipped. But we’ve set her to 1 on the y axis, so she’s not upside down or super tall or anything.
You know what we’re going to do now. Try changing the scale numbers. Can you make Mia go upside down? Can you make her super huge or super tiny or super wide?
Anyway, now Mia’s in place, and we’re ready to add a *bunch* of bricks.
Second Task: Add a bunch of bricks!
On day one, when we added two bricks, we had to write code for each brick, and we had to name them differently. That was fine for just two bricks, but Mia’s Daring Escape is going to have dozens of bricks! Hundreds of bricks!
It would be really annoying to write the code for every brick.
Instead, we’re going to use a loop.
A loop is when you make the computer do something over and over again a certain number of times. Maybe forever.
We’re going to make a loop that adds ten bricks to the screen.
This is nice, because later, when we want way more than ten bricks, we only need to change the loop number to make it higher.
Sigh. Loops are ugly, true in almost every programming language, and there’s no nice way to teach them. I’m sorry.
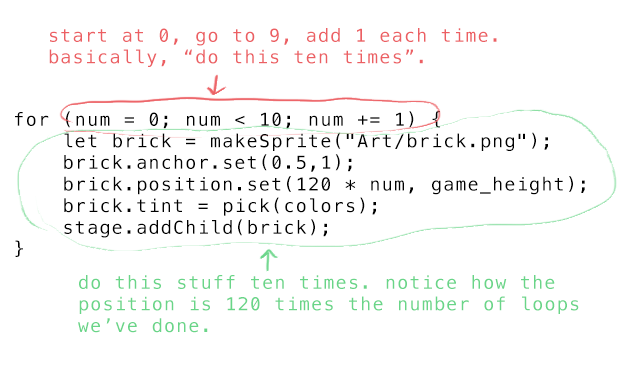
The loop starts with “for”, then inside ( ) parentheses you say how you want the loop to go. Then in between { } curly brackets, you write the code that you want to happen over and over.
What’s nice is you can count the number of times you’ve been in the loop, and use this as a variable in your code. So, for instance, we’re going to move 120 pixels each time we put another brick down, and we’ll use the loop number to set a different position every time.
Let’s write the loop:
let mia = null;
let bricks = [];
let colors = [
  color(1,0,0), // Red
  color(0,1,0), // Green
  color(0,0,1), // Blue
]


function initializeGame() {

  let blue_sky = makeSprite("Art/blue_sky.png");
  blue_sky.position.set(0, 0);
  stage.addChild(blue_sky);

  for (num = 0; num < 10; num += 1) {
    let brick = makeSprite("Art/brick.png");
    brick.anchor.set(0.5,1);
    brick.position.set(120 * num, game_height);
    brick.tint = pick(colors);
    stage.addChild(brick);
    bricks.push(brick);
  }

  mia = makeAnimatedSprite("Art/mia_animations.json", "run");
  mia.anchor.set(0.5, 0.9);
  mia.position.set(200, game_height - 40);
  stage.addChild(mia);
  mia.animationSpeed = 0.3;
  mia.play();
}
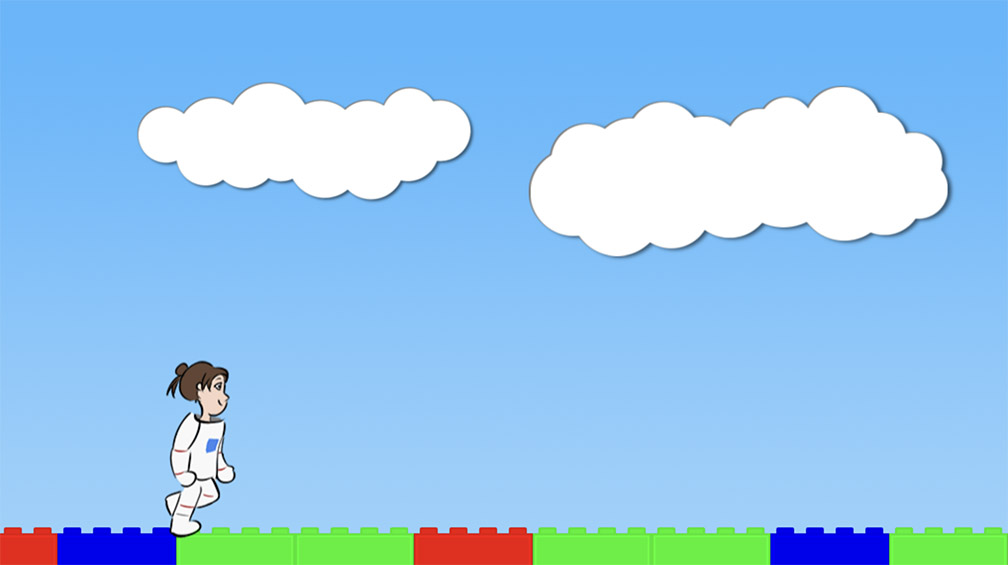
We start by making two lists. One is a list of bricks, and the other is a list of colors. We’ll talk more about lists later, but for now, lists are exactly like in real life. Milk, eggs, flour, sugar is a list.
Then we write our loop. Inside the loop, we do the same sprite making code we’ve done a few times before.
Detail: We didn’t have to name each brick differently, brick_1, brick_2, brick_3, etc. That’s because when you define something inside a loop, the variable name only lasts for one loop, and you can re-use it on the next go around.
You’ve no doubt noticed that we write let in a bunch of places. let says “make me a new variable with this name”.
If you try to use let to make a new variable with the same name as an old one, the program will tell you that’s illegal, and it will crash.
Variables that get created outside any function are global. You can use them everywhere, but you can’t re-use the name for something else.
Variables that get created inside a function or inside a loop (basically, inside { } curly braces) are local, and they live and die in that local area. You can’t use them outside, but you can use the same names over again.
All of this is called scope.
When we tint the bricks, we use a new function called pick to pick a random color from the list of colors. That means the bricks are randomly red, blue, or green.
Try resetting the program a few times. The brick colors should change.
We also write “bricks.push(brick)”, which adds the new brick to our list of bricks. We’ll use this list in another lesson.
Third Task: Scroll the Screen!
Mia’s Daring Escape is a platform game. That means we’re going to run a long distance, and the screen is going to have to scroll to keep up.
Right now, when you go too far left or right, Mia just runs off the edge of the screen.
We need to write code to make the game follow Mia, and we need to make the level bigger.
While Mia is running great distances, we want to keep Mia roughly in the center of the screen. In order to accomplish this, we make a tracker. The tracker can be up to 100 pixels away from Mia.
Then, we move the whole game stage so that the tracker is in the center of the screen.
And we’re going to do all of this in a new function!
Add this to the code:
let mia = null;
let bricks = [];
let colors = [
  color(1,0,0), // Red
  color(0,1,0), // Green
  color(0,0,1), // Blue
]

let tracker = 0;


function initializeGame() {

  let blue_sky = makeSprite("Art/blue_sky.png");
  blue_sky.position.set(0, 0);
  stage.addChild(blue_sky);

  for (num = 0; num < 10; num += 1) {
    let brick = makeSprite("Art/brick.png");
    brick.anchor.set(0.5,1);
    brick.position.set(120 * num, game_height);
    brick.tint = pick(colors);
    stage.addChild(brick);
    bricks.push(brick);
  }

  mia = makeAnimatedSprite("Art/mia_animations.json", "run");
  mia.anchor.set(0.5, 0.9);
  mia.position.set(200, game_height - 40);
  stage.addChild(mia);
  mia.animationSpeed = 0.3;
  mia.play();
}

// Keep Mia roughly in the center of the screen by using a tracker
// which stays within 100 pixels of Mia, and then moving the whole stage
// so that the tracker stays in the center of the screen.
function followMia() {

  if (mia.x - tracker > 100) {
    tracker = mia.x - 100;
  }

  if (tracker - mia.x > 100) {
    tracker = mia.x + 100;
  }

  stage.x = (game_width / 2 - tracker);
}


function updateGame(diff) {

  // Don't try to update the game until we've created Mia,
  // or the game will crash.
  if (mia == null) return;

  // If the right key got pushed, move Mia to the right
  if (key_down["ArrowRight"]) {
    mia.x = mia.x + 7;
    mia.scale.set(1,1);
  }

  // If the left key got pushed, move Mia to the left
  if (key_down["ArrowLeft"]) {
    mia.x = mia.x - 7;
    mia.scale.set(-1,1);
  }

  followMia();
}
Reminder: you can always press Command-R on a Mac or Ctrl-R on Windows to reset the game.
Also reminder: you can press Command-Option-J (edit: it’s Command-Option-I) on a Mac or Ctrl-Shift-J on Windows to bring up the debug console to see any errors!
There’s a lot going on here. We make a new variable called tracker by writing “let tracker” at the top.
We make a new function called followMia, and we call that function by writing followMia() at the bottom of updateGame.
followMia is where we do our tracking and our screen shifting.
First, we check to see if the tracker is more than 100 pixels behind mia’s x position, and if so, we move it to 100 behind.
Then, we check to see if the tracker is more than 100 pixels ahead of mia’s x position, and if so, we move it to 100 ahead.
This means Mia can run around to the sides of the tracker a little bit, but if she gets too far, the tracker will snap in place and start following her.
Finally, we move the whole game stage to put the tracker in the center of the screen! The tracker acts like a sort of focus point for the camera; it will always stare at the tracker.
Detail: Why is the stage being pushed to (game_width / 2 – tracker)?
To come up with that number, we do a little bit of algebra.
The tracker is sitting on the stage. If the stage x is 100, and the tracker is 200, the tracker will be at 300 on the screen. In general, we want:
tracker + stage.x == game_width/2
Rewrite this to get:
stage.x == game_width/2 – tracker
Hooray! Now Mia can run… off… into the blackness of space.
Okay, so we need more sky and more bricks.
More bricks are easy!
Just change the loop numbers, like this:
for (num = 0; num < 10; num += 1) {
for (num = -8; num < 70; num += 1) {
  let brick = makeSprite("Art/brick.png");
  brick.anchor.set(0.5,1);
  brick.position.set(120 * num, game_height);
  brick.tint = pick(colors);
  stage.addChild(brick);
  bricks.push(brick);
}
Boom. Tons of bricks.
For the sky, we’re going to need to put the sky picture into its own loop.
Do this:
let blue_sky = makeSprite("Art/blue_sky.png");
blue_sky.position.set(0, 0);
stage.addChild(blue_sky);

for (num = -1; num < 8; num += 1) {
  let blue_sky = makeSprite("Art/blue_sky.png");
  blue_sky.position.set(game_width * num, 0);
  stage.addChild(blue_sky);
}
Lots of sky now too. The sky loop is smaller because the sky picture is bigger. Note that each sky picture is a whole game_width further than the last. That’s 1024 pixels for each sky.
Later we’ll add boundaries, so Mia can’t run off into empty space. But for now, you should be able to run a long time to the right before running out of bricks and sky.
Pretty good. We’ve just got one last thing to do today.
Last Task: Make Mia jump!
You’re pretty tired again. I can see it.
Just like yesterday, we’re not going to think too hard about this last task. It’s kind of a bonus.
The last thing we have to do is make Mia jump.
To do this, we’re going to give Mia a state and a velocity.
Mia’s state can be either “running” or “jumping”. When the player presses spacebar, if Mia’s not already jumping, we’ll switch her state to jumping.
Mia’s velocity is how fast she’s moving and in what direction. For now, we’re just going to give Mia a velocity in the y direction, up and down.
The way velocity works in beginner game programming is this: every time you call updateGame, you change the position by adding velocity. Remember that the updateGame function is called about 60 times a second. So if the character starts at y = 100, and the velocity is 5, then on one frame, the character will go from 100 to 105, and on the next, from 105 to 110, and so forth, and after 1 second (60 frames), the character will be at 400 (that’s 100 + 5 * 60).
For a jump, you start by setting the velocity upwards (negative, towards y = 0), but every update, you add some gravity (positive, towards y = 576), so eventually the upward jump stalls out and the character falls back to ground.
Let’s write this out in code. Don’t worry about the details today. We’ll learn more about this and refine it later.
Change the code like so:
function initializeGame() {

  for (num = -1; num < 8; num += 1) {
    let blue_sky = makeSprite("Art/blue_sky.png");
    blue_sky.position.set(game_width * num, 0);
    stage.addChild(blue_sky);
  }

  for (num = -8; num < 70; num += 1) {
    let brick = makeSprite("Art/brick.png");
    brick.anchor.set(0.5,1);
    brick.position.set(120 * num, game_height);
    brick.tint = pick(colors);
    stage.addChild(brick);
    bricks.push(brick);
  }

  mia = makeAnimatedSprite("Art/mia_animations.json", "run");
  mia.anchor.set(0.5, 0.9);
  mia.position.set(200, game_height - 40);
  stage.addChild(mia);
  mia.animationSpeed = 0.3;
  mia.play();
  mia.state = "running";
  mia.y_velocity = 0;
}

...
...
...

function updateGame(diff) {

  // Don't try to update the game until we've created Mia,
  // or the game will crash.
  if (mia == null) return;

  // If the right key got pushed, move Mia to the right
  if (key_down["ArrowRight"]) {
    mia.x = mia.x + 7;
    mia.scale.set(1,1);
  }

  // If the left key got pushed, move Mia to the left
  if (key_down["ArrowLeft"]) {
    mia.x = mia.x - 7;
    mia.scale.set(-1,1);
  }

  // If the space bar got pushed, make Mia jump
  if (key_down[" "] && mia.state == "running") {
    mia.state = "jumping";
    mia.y_velocity = -20;
  }

  // If Mia is jumping, move her upwards, use gravity to pull her downwards,
  // and if she reaches the ground, stop the jump.
  if (mia.state == "jumping") {
    mia.y = mia.y + mia.y_velocity;
    mia.y_velocity = mia.y_velocity + 0.8;
    if (mia.y > game_height - 40) {
      mia.y = game_height - 40;
      mia.y_velocity = 0;
      mia.state = "running";
    }
  }

  followMia();
}
Note the line “key_down[” “] && mia.state == “running”. That’s key_down, then a single space between quotes, which means the spacebar. That’s also two & symbols. It won’t work with one.
If the spacebar is pressed, Mia switches to jumping and her velocity makes her go up.
When she’s jumping, gravity gradually brings her back down, and if she hits our original ground height, she switches back to running.
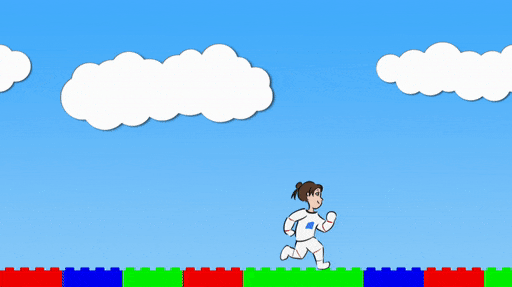
Boom! You now have a platformer.
Tomorrow we’ll add falling bricks and death and stuff.